從Spring2.0起就提供了一組全面的自動數據綁定標簽來處理表單元素。生成的標簽兼容HTML 4.01與XHTML 1.0。表單標簽庫中包含了可以用在JSP頁面中渲染HTML元素的標簽。表單標記庫包含在spring-webmvc.jar中,庫的描述符稱為spring-form.tld,為了使用這些標簽必須在jsp頁面開頭處聲明這個tablib指令。
<%@ taglib prefix="form" uri="http://www.springframework.org/tags/form" %>
以下表格展示了標簽庫中的常用標簽:
標簽
描述
form
渲染表單元素form
input
渲染<input type=”text”/>元素
password
渲染<input type=”password”/>元素
hidden
渲染<input type=”hidden”/>元素
textarea
渲染textarea元素
checkbox
渲染一個<input type=”checkbox”/>復選元素
checkboxs
渲染多個<input type=”checkbox”/>元素
radiobutton
渲染一個<input type=”radio”/>單選元素
radiobuttons
渲染多個<input type=”radio”/>元素
select
渲染一個選擇元素
option
渲染一個可選元素
options
渲染多個可選元素列表
errors
在span元素中渲染字段錯誤
path:要綁定的屬性路徑,最重要的屬性,多個元素必填,相當於 modelAttribute.getXXX() 。
cssClass:定義要應用到被渲染元素的CSS類,類樣式。
cssStyle:定義要應用到被渲染元素的CSS樣式,行內樣式。
htmlEscape:接受true或者false,表示是否應該對被渲染的值進行HTML轉義。
cssErrorClass:定義要應用到被渲染input元素的CSS類,如果bound屬性中包含錯誤,則覆蓋cssClass屬性值。
這個標簽會生成HTML form標簽,同時為form內部所包含的標簽提供一個綁定路徑(binding path)。 它把命令對象(command object)存在PageContext中,這樣form內部的標簽就可以使用這個對象了。標簽庫中的其他標簽都聲明在form標簽的內部。
讓我們假設有一個叫User的領域對象,它是一個JavaBean,有著諸如 firstName和lastName這樣的屬性。我們將把它當作 一個表單支持對象(form backing object),它對應的表單控制器用 form.jsp頁面來顯示表單。
commandName:暴露表單對象的模型屬性名稱,默認為command,它定義了模型屬性的名稱,其中包含了一個backing object,其屬性將用於填充生成的表單。如果該屬性存在,則必須在返回包含該表單的視圖的請求處理方法中添加相應的模型屬性。
modelAttribute:暴露form backing object的模型屬性名稱,默認為command
commandName與modelAttribute功能基本一樣,使用modelAttribute就可以了,因為commandName已被拋棄。
如果在頁面中使用form不設置任意屬性<form:form/>,解析後的結果如下:
<form id="command" action="/SpringMVC04/bar/action11" method="post"></form>
新建一個控制器,在控制器中添加一個action,代碼如下:
package com.zhangguo.springmvc04.controllers;
import org.springframework.stereotype.Controller;
import org.springframework.ui.Model;
import org.springframework.web.bind.annotation.RequestMapping;
import com.zhangguo.springmvc04.entities.Product;

@Controller
@RequestMapping("/bar")
public class BarController {
    @RequestMapping("/action11")
    public String action11(Model model){
        //向模型中添加一個名為product的對象,用於渲染視圖
        model.addAttribute("product", new Product("Meizu note1", 999));
        return "bar/action11";
    }
}
在views/bar目錄下添加action11.jsp頁面,頁面內容如下:
<%@ page language="java" contentType="text/html; charset=UTF-8" pageEncoding="UTF-8"%>
<%@ taglib prefix="c" uri="http://java.sun.com/jsp/jstl/core"%>
<%@ taglib prefix="form" uri="http://www.springframework.org/tags/form"%>
<!DOCTYPE html>
<html>
<head>
<meta http-equiv="Content-Type" content="text/html; charset=UTF-8">
<title>bar/action11</title>
</head>
<body>
    <form:form modelAttribute="product">
        <p>
            <label for="name">名稱:</label>
            <form:input path="name" />
        </p>
        <p>
            <label for="price">價格:</label>
            <form:input path="price" />
        </p>
    </form:form>
</body>
</html>
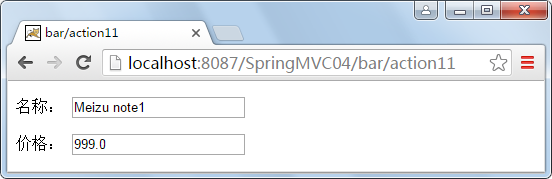
form表單與模型中名稱為product的對象進行綁定,form中的表單元素的path指的就是訪問該對象的路徑,如果沒有該對象或找不到屬性名將異常。系統將自動把指定模型中的值與頁面進行綁定,渲染後的結果如下:
<!DOCTYPE html>
<html>
<head>
<meta http-equiv="Content-Type" content="text/html; charset=UTF-8">
<title>bar/action11</title>
</head>
<body>
    <form id="product" action="/SpringMVC04/bar/action11" method="post">
        <p>
            <label for="name">名稱:</label>
            <input id="name" name="name" type="text" value="Meizu note1"/>
        </p>
        <p>
            <label for="price">價格:</label>
            <input id="price" name="price" type="text" value="999.0"/>
        </p>
    </form>
</body>
</html>
運行結果:
模型可以為空,不是為null,中間可以沒有數據,但非字符類型會取默認值,如價格會變成0.0。model.addAttribute("product", new Product()),結果如下:
input元素可以設置其它的屬性,如前面提到的通用屬性,修改後的表單如下:
        <p>
            <label for="name">名稱:</label>
            <form:input path="name" cssClass="textCss" css a="b" htmlEscape="false"/>
        </p>
修改action11方法的內容如下:
        //向模型中添加一個名為product的對象,用於渲染視圖
        model.addAttribute("product", new Product("Meizu note1<hr/>", 999));
渲染結果:
        <p>
            <label for="name">名稱:</label>
            <input id="name" name="name" class="textCss"  a="b" type="text" value="Meizu note1<hr/>"/>
        </p>
默認從服務器發送到客戶端的數據中是會編碼的,如示例中<hr/>,會解析成<hr>,但我們設置屬性htmlEscape="false"結果原樣輸出;我們在標簽中設置a="b"原樣解析出來,這裡給開發者留了很大的空間,如想使用原input標簽的屬性都可以直接寫。
form:checkbox元素將渲染成一個復選框,通過該元素可以獲得3種不同類型的值,分別是boolean,數組,基本數據類型,添加一個新的實體類Person,如下所示:
package com.zhangguo.springmvc04.entities;

public class Person {
    /*
     * 婚否
     */
    private boolean isMarried;
    /*
     * 愛好
     */
    private String[] hobbies;
    /**
     * 學歷
     */
    private String education;


    public boolean getIsMarried() {
        return isMarried;
    }
    public void setIsMarried(boolean isMarried) {
        this.isMarried = isMarried;
    }
    public String[] getHobbies() {
        return hobbies;
    }
    public void setHobbies(String[] hobbies) {
        this.hobbies = hobbies;
    }
    public String getEducation() {
        return education;
    }
    public void setEducation(String education) {
        this.education = education;
    }
}
特別注意的是boolean類型的值生成的get/set屬性名稱前是不帶get與set的,這樣會引起異常,建議手動修改。
在控制器中新增2個action,代碼如下:
//checkbox
@RequestMapping("/action21")
public String action21(Model model){
model.addAttribute("person", new Person());
return "bar/action21";
}
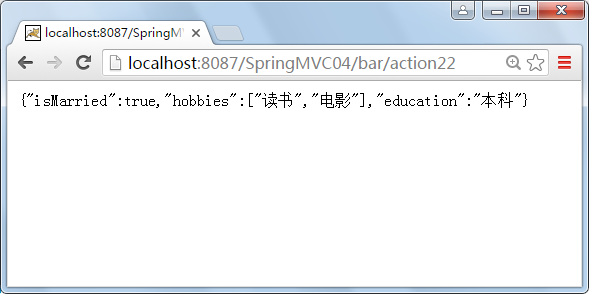
@RequestMapping("/action22")
@ResponseBody
public Person action22(HttpServletResponse response,Person person){
return person;
}
在views/bar目錄下添加action21視圖,視圖腳本如下:
<%@ page language="java" contentType="text/html; charset=UTF-8" pageEncoding="UTF-8"%>
<%@ taglib prefix="c" uri="http://java.sun.com/jsp/jstl/core"%>
<%@ taglib prefix="form" uri="http://www.springframework.org/tags/form"%>
<!DOCTYPE html>
<html>
<head>
<meta http-equiv="Content-Type" content="text/html; charset=UTF-8">
<title>bar/action21</title>
</head>
<body>
    <form:form modelAttribute="person" action="action22">
        <p>
            <label for="name">婚否:</label>
            <form:checkbox path="isMarried" />
        </p>
        <p>
            <label for="name">愛好:</label>
            <form:checkbox path="hobbies" value="讀書"/>讀書
            <form:checkbox path="hobbies" value="上網"/>上網
            <form:checkbox path="hobbies" value="電影"/>電影
        </p>
        <p>
            <label for="name">畢業:</label>
            <form:checkbox path="education" value="本科"/>大學本科
        </p>
        <p>
        <button>提交</button>
        </p>
    </form:form>
</body>
</html>
渲染後的視圖如下:
<!DOCTYPE html>
<html>
<head>
<meta http-equiv="Content-Type" content="text/html; charset=UTF-8">
<title>bar/action21</title>
</head>
<body>
    <form id="person" action="action22" method="post">
        <p>
            <label for="name">婚否:</label>
            <input id="isMarried1" name="isMarried" type="checkbox" value="true"/><input type="hidden" name="_isMarried" value="on"/>
        </p>
        <p>
            <label for="name">愛好:</label>
            <input id="hobbies1" name="hobbies" type="checkbox" value="讀書"/><input type="hidden" name="_hobbies" value="on"/>讀書
            <input id="hobbies2" name="hobbies" type="checkbox" value="上網"/><input type="hidden" name="_hobbies" value="on"/>上網
            <input id="hobbies3" name="hobbies" type="checkbox" value="電影"/><input type="hidden" name="_hobbies" value="on"/>電影
        </p>
        <p>
            <label for="name">畢業:</label>
            <input id="education1" name="education" type="checkbox" value="本科"/><input type="hidden" name="_education" value="on"/>大學本科
        </p>
        <p>
        <button>提交</button>
        </p>
    </form>
</body>
</html>
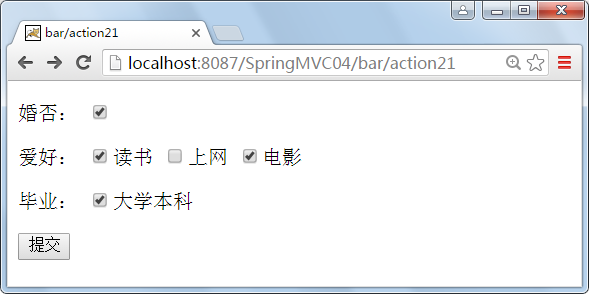
運行結果:
form:checkbox在渲染成input標簽裡會變成2個表單元素,這樣可以確保用戶沒有選擇內容時也會將值帶會服務器,默認是沒有這樣的。
小結:checkbox有三種使用方法
第一種用法:若綁定值是java.lang.Boolean類型,則值為true時,input(checkbox)標為checked(選中)。其value(值)屬性對應於setValue(Object)值屬性的解析值。
第二種用法:若綁定值是Array(數組)類型或java.util.Collection,則配置的setValue(Object)值出現在綁定的Collection中時,input(checkbox)標為checked(選中)。
第三種用法:若綁定值為其他類型,則當配置的setValue(Object)等於其綁定值時,input(checkbox)標為checked(選中)。
這個標簽生成類型為radio的HTML input 標簽,也就是常見的單選框。這個標簽的典型用法是一次聲明多個標簽實例,所有的標簽都有相同的path屬性,但是他們的value屬性不同。
定義2個action,代碼如下:
@RequestMapping("/action31")
public String action31(Model model){
model.addAttribute("person", new Person());
return "bar/action31";
}
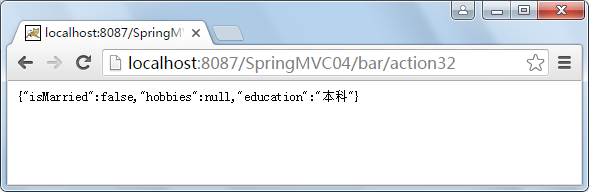
@RequestMapping("/action32")
@ResponseBody
public Person action32(HttpServletResponse response,Person person){
return person;
}
在views/bar下定義視圖action31.jsp,腳本如下:
<%@ page language="java" contentType="text/html; charset=UTF-8" pageEncoding="UTF-8"%>
<%@ taglib prefix="c" uri="http://java.sun.com/jsp/jstl/core"%>
<%@ taglib prefix="form" uri="http://www.springframework.org/tags/form"%>
<!DOCTYPE html>
<html>
<head>
<meta http-equiv="Content-Type" content="text/html; charset=UTF-8">
<title>bar/action31</title>
</head>
<body>
    <form:form modelAttribute="person" action="action32">
        <p>
            <label for="name">學歷:</label>
            <form:radiobutton path="education" value="專科"/>專科
            <form:radiobutton path="education" value="本科"/>本科
            <form:radiobutton path="education" value="研究生"/>研究生
        </p>
        <p>
        <button>提交</button>
        </p>
    </form:form>
</body>
</html>
運行後頁面渲染結果:
<!DOCTYPE html>
<html>
<head>
<meta http-equiv="Content-Type" content="text/html; charset=UTF-8">
<title>bar/action31</title>
</head>
<body>
    <form id="person" action="action32" method="post">
        <p>
            <label for="name">學歷:</label>
            <input id="education1" name="education" type="radio" value="專科"/>專科
            <input id="education2" name="education" type="radio" value="本科"/>本科
            <input id="education3" name="education" type="radio" value="研究生"/>研究生
        </p>
        <p>
        <button>提交</button>
        </p>
    </form>
</body>
</html>
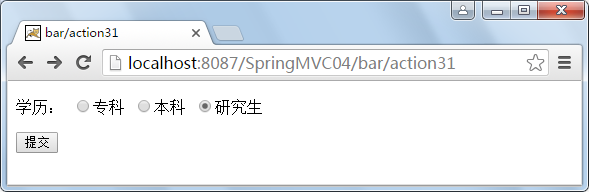
運行結果:
這個標簽生成類型為password的HTML input標簽,渲染後生成一個密碼框。input標簽的值和表單支持對象相應屬性的值保持一致。該標簽與input類似,但有一個特殊的屬性showPassword, 是否將對象中的值綁定到密碼框中,默認為false,也意味著密碼框中不會出現默認的掩碼。
修改action31,修改後如下所示:
    @RequestMapping("/action31")
    public String action31(Model model){
        Person person=new Person();
        person.setEducation("edu");
        model.addAttribute("person", person);
        return "bar/action31";
    }
當頁面腳本如下時:
        <p>
           <label>密碼:</label>
           <form:password path="education" showPassword="true"/>
        </p>
渲染結果:
        <p>
           <label>密碼:</label>
           <input id="education" name="education" type="password" value="edu"/>
        </p>

當頁面腳本如下時:
        <p>
           <label>密碼:</label>
           <form:password path="education" showPassword="false"/>
        </p>
渲染結果:
        <p>
           <label>密碼:</label>
           <input id="education" name="education" type="password" value=""/>
        </p>

這個標簽生成HTML select標簽,就是下拉框,多選框。在生成的HTML代碼中,被選中的選項和表單支持對象相應屬性的值保持一致。這個標簽也支持嵌套的option和options標簽。
定義兩個action,代碼如下:
//select 下拉列表
@RequestMapping("/action41")
public String action41(Model model){
List<ProductType> productTypes = new ArrayList<ProductType>();
productTypes.add(new ProductType(11, "數碼電子"));
productTypes.add(new ProductType(21, "鞋帽服飾"));
productTypes.add(new ProductType(31, "圖書音像"));
productTypes.add(new ProductType(41, "五金家電"));
productTypes.add(new ProductType(51, "生鮮水果"));
model.addAttribute("productTypes", productTypes);
model.addAttribute("person", new Person());
return "bar/action41";
}
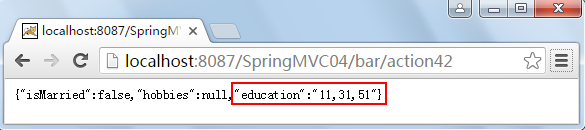
@RequestMapping("/action42")
@ResponseBody
public Person action42(HttpServletResponse response,Person person){
return person;
}
在action41中為模型添加了一個屬性productTypes,該對象用於綁定到頁面的下拉列表框。
在views/bar下添加視圖action41.jsp,腳本如下:
<%@ page language="java" contentType="text/html; charset=UTF-8" pageEncoding="UTF-8"%>
<%@ taglib prefix="c" uri="http://java.sun.com/jsp/jstl/core"%>
<%@ taglib prefix="form" uri="http://www.springframework.org/tags/form"%>
<!DOCTYPE html>
<html>
<head>
<meta http-equiv="Content-Type" content="text/html; charset=UTF-8">
<title>bar/action41</title>
</head>
<body>
<form:form modelAttribute="person" action="action42">
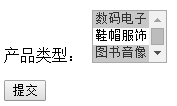
<p>
<label for="name">產品類型:</label>
<form:select size="3" multiple="multiple" path="education" items="${productTypes}" itemLabel="name" itemValue="id"></form:select>
</p>
<p>
<button>提交</button>
</p>
</form:form>
</body>
</html>
size="3" 表示可見項為3項,默認可見項為1項
multiple="multiple" 允許多選,默認為單選
path="education" 與表單中指定的modelAttribute對象進行雙向綁定
items="${productTypes}" 綁定到下拉列表的集合對象
itemLabel="name" 集合中的對象用於作為下拉列表option的text屬性
itemValue="id" 集合中的對象用於作為下拉列表option的value屬性
渲染後的頁面:
<!DOCTYPE html>
<html>
<head>
<meta http-equiv="Content-Type" content="text/html; charset=UTF-8">
<title>bar/action41</title>
</head>
<body>
    <form id="person" action="action42" method="post">
        <p>
            <label for="name">產品類型:</label>
            <select id="education" name="education" multiple="multiple" size="3">
                <option value="11">數碼電子</option>
                <option value="21">鞋帽服飾</option>
                <option value="31">圖書音像</option>
                <option value="41">五金家電</option>
                <option value="51">生鮮水果</option></select>
                <input type="hidden" name="_education" value="1" />
        </p>
        <p>
            <button>提交</button>
        </p>
    </form>
</body>
</html>
請注意渲染後一個form:selelct標簽變成了2個標簽,多出一個hidden,保證沒有選擇時也有值帶回服務器。
運行結果:
這個標簽生成HTML option標簽,可以用於生成select表單元素中的單項,沒有path屬性,有label與value屬性。新增2個action,代碼如下:
//option
@RequestMapping("/action51")
public String action51(Model model){
model.addAttribute("person", new Person());
return "bar/action51";
}
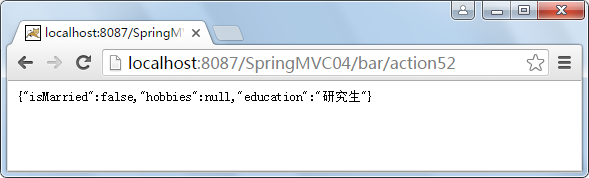
@RequestMapping("/action52")
@ResponseBody
public Person action52(HttpServletResponse response,Person person){
return person;
}
在views/bar下新增頁面action51.jsp,內容如下:
<%@ page language="java" contentType="text/html; charset=UTF-8" pageEncoding="UTF-8"%>
<%@ taglib prefix="c" uri="http://java.sun.com/jsp/jstl/core"%>
<%@ taglib prefix="form" uri="http://www.springframework.org/tags/form"%>
<!DOCTYPE html>
<html>
<head>
<meta http-equiv="Content-Type" content="text/html; charset=UTF-8">
<title>bar/action51</title>
</head>
<body>
    <form:form modelAttribute="person" action="action52">
        <p>
            <label for="name">學歷:</label>
            <form:select path="education">
                <form:option value="" >--請選擇--</form:option>
                <form:option value="大專">大專</form:option>
                <form:option value="本科">本科</form:option>
                <form:option value="研究生">研究生</form:option>
            </form:select>
        </p>
        <p>
            <button>提交</button>
        </p>
    </form:form>
</body>
</html>
渲染後的頁面:
<!DOCTYPE html>
<html>
<head>
<meta http-equiv="Content-Type" content="text/html; charset=UTF-8">
<title>bar/action51</title>
</head>
<body>
    <form id="person" action="action52" method="post">
        <p>
            <label for="name">學歷:</label>
            <select id="education" name="education">
                <option value="">--請選擇--</option>
                <option value="大專">大專</option>
                <option value="本科">本科</option>
                <option value="研究生">研究生</option>
            </select>
        </p>
        <p>
            <button>提交</button>
        </p>
    </form>
</body>
</html>
運行結果:

這個標簽生成一系列的HTML option標簽,可以用它生成select標簽中的子標簽,在控制器中新增兩個action,代碼如下:
//options
@RequestMapping("/action61")
public String action61(Model model){
List<ProductType> productTypes = new ArrayList<ProductType>();
productTypes.add(new ProductType(11, "數碼電子"));
productTypes.add(new ProductType(21, "鞋帽服飾"));
productTypes.add(new ProductType(31, "圖書音像"));
productTypes.add(new ProductType(41, "五金家電"));
productTypes.add(new ProductType(51, "生鮮水果"));
model.addAttribute("productTypes", productTypes);
model.addAttribute("person", new Person());
return "bar/action61";
}
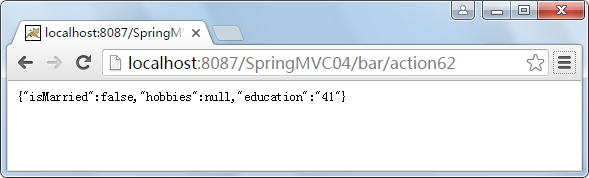
@RequestMapping("/action62")
@ResponseBody
public Person action62(HttpServletResponse response,Person person){
return person;
}
在views/bar下增加一個名為action61.jsp的頁面,頁面腳本如下:
<%@ page language="java" contentType="text/html; charset=UTF-8" pageEncoding="UTF-8"%>
<%@ taglib prefix="c" uri="http://java.sun.com/jsp/jstl/core"%>
<%@ taglib prefix="form" uri="http://www.springframework.org/tags/form"%>
<!DOCTYPE html>
<html>
<head>
<meta http-equiv="Content-Type" content="text/html; charset=UTF-8">
<title>bar/action61</title>
</head>
<body>
    <form:form modelAttribute="person" action="action62">
        <p>
            <label for="name">產品類型:</label>
            <form:select path="education">
               <form:option value="">--請選擇--</form:option>
               <form:options items="${productTypes}" itemLabel="name" itemValue="id"/>
            </form:select>
        </p>
        <p>
            <button>提交</button>
        </p>
    </form:form>
</body>
</html>
綁定集合的方法與select類似,渲染後的頁面生成結果如下:
<!DOCTYPE html>
<html>
<head>
<meta http-equiv="Content-Type" content="text/html; charset=UTF-8">
<title>bar/action61</title>
</head>
<body>
    <form id="person" action="action62" method="post">
        <p>
            <label for="name">產品類型:</label>
            <select id="education" name="education">
               <option value="">--請選擇--</option>
               <option value="11">數碼電子</option>
               <option value="21">鞋帽服飾</option>
               <option value="31">圖書音像</option>
               <option value="41">五金家電</option>
               <option value="51">生鮮水果</option>
            </select>
        </p>
        <p>
            <button>提交</button>
        </p>
    </form>
</body>
</html>
通過這個方式實現了一個請選擇標簽,運行結果如下:
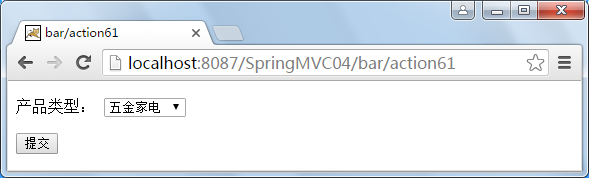
上面的這個例子同時使用了option標簽和options標簽。這兩個標簽生成的HTML代碼是相同的,但是第一個option標簽允許你在JSP中明確聲明這個標簽的值只供顯示使用,並不綁定到表單支持對象的屬性上。
這個標簽生成HTML textarea標簽,就是一個多行文本標簽,用法與input非常類似。errors標簽用於顯示錯誤信息,如下腳本:
<tr>
    <td>學歷:</td>
    <td><form:textarea path="education" rows="3" cols="20" /></td>
    <td><form:errors path="education" /></td>
</tr>
將被渲染成:
            <tr>
                <td>學歷:</td>
                <td><textarea id="education" name="education" rows="3" cols="20"></textarea></td>
                <td></td>
            </tr>
因為當前並沒有對應的錯誤信息,所以errors標簽並未生成任何HTML腳本。errors標簽生成類型為'span'的HTML標簽,用來顯示表單驗證時出現的錯誤信息。通過這個標簽,你可以訪問控制器(controller)和與控制器關聯的驗證器(validator)產生的錯誤信息。
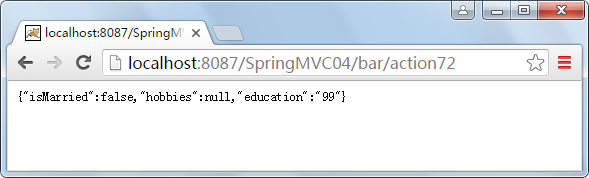
這個標簽生成類型為hidden的HTML input標簽。在生成的HTML代碼中,input標簽的值和表單支持對象相應屬性的值保持一致。如果你需要聲明一個類型為hidden的input標簽,但是表單支持對象中沒有對應的屬性,你只能使用HTML的標簽。在控制器下新增兩個action,代碼如下:
        //hidden
        @RequestMapping("/action71")
        public String action71(Model model){
            Person person=new Person();
            person.setEducation("99");
            model.addAttribute("person", person);
            return "bar/action71";
        }

        @RequestMapping("/action72")
        @ResponseBody
        public Person action72(HttpServletResponse response,Person person){
            return person;
        }
在views/bar目錄下新增視圖action71.jsp,腳本如下:
<%@ page language="java" contentType="text/html; charset=UTF-8" pageEncoding="UTF-8"%>
<%@ taglib prefix="c" uri="http://java.sun.com/jsp/jstl/core"%>
<%@ taglib prefix="form" uri="http://www.springframework.org/tags/form"%>
<!DOCTYPE html>
<html>
<head>
<meta http-equiv="Content-Type" content="text/html; charset=UTF-8">
<title>bar/action71</title>
</head>
<body>
    <form:form modelAttribute="person" action="action72">
        <p>
            <form:hidden path="education" />
            <input type="hidden" value="1" name="id">
        </p>
        <p>
            <button>提交</button>
        </p>
    </form:form>
</body>
</html>
渲染後的頁面:
<!DOCTYPE html>
<html>
<head>
<meta http-equiv="Content-Type" content="text/html; charset=UTF-8">
<title>bar/action61</title>
</head>
<body>
    <form id="person" action="action62" method="post">
        <p>
            <input id="education" name="education" type="hidden" value="99"/>
            <input type="hidden" value="1" name="id">
        </p>
        <p>
            <button>提交</button>
        </p>
    </form>
</body>
</html>
運行結果:
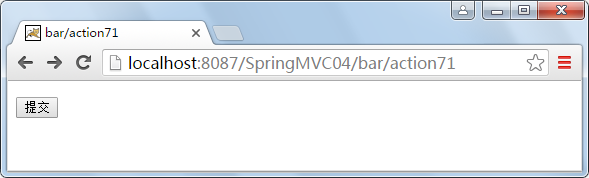
隱藏域用於保持頁面狀態。
radiobuttons將生成一組單選框,只允許多個中選擇1個;checkboxs生成一組復選列表,允許多選。添加兩個action,代碼如下:
    //radiobuttons,checkboxs
    @RequestMapping("/action81")
    public String action81(Model model) {
        List<ProductType> productTypes = new ArrayList<ProductType>();
        productTypes.add(new ProductType(11, "數碼電子"));
        productTypes.add(new ProductType(21, "鞋帽服飾"));
        productTypes.add(new ProductType(31, "圖書音像"));
        productTypes.add(new ProductType(41, "五金家電"));
        productTypes.add(new ProductType(51, "生鮮水果"));
        model.addAttribute("productTypes", productTypes);
        model.addAttribute("person", new Person());
        return "bar/action81";
    }

    @RequestMapping("/action82")
    @ResponseBody
    public Person action82(HttpServletResponse response, Person person) {
        return person;
    }
在views/bar目錄下添加一個名為action81.jsp的視圖,腳本如下:
<%@ page language="java" contentType="text/html; charset=UTF-8" pageEncoding="UTF-8"%>
<%@ taglib prefix="c" uri="http://java.sun.com/jsp/jstl/core"%>
<%@ taglib prefix="form" uri="http://www.springframework.org/tags/form"%>
<!DOCTYPE html>
<html>
<head>
<meta http-equiv="Content-Type" content="text/html; charset=UTF-8">
<title>bar/action81</title>
</head>
<body>
    <form:form modelAttribute="person" action="action82">
        <p>
            <label for="name">產品類型:</label>
            <form:radiobuttons path="education" items="${productTypes}"  itemLabel="name"  itemValue="id" delimiter=","  element="a"/>
        </p>
        <p>
            <label for="name">產品類型:</label>
            <form:checkboxes path="education" items="${productTypes}"  itemLabel="name"  itemValue="id" delimiter="-"/>
        </p>
        <p>
        <button>提交</button>
        </p>
    </form:form>
</body>
</html>
屬性delimiter=",",表示生成的單項間使用“,”號分隔,默認為空。
屬性element="a",表示生成的單項容器,默認為span。
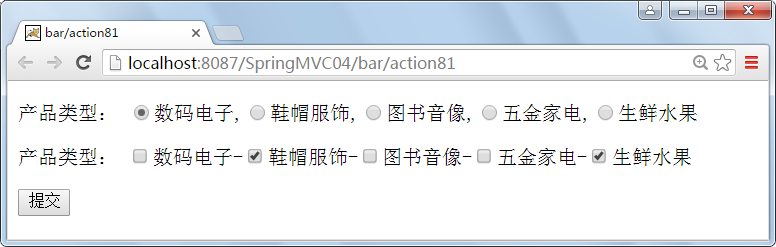
渲染後結果如下:
<!DOCTYPE html>
<html>
<head>
<meta http-equiv="Content-Type" content="text/html; charset=UTF-8">
<title>bar/action81</title>
</head>
<body>
    <form id="person" action="action82" method="post">
        <p>
            <label for="name">產品類型:</label>
            <a><input id="education1" name="education" type="radio" value="11"/><label for="education1">數碼電子</label></a><a>,<input id="education2" name="education" type="radio" value="21"/><label for="education2">鞋帽服飾</label></a><a>,<input id="education3" name="education" type="radio" value="31"/><label for="education3">圖書音像</label></a><a>,<input id="education4" name="education" type="radio" value="41"/><label for="education4">五金家電</label></a><a>,<input id="education5" name="education" type="radio" value="51"/><label for="education5">生鮮水果</label></a>
        </p>
        <p>
            <label for="name">產品類型:</label>
            <span><input id="education6" name="education" type="checkbox" value="11"/><label for="education6">數碼電子</label></span><span>-<input id="education7" name="education" type="checkbox" value="21"/><label for="education7">鞋帽服飾</label></span><span>-<input id="education8" name="education" type="checkbox" value="31"/><label for="education8">圖書音像</label></span><span>-<input id="education9" name="education" type="checkbox" value="41"/><label for="education9">五金家電</label></span><span>-<input id="education10" name="education" type="checkbox" value="51"/><label for="education10">生鮮水果</label></span><input type="hidden" name="_education" value="on"/>
        </p>
        <p>
        <button>提交</button>
        </p>
    </form>
</body>
</html>
運行結果如下:


多數MVC框架都為Web應用程序提供一種它自己處理視圖的辦法,Spring MVC 提供視圖解析器,它使用ViewResolver進行視圖解析,讓用戶在浏覽器中渲染模型。ViewResolver是一種開箱即用的技術,能夠解析JSP、Velocity模板、FreeMarker模板和XSLT等多種視圖。
Spring處理視圖最重要的兩個接口是ViewResolver和View。ViewResolver接口在視圖名稱和真正的視圖之間提供映射關系; 而View接口則處理請求將真正的視圖呈現給用戶。
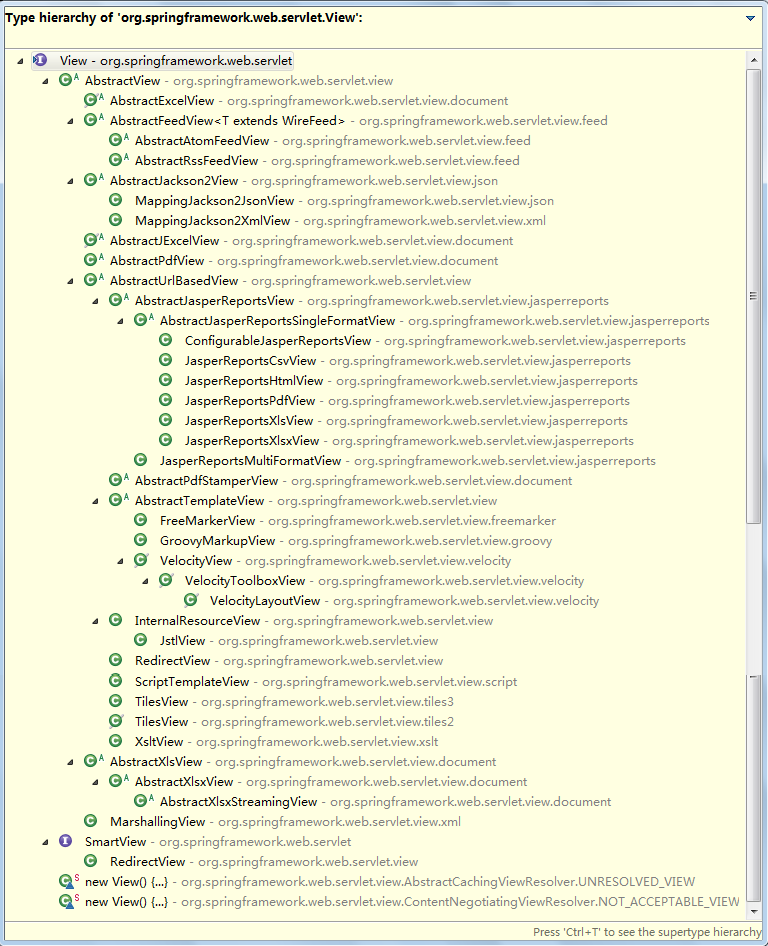
在Spring MVC控制器中,所有的請求處理方法(Action)必須解析出一個邏輯視圖名稱,無論是顯式的(返回String,View或ModelAndView)還是隱式的(基於約定的,如視圖名就是方法名)。Spring中的視圖由視圖解析器處理這個邏輯視圖名稱,Spring常用的視圖解析器有如下幾種:
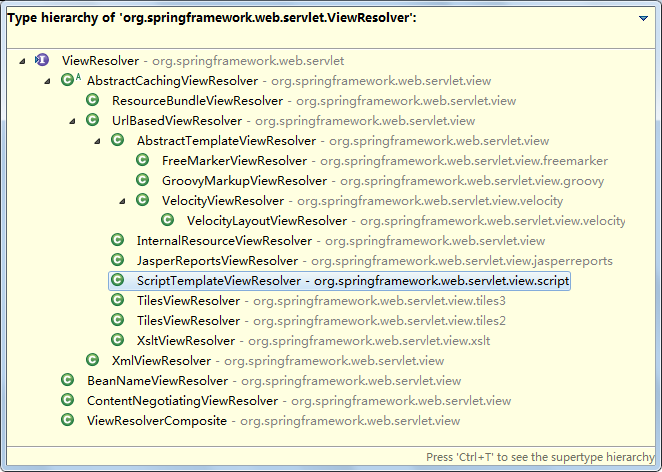
AbstractCachingViewResolver:用來緩存視圖的抽象視圖解析器。通常情況下,視圖在使用前就准備好了。繼承該解析器就能夠使用視圖緩存。這是一個抽象類,這種視圖解析器會把它曾經解析過的視圖緩存起來,然後每次要解析視圖的時候先從緩存裡面找,如果找到了對應的視圖就直接返回,如果沒有就創建一個新的視圖對象,然後把它放到一個用於緩存的map中,接著再把新建的視圖返回。使用這種視圖緩存的方式可以把解析視圖的性能問題降到最低。
XmlViewResolver :XML視圖解析器。它實現了ViewResolver接口,接受相同DTD定義的XML配置文件作為Spring的XML bean工廠。它繼承自AbstractCachingViewResolver抽象類,所以它也是支持視圖緩存的。通俗來說就是通過xml指定邏輯名稱與真實視圖間的關系,示例如下:
    <bean class="org.springframework.web.servlet.view.XmlViewResolver">
       <property name="location" value="/WEB-INF/views.xml"/>
       <property name="order" value="2"/>
    </bean>
views.xml是邏輯名與真實視圖名的映射文件,order是定義多個視圖時的優先級,可以這樣定義:
<?xml version="1.0" encoding="UTF-8"?>
<beans xmlns="http://www.springframework.org/schema/beans"
    xmlns:xsi="http://www.w3.org/2001/XMLSchema-instance"
    xsi:schemaLocation="http://www.springframework.org/schema/beans
     http://www.springframework.org/schema/beans/spring-beans-4.3.xsd">
    <bean id="index" class="org.springframework.web.servlet.view.InternalResourceView">
        <property name="url" value="/index.jsp" />
    </bean>
</beans>
id就是邏輯名稱了,在使用時可以在請求處理方法中這樣指定:
    @RequestMapping("/index")
    public String index() {
       return "index";
    }
從配置可以看出最終還是使用InternalResourceView完成了視圖解析。
ResourceBundleViewResolver:它使用了ResourceBundle定義下的bean,實現了ViewResolver接口,指定了綁定包的名稱。通常情況下,配置文件會定義在classpath下的properties文件中,默認的文件名字是views.properties。
UrlBasedViewResolver:它簡單實現了ViewResolver接口,它不用顯式定義,直接影響邏輯視圖到URL的映射。它讓你不用任何映射就能通過邏輯視圖名稱訪問資源。它是對ViewResolver的一種簡單實現,而且繼承了AbstractCachingViewResolver,主要就是提供的一種拼接URL的方式來解析視圖,它可以讓我們通過prefix屬性指定一個指定的前綴,通過suffix屬性指定一個指定的後綴,然後把返回的邏輯視圖名稱加上指定的前綴和後綴就是指定的視圖URL了。如prefix=/WEB-INF/views/,suffix=.jsp,返回的視圖名稱viewName=bar/index,則UrlBasedViewResolver解析出來的視圖URL就是/WEB-INF/views/bar/index.jsp。redirect:前綴表示重定向,forword:前綴表示轉發。使用UrlBasedViewResolver的時候必須指定屬性viewClass,表示解析成哪種視圖,一般使用較多的就是InternalResourceView,利用它來展現jsp,但是當我們使用JSTL的時候我們必須使用org.springframework.web.servlet.view.JstlView。
InternalResourceViewResolver:內部視圖解析器。它是URLBasedViewResolver的子類,所以URLBasedViewResolver支持的特性它都支持。在實際應用中InternalResourceViewResolver也是使用的最廣泛的一個視圖解析器。
    <bean class="org.springframework.web.servlet.view.InternalResourceViewResolver" id="internalResourceViewResolver">
        <!-- 前綴 -->
        <property name="prefix" value="/WEB-INF/views/" />
        <!-- 後綴 -->
        <property name="suffix" value=".jsp" />
    </bean>
在JSP視圖技術中,Spring MVC經常會使用 UrlBasedViewResolver視圖解析器,該解析器會將視圖名稱翻譯成URL並通過RequestDispatcher處理請求後渲染視圖。修改springmvc-servlet.xml配置文件,增加如下視圖解析器:
<bean id="viewResolver" class="org.springframework.web.servlet.view.UrlBasedViewResolver">
    <property name="viewClass" value="org.springframework.web.servlet.view.JstlView"/>
    <property name="prefix" value="/WEB-INF/jsp/"/>
    <property name="suffix" value=".jsp"/>
</bean>
VelocityViewResolver:Velocity視圖解析器,UrlBasedViewResolver的子類,VelocityViewResolver會把返回的邏輯視圖解析為VelocityView。
FreeMarkerViewResolver:FreeMarker視圖解析器,UrlBasedViewResolver的子類,FreeMarkerViewResolver會把Controller處理方法返回的邏輯視圖解析為FreeMarkerView,使用FreeMarkerViewResolver的時候不需要我們指定其viewClass,因為FreeMarkerViewResolver中已經把viewClass為FreeMarkerView了。Spring本身支持了對Freemarker的集成。只需要配置一個針對Freemarker的視圖解析器即可。
ContentNegotiatingViewResolver:內容協商視圖解析器,這個視圖解析器允許你用同樣的內容數據來呈現不同的view,在RESTful服務中可用。
Spring支持同時配置多個視圖解析器,也就是鏈式視圖解析器。這樣,在某些情況下,就能夠重寫某些視圖。如果我們配置了多個視圖解析器,並想要給視圖解析器排序的話,設定order屬性就可以指定解析器執行的順序。order的值越高,解析器執行的順序越晚,當一個ViewResolver在進行視圖解析後返回的View對象是null的話就表示該ViewResolver不能解析該視圖,這個時候如果還存在其他order值比它大的ViewResolver就會調用剩余的ViewResolver中的order值最小的那個來解析該視圖,依此類推。InternalResourceViewResolver這種能解析所有的視圖,即永遠能返回一個非空View對象的ViewResolver一定要把它放在ViewResolver鏈的最後面:
<!-- jsp jstl -->
    <bean id="JSPViewResolver" class="org.springframework.web.servlet.view.InternalResourceViewResolver">
        <property name="viewClass" value="org.springframework.web.servlet.view.JstlView"/>
        <property name="viewNames" value="*jsp" />
        <property name="contentType" value="text/html; charset=utf-8"/>
        <property name="prefix" value="/" />
        <property name="suffix" value="" />
        <property name="order" value="1"></property>
    </bean>

<!-- FreeMarker -->
<bean id="FMViewResolver" class="org.springframework.web.servlet.view.freemarker.FreeMarkerViewResolver">
        <property name="viewClass" value="org.springframework.web.servlet.view.freemarker.FreeMarkerView"/>
        <property name="viewNames" value="*html" />
        <property name="contentType" value="text/html; charset=utf-8"/>
        <property name="cache" value="true" />
        <property name="prefix" value="/" />
        <property name="suffix" value="" />
        <property name="order" value="0"></property>
    </bean>
viewClass指定了視圖渲染類,viewNames指定視圖名稱匹配規則如名稱以html開頭或結束,contentType支持了頁面頭部信息匹配規則。
修改Spring MVC配置文件springmvc-servlet.xml,在beans結點中增加兩個視圖解析器,一個為內部解析器用於解析jsp與JSTL,另一個為解析FreeMaker格式,修改後的文件如下所示:
<?xml version="1.0" encoding="UTF-8"?>
<beans xmlns="http://www.springframework.org/schema/beans"
    xmlns:xsi="http://www.w3.org/2001/XMLSchema-instance" xmlns:context="http://www.springframework.org/schema/context"
    xmlns:mvc="http://www.springframework.org/schema/mvc"
    xsi:schemaLocation="http://www.springframework.org/schema/beans
         http://www.springframework.org/schema/beans/spring-beans.xsd
        http://www.springframework.org/schema/context
        http://www.springframework.org/schema/context/spring-context-4.3.xsd
        http://www.springframework.org/schema/mvc
        http://www.springframework.org/schema/mvc/spring-mvc-4.3.xsd">
    <!-- 自動掃描包,實現支持注解的IOC -->
    <context:component-scan base-package="com.zhangguo.MavenTest" />

    <!-- Spring MVC不處理靜態資源 -->
    <mvc:default-servlet-handler />

    <!-- 支持mvc注解驅動 -->
    <mvc:annotation-driven enable-matrix-variables="true" />

    <!-- 配置映射媒體類型的策略 -->
    <bean
        class="org.springframework.web.servlet.mvc.method.annotation.RequestMappingHandlerMapping">
        <property name="removeSemicolonContent" value="false" />
    </bean>

    <!-- 內部視圖解析器,JSP與JSTL模板 -->
    <bean
        class="org.springframework.web.servlet.view.InternalResourceViewResolver"
        id="internalResourceViewResolver">
        <!--指定視圖渲染類 -->
        <property name="viewClass"
            value="org.springframework.web.servlet.view.JstlView" />
        <!--自動添加到路徑中的前綴 -->
        <property name="prefix" value="/WEB-INF/views/" />
        <!--自動添加到路徑中的後綴 -->
        <property name="suffix" value=".jsp" />
        <!--設置所有視圖的內容類型,如果視圖本身設置內容類型視圖類可以忽略 -->
        <property name="contentType" value="text/html;charset=UTF-8" />
        <!-- 優先級,越小越前 -->
        <property name="order" value="2" />
    </bean>

    <!-- FreeMarker視圖解析器與屬性配置 -->
    <bean id="viewResolver"
        class="org.springframework.web.servlet.view.freemarker.FreeMarkerViewResolver">
        <!--是否啟用緩存 -->
        <property name="cache" value="true" />
        <!--自動添加到路徑中的前綴 -->
        <property name="prefix" value="" />
        <!--自動添加到路徑中的後綴 -->
        <property name="suffix" value=".html" />
        <!--指定視圖渲染類 -->
        <property name="viewClass"
            value="org.springframework.web.servlet.view.freemarker.FreeMarkerView" />
        <!-- 設置是否暴露Spring的macro輔助類庫,默認為true -->
        <property name="exposeSpringMacroHelpers" value="true" />
        <!-- 是否應將所有request屬性添加到與模板合並之前的模型。默認為false。 -->
        <property name="exposeRequestAttributes" value="true" />
        <!-- 是否應將所有session屬性添加到與模板合並之前的模型。默認為false。 -->
        <property name="exposeSessionAttributes" value="true" />
        <!-- 在頁面中使用${rc.contextPath}就可獲得contextPath -->
        <property name="requestContextAttribute" value="rc" />
        <!--設置所有視圖的內容類型,如果視圖本身設置內容類型視圖類可以忽略 -->
        <property name="contentType" value="text/html;charset=UTF-8" />
        <!-- 優先級,越小越前 -->
        <property name="order" value="1" />
    </bean>

    <!-- 配置FreeMarker細節 -->
    <bean id="freemarkerConfig"
        class="org.springframework.web.servlet.view.freemarker.FreeMarkerConfigurer">
        <!-- 模板路徑 -->
        <property name="templateLoaderPath" value="/WEB-INF/htmlviews" />
        <property name="freemarkerSettings">
            <props>
                <!-- 刷新模板的周期,單位為秒 -->
                <prop key="template_update_delay">5</prop>
                <!--模板的編碼格式 -->
                <prop key="defaultEncoding">UTF-8</prop>
                <!--url編碼格式 -->
                <prop key="url_escaping_charset">UTF-8</prop>
                <!--此屬性可以防止模板解析空值時的錯誤 -->
                <prop key="classic_compatible">true</prop>
                <!--該模板所使用的國際化語言環境選項-->
                <prop key="locale">zh_CN</prop>
                <!--布爾值格式-->
                <prop key="boolean_format">true,false</prop>
                <!--日期時間格式-->
                <prop key="datetime_format">yyyy-MM-dd HH:mm:ss</prop>
                <!--時間格式-->
                <prop key="time_format">HH:mm:ss</prop>
                <!--數字格式-->
                <prop key="number_format">0.######</prop>
                <!--自動開啟/關閉空白移除,默認為true-->
                <prop key="whitespace_stripping">true</prop>
            </props>
        </property>
    </bean>
</beans>
這裡要注意的是的order越小解析優化級越高,在視圖解析過程中,如果order為1的視圖解析器不能正確解析視圖的話,會將結果交給order為2的視圖解析器,這裡為2的視圖解析器是InternalResourceViewResolver,它總是會生成一個視圖的,所以一部內部視圖在放在視圖解析鏈的末尾,成一什麼都沒有找到他還會生成一個404的view返回。
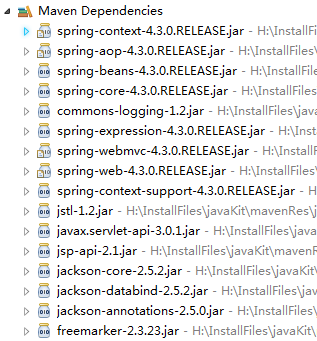
為了使用FreeMarker,需要引用spring-context-support與FreeMarker的jar包,修改後的pom.xml配置文件如下:
<project xmlns="http://maven.apache.org/POM/4.0.0" xmlns:xsi="http://www.w3.org/2001/XMLSchema-instance"
    xsi:schemaLocation="http://maven.apache.org/POM/4.0.0 http://maven.apache.org/xsd/maven-4.0.0.xsd">
    <modelVersion>4.0.0</modelVersion>
    <groupId>com.zhangguo</groupId>
    <artifactId>SpringMVC04</artifactId>
    <version>0.0.1</version>
    <packaging>war</packaging>
    <properties>
        <project.build.sourceEncoding>UTF-8</project.build.sourceEncoding>
        <spring.version>4.3.0.RELEASE</spring.version>
    </properties>

    <dependencies>
        <!--Spring框架核心庫 -->
        <dependency>
            <groupId>org.springframework</groupId>
            <artifactId>spring-context</artifactId>
            <version>${spring.version}</version>
        </dependency>
        <!-- Spring MVC -->
        <dependency>
            <groupId>org.springframework</groupId>
            <artifactId>spring-webmvc</artifactId>
            <version>${spring.version}</version>
        </dependency>
        <dependency>
            <groupId>org.springframework</groupId>
            <artifactId>spring-context-support</artifactId>
            <version>${spring.version}</version>
        </dependency>
        <!-- JSTL -->
        <dependency>
            <groupId>javax.servlet</groupId>
            <artifactId>jstl</artifactId>
            <version>1.2</version>
        </dependency>
        <!-- Servlet核心包 -->
        <dependency>
            <groupId>javax.servlet</groupId>
            <artifactId>javax.servlet-api</artifactId>
            <version>3.0.1</version>
            <scope>provided</scope>
        </dependency>
        <!--JSP應用程序接口 -->
        <dependency>
            <groupId>javax.servlet.jsp</groupId>
            <artifactId>jsp-api</artifactId>
            <version>2.1</version>
            <scope>provided</scope>
        </dependency>
        <!-- jackson -->
        <dependency>
            <groupId>com.fasterxml.jackson.core</groupId>
            <artifactId>jackson-core</artifactId>
            <version>2.5.2</version>
        </dependency>
        <dependency>
            <groupId>com.fasterxml.jackson.core</groupId>
            <artifactId>jackson-databind</artifactId>
            <version>2.5.2</version>
        </dependency>
        <!-- FreeMarker -->
        <dependency>
            <groupId>org.freemarker</groupId>
            <artifactId>freemarker</artifactId>
            <version>2.3.23</version>
        </dependency>
    </dependencies>

</project>
依賴成功後的包:
新增一個名為FooController的控制器,增加兩個請求處理方法jstl與ftl,jstl讓第2個視圖解析器解析,ftl讓第1個解析器解析,第1個視圖解析器也是默認的視圖解析器,示例代碼如下:
package com.zhangguo.MavenTest.Controllers;

import org.springframework.stereotype.Controller;
import org.springframework.ui.Model;
import org.springframework.web.bind.annotation.RequestMapping;

@Controller
@RequestMapping("/foo")
public class FooController {
    @RequestMapping("/jstl")
    public String jstl(Model model) {
        model.addAttribute("message", "Hello JSTL View!");
        return "foo/jstl";
    }

    @RequestMapping("/ftl")
    public String ftl(Model model) {
        model.addAttribute("users", new String[]{"tom","mark","jack"});
        model.addAttribute("message", "Hello FreeMarker View!");
        return "foo/ftl";
    }
}
在WEB-INF/views/foo目錄下新增jsp頁面jstl.jsp頁面,在WEB-INF/htmlviews/foo目錄下新增ftl.html頁面,目錄結構如下:
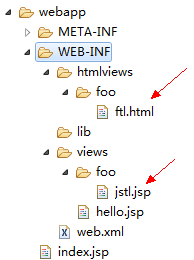
jstl.jsp頁面內容如下:
<%@ page language="java" contentType="text/html; charset=UTF-8" pageEncoding="UTF-8"%>
<%@ taglib prefix="c" uri="http://java.sun.com/jsp/jstl/core"%>
<!DOCTYPE html>
<html>
<head>
<meta http-equiv="Content-Type" content="text/html; charset=UTF-8">
<title>foo/jstl for JSTL</title>
</head>
<body>
${message}
</body>
</html>
ftl.html頁面內容如下:
<!DOCTYPE html>
<html>
<head>
<meta http-equiv="Content-Type" content="text/html; charset=UTF-8">
<title>foo/ftl for Freemarker</title>
</head>
<body>
    <p>${message}</p>
    <ul>
       <#list users as user><li>${user}</li></#list>
    </ul>
</body>
</html>
當請求http://localhost:8087/MavenTest/foo/ftl時運行結果如下:

當請求http://localhost:8087/MavenTest/foo/jstl時運行結果如下:
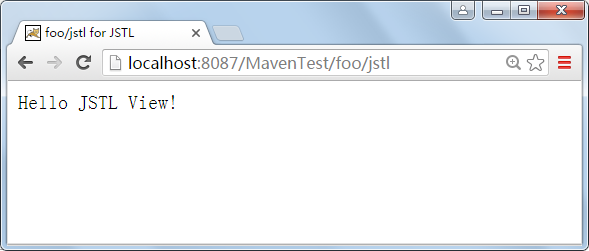
當訪問/foo/ftl時會找到action ftl方法,該方法返回foo/ftl字符串,視圖解析器中order為1的解析器去foo目錄下找名稱為ftl的視圖,視圖存在,將視圖與模型渲染後輸出。當訪問/foo/jstl時會找到action jstl訪問,該方法返回foo/jstl字符串,視圖解析器中order為1的解析器去foo目錄下找名稱為jstl的視圖,未能找到,解析失敗,轉到order為2的視圖解析器解析,在目錄foo下找到jstl的文件成功,將視圖與模板渲染後輸出。
如果想視圖解析器更加直接的選擇可以使用屬性viewNames,如viewNames="html*",則會只解析視圖名以html開頭的視圖。
在ftl.html頁面中,使用了FreeMarker模板語言,具體的應用細節請看本博客的另一篇文章。
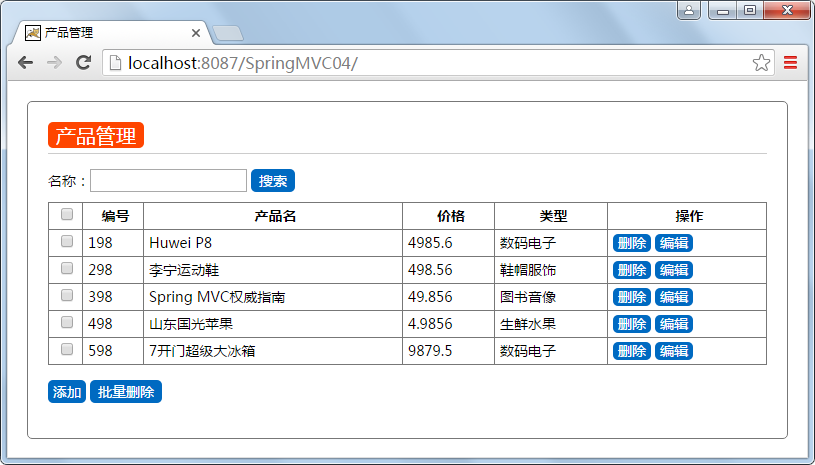
為了鞏固前面學習的內容,通過一個相對綜合的示例串聯前面學習過的一些知識點,主要實現產品管理管理功能,包含產品的添加,刪除,修改,查詢,多刪除功能,運行結果如下:
這一步在前面的文章中也多次提到,如果熟悉的話可以跳過。如果初學可以查看前面發布過一些文章中的內容,內容更加詳細。如:Spring整合MyBatis(Maven+MySQL)一。
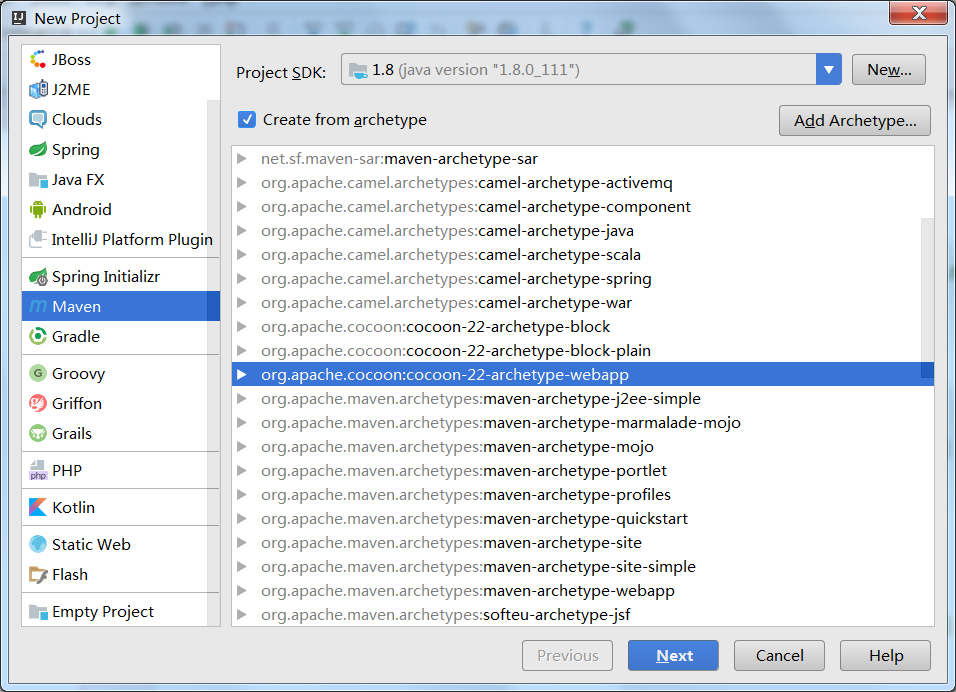
新建一個名稱為SpringMVC04的Maven簡單項目,填寫好項目名稱,組名,打包選擇war。
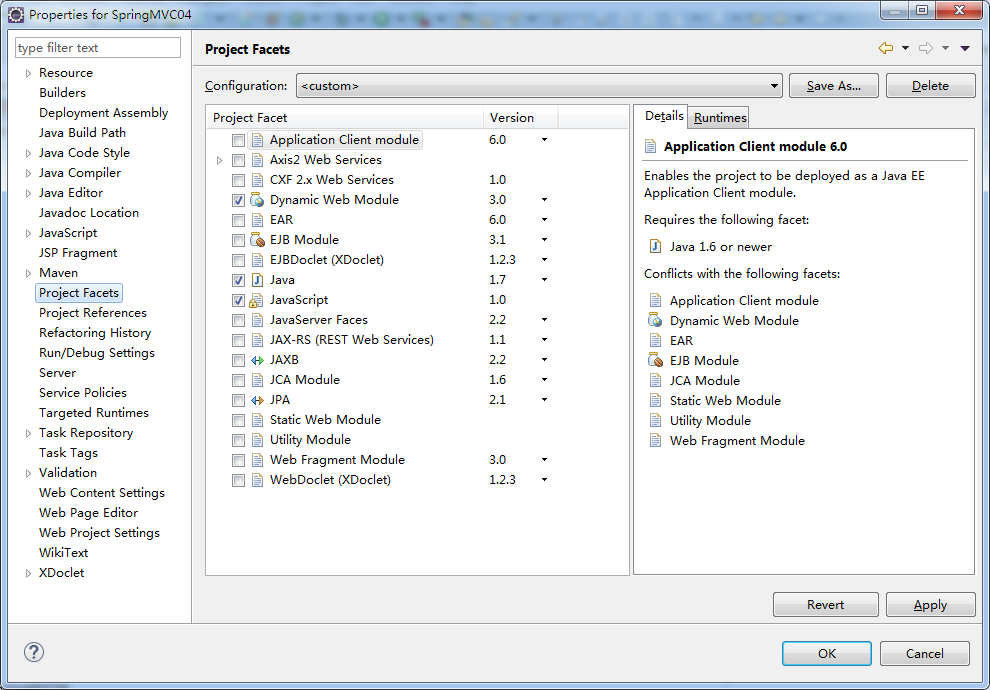
在項目上右鍵選擇屬性,再選擇“Project Facets”,先設置java運行環境為1.7,先去掉"Dynamic Web Module"前的勾,然後保存關閉;再打開勾選上"Dynamic Web Module",版本選擇“3.0”;這裡在左下解會出現一個超鏈接,創建“Web Content”,完成關閉。
項目上右鍵屬性,選擇“Deplyment Assembly”,刪除不需要發布的內容如:帶“test”的兩個目錄,WebContent目錄,再添加一個main下的webapp目錄。
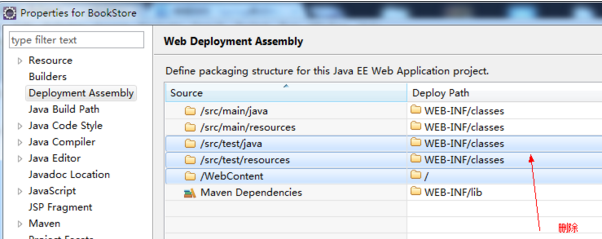
修改後的結果如下所示:
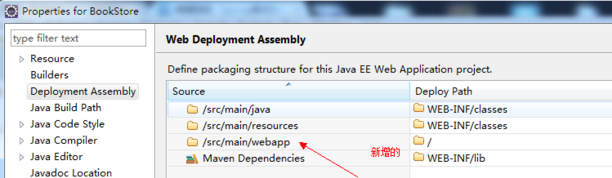
將WebContent下的內容復制到/src/main/webapp下,再刪除WebContent目錄。
修改後的目錄結構如下:

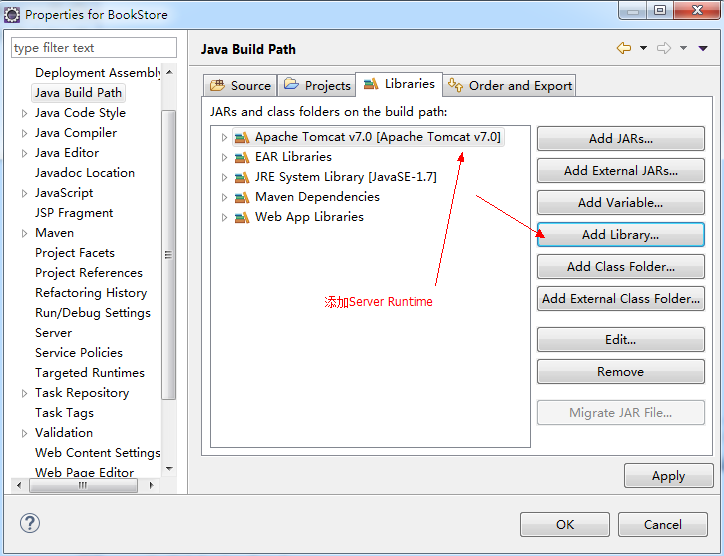
3.1.5、添加“服務器運行時(Server Runtime)”,當然如果選擇直接依賴Servlet與jsp的jar包,則這一步可以跳過,添加後的結果如下:
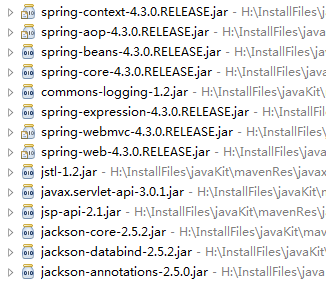
項目主要依賴的jar包有Spring核心包、Spring MVC、JSTL、JSP、Servlet核心包、Jackson等,具體的pom.xml文件如下:
<project xmlns="http://maven.apache.org/POM/4.0.0" xmlns:xsi="http://www.w3.org/2001/XMLSchema-instance"
    xsi:schemaLocation="http://maven.apache.org/POM/4.0.0 http://maven.apache.org/xsd/maven-4.0.0.xsd">
    <modelVersion>4.0.0</modelVersion>
    <groupId>com.zhangguo</groupId>
    <artifactId>SpringMVC04</artifactId>
    <version>0.0.1</version>
    <packaging>war</packaging>
    <properties>
        <project.build.sourceEncoding>UTF-8</project.build.sourceEncoding>
        <spring.version>4.3.0.RELEASE</spring.version>
    </properties>

    <dependencies>
        <!--Spring框架核心庫 -->
        <dependency>
            <groupId>org.springframework</groupId>
            <artifactId>spring-context</artifactId>
            <version>${spring.version}</version>
        </dependency>
        <!-- Spring MVC -->
        <dependency>
            <groupId>org.springframework</groupId>
            <artifactId>spring-webmvc</artifactId>
            <version>${spring.version}</version>
        </dependency>
        <!-- JSTL -->
        <dependency>
            <groupId>javax.servlet</groupId>
            <artifactId>jstl</artifactId>
            <version>1.2</version>
        </dependency>
        <!-- Servlet核心包 -->
        <dependency>
            <groupId>javax.servlet</groupId>
            <artifactId>javax.servlet-api</artifactId>
            <version>3.0.1</version>
            <scope>provided</scope>
        </dependency>
        <!--JSP應用程序接口 -->
        <dependency>
            <groupId>javax.servlet.jsp</groupId>
            <artifactId>jsp-api</artifactId>
            <version>2.1</version>
            <scope>provided</scope>
        </dependency>
        <!-- jackson -->
        <dependency>
            <groupId>com.fasterxml.jackson.core</groupId>
            <artifactId>jackson-core</artifactId>
            <version>2.5.2</version>
        </dependency>
        <dependency>
            <groupId>com.fasterxml.jackson.core</groupId>
            <artifactId>jackson-databind</artifactId>
            <version>2.5.2</version>
        </dependency>
    </dependencies>

</project>
依賴成功後的結果如下:
具體的內容請看該系列文章中的第一篇,Spring MVC運行環境引用的包在上一步中已完成,修改web.xml注冊中心控制器,修改後的web.xml如下所示:
<?xml version="1.0" encoding="UTF-8"?>
<web-app xmlns:xsi="http://www.w3.org/2001/XMLSchema-instance" xmlns="http://java.sun.com/xml/ns/javaee"
    xsi:schemaLocation="http://java.sun.com/xml/ns/javaee http://java.sun.com/xml/ns/javaee/web-app_3_0.xsd"
    id="WebApp_ID" version="3.0">

    <servlet>
        <servlet-name>springmvc</servlet-name>
        <servlet-class>org.springframework.web.servlet.DispatcherServlet</servlet-class>
        <init-param>
            <param-name>contextConfigLocation</param-name>
            <param-value>classpath*:springmvc-servlet.xml</param-value>
        </init-param>
        <load-on-startup>1</load-on-startup>
    </servlet>

    <servlet-mapping>
        <servlet-name>springmvc</servlet-name>
        <url-pattern>/</url-pattern>
    </servlet-mapping>
</web-app>
在源代碼根目錄下添加spring mvc配置文件springmvc-servlet.xml,詳細內容如下:
<?xml version="1.0" encoding="UTF-8"?>
<beans xmlns="http://www.springframework.org/schema/beans"
    xmlns:xsi="http://www.w3.org/2001/XMLSchema-instance"
    xmlns:context="http://www.springframework.org/schema/context"
    xmlns:mvc="http://www.springframework.org/schema/mvc"
    xsi:schemaLocation="http://www.springframework.org/schema/beans
         http://www.springframework.org/schema/beans/spring-beans.xsd
        http://www.springframework.org/schema/context
        http://www.springframework.org/schema/context/spring-context-4.3.xsd
        http://www.springframework.org/schema/mvc
        http://www.springframework.org/schema/mvc/spring-mvc-4.3.xsd">

    <!-- 自動掃描包,實現支持注解的IOC -->
    <context:component-scan base-package="com.zhangguo.springmvc04" />

    <!-- Spring MVC不處理靜態資源 -->
    <mvc:default-servlet-handler />

    <!-- 支持mvc注解驅動 -->
    <mvc:annotation-driven enable-matrix-variables="true" />

    <!-- 配置映射媒體類型的策略 -->
    <bean
        class="org.springframework.web.servlet.mvc.method.annotation.RequestMappingHandlerMapping">
        <property name="removeSemicolonContent" value="false" />
    </bean>

    <!-- 視圖解析器 -->
    <bean
        class="org.springframework.web.servlet.view.InternalResourceViewResolver"
        id="internalResourceViewResolver">
        <!-- 前綴 -->
        <property name="prefix" value="/WEB-INF/views/" />
        <!-- 後綴 -->
        <property name="suffix" value=".jsp" />
    </bean>
</beans>
在包com.zhangguo.springmvc04.entities新增加產品類型類ProductType,代碼如下所示:

添加產品POJO類Product,具體代碼如下:
在包com.zhangguo.springmvc04.services下創建產品類型服務接口ProductTypeService,代碼如下:
package com.zhangguo.springmvc04.services;

import java.util.List;

import com.zhangguo.springmvc04.entities.ProductType;

/**
 * 產品類型服務
 *
 */
public interface ProductTypeService {
    /**
     * 根據產品類型編號獲得產品類型對象
     */
    public ProductType getProductTypeById(int id);

    /**
     * 獲得所有的產品類型
     */
    public List<ProductType> getAllProductTypes();
}
實現類ProductTypeServiceImpl,代碼如下:
package com.zhangguo.springmvc04.services;

import java.util.ArrayList;
import java.util.List;

import org.springframework.stereotype.Service;
import com.zhangguo.springmvc04.entities.ProductType;

@Service
public class ProductTypeServiceImpl implements ProductTypeService {

    private static List<ProductType> productTypes;

    static {
        productTypes = new ArrayList<ProductType>();
        productTypes.add(new ProductType(11, "數碼電子"));
        productTypes.add(new ProductType(21, "鞋帽服飾"));
        productTypes.add(new ProductType(31, "圖書音像"));
        productTypes.add(new ProductType(41, "五金家電"));
        productTypes.add(new ProductType(51, "生鮮水果"));
    }

    @Override
    public ProductType getProductTypeById(int id) {
        for (ProductType productType : productTypes) {
            if (productType.getId() == id) {
                return productType;
            }
        }
        return null;
    }

    @Override
    public List<ProductType> getAllProductTypes() {
        return productTypes;
    }

}
創建產品服務接口ProductService,代碼如下:
package com.zhangguo.springmvc04.services;

import java.util.List;

import com.zhangguo.springmvc04.entities.Product;

public interface ProductService {

    /*
     * 獲得所有的產品
     */
    List<Product> getAllProducts();

    /*
     * 獲得產品通過編號
     */
    Product getProductById(int id);

    /*
     * 獲得產品名稱通過名稱
     */
    List<Product> getProductsByName(String productName);

    /**
     * 新增產品對象
     */
    void addProduct(Product enttiy) throws Exception;

    /**
     * 更新產品對象
     */
    public void updateProduct(Product entity) throws Exception;

    /**
     * 刪除產品對象
     */
    void deleteProduct(int id);

    /**
     * 多刪除產品對象
     */
    void deletesProduct(int[] ids);

}
實現類ProductServiceImpl,代碼如下:
package com.zhangguo.springmvc04.services;

import java.util.ArrayList;
import java.util.List;
import org.springframework.stereotype.Service;
import com.zhangguo.springmvc04.entities.Product;

@Service
public class ProductServiceImpl implements ProductService {
    private static List<Product> products;

    static {
        ProductTypeService productTypeService = new ProductTypeServiceImpl();
        products = new ArrayList<Product>();
        products.add(new Product(198, "Huwei P8", 4985.6, productTypeService.getProductTypeById(11)));
        products.add(new Product(298, "李寧運動鞋", 498.56, productTypeService.getProductTypeById(21)));
        products.add(new Product(398, "Spring MVC權威指南", 49.856, productTypeService.getProductTypeById(31)));
        products.add(new Product(498, "山東國光蘋果", 4.9856, productTypeService.getProductTypeById(51)));
        products.add(new Product(598, "8開門超級大冰箱", 49856.1, productTypeService.getProductTypeById(41)));
    }

    /*
     * 獲得所有的產品
     */
    @Override
    public List<Product> getAllProducts() {
        return products;
    }

    /*
     * 獲得產品通過編號
     */
    @Override
    public Product getProductById(int id) {
        for (Product product : products) {
            if (product.getId() == id) {
                return product;
            }
        }
        return null;
    }

    /*
     * 獲得產品名稱通過名稱
     */
    @Override
    public List<Product> getProductsByName(String productName) {
        if(productName==null||productName.equals("")){
            return getAllProducts();
        }
        List<Product> result = new ArrayList<Product>();
        for (Product product : products) {
            if (product.getName().contains(productName)) {
                result.add(product);
            }
        }
        return result;
    }

    /**
     * 新增
     * @throws Exception
     */
    @Override
    public void addProduct(Product entity) throws Exception {
        if(entity.getName()==null||entity.getName().equals("")){
            throw new Exception("產品名稱必須填寫");
        }
        if (products.size() > 0) {
            entity.setId(products.get(products.size() - 1).getId() + 1);
        } else {
            entity.setId(1);
        }
        products.add(entity);
    }

    /*
     * 更新
     */
    public void updateProduct(Product entity) throws Exception
    {
        if(entity.getPrice()<0){
            throw new Exception("價格必須大於0");
        }
        Product source=getProductById(entity.getId());
        source.setName(entity.getName());
        source.setPrice(entity.getPrice());
        source.setProductType(entity.getProductType());
    }

    /**
     * 刪除
     */
    @Override
    public void deleteProduct(int id){
        products.remove(getProductById(id));
    }

    /*
     * 多刪除
     */
    @Override
    public void deletesProduct(int[] ids){
        for (int id : ids) {
            deleteProduct(id);
        }
    }
}
3.6、實現展示、查詢、刪除與多刪除功能
在com.zhangguo.springmvc04.controllers包下定義一個名為ProductController的控制器,代碼如下所示:
package com.zhangguo.springmvc04.controllers;

import org.springframework.beans.factory.annotation.Autowired;
import org.springframework.stereotype.Controller;
import org.springframework.ui.Model;
import org.springframework.web.bind.annotation.PathVariable;
import org.springframework.web.bind.annotation.RequestMapping;
import org.springframework.web.bind.annotation.RequestParam;

import com.zhangguo.springmvc04.services.ProductService;

@Controller
@RequestMapping
public class ProductController {
    @Autowired
    ProductService productService;

    //展示與搜索action
    @RequestMapping
    public String index(Model model, String searchKey) {
        model.addAttribute("products", productService.getProductsByName(searchKey));
        model.addAttribute("searchKey", searchKey);
        return "product/index";
    }

    //刪除,id為路徑變量
    @RequestMapping("/delete/{id}")
    public String delete(@PathVariable int id){
        productService.deleteProduct(id);
        return "redirect:/";
    }

    //多刪除,ids的值為多個id參數組成
    @RequestMapping("/deletes")
    public String deletes(@RequestParam("id")int[] ids){
        productService.deletesProduct(ids);
        return "redirect:/";
    }
}
控制器上的路徑映射value並未指定值是讓該控制器為默認控制器,index請求處理方法在路徑映射注解@RequestMapping中也並未指定value值是讓該action為默認action,所有當我們訪問系統時這個index就成了歡迎頁。
定義所有頁面風格用的main.css樣式,腳本如下:
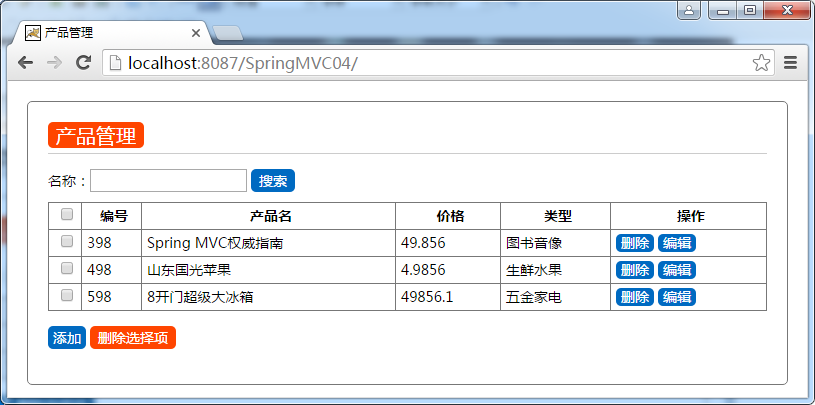
在views目錄下新建目錄product,在product目錄下新建一個視圖index.jsp,頁面腳本如下所示:
<%@ page language="java" contentType="text/html; charset=UTF-8" pageEncoding="UTF-8"%>
<%@taglib prefix="c" uri="http://java.sun.com/jsp/jstl/core"%>
<%@taglib prefix="fmt" uri="http://java.sun.com/jsp/jstl/fmt" %>
<!DOCTYPE html>
<html>
<head>
<meta http-equiv="Content-Type" content="text/html; charset=UTF-8">
<link href="<c:url value="/styles/main.css"/>"  type="text/css" rel="stylesheet" />
<title>產品管理</title>
</head>
<body>
    <div class="main">
        <h2 class="title"><span>產品管理</span></h2>
        <form method="get">
           名稱:<input type="text" name="searchKey" value="${searchKey}"/>
           <input type="submit"  value="搜索" class="btn out"/>
        </form>
        <form action="deletes" method="post">
        <table border="1" width="100%" class="tab">
            <tr>
                <th><input type="checkbox" id="chbAll"></th>
                <th>編號</th>
                <th>產品名</th>
                <th>價格</th>
                <th>類型</th>
                <th>操作</th>
            </tr>
            <c:forEach var="product" items="${products}">
                <tr>
                    <th><input type="checkbox" name="id" value="${product.id}"></th>
                    <td>${product.id}</td>
                    <td>${product.name}</td>
                    <td>${product.price}</td>
                    <td>${product.productType.name}</td>
                    <td>
                    <a href="delete/${product.id}" class="abtn">刪除</a>
                    <a href="edit/${product.id}" class="abtn">編輯</a>
                    </td>
                </tr>
            </c:forEach>
        </table>
        <p >${message}</p>
        <p>
            <a href="add" class="abtn out">添加</a>
            <input type="submit"  value="刪除選擇項" class="btn out"/>
        </p>
        <script type="text/javascript" src="<c:url value="/scripts/jQuery1.11.3/jquery-1.11.3.min.js"/>" ></script>
    </form>
    </div>
</body>
</html>
運行結果如下:
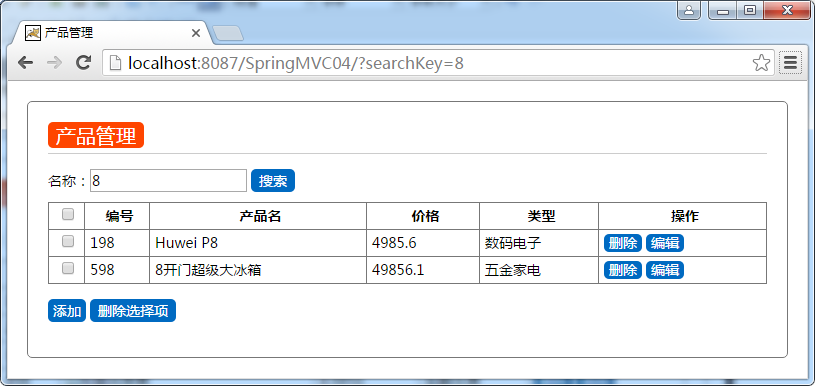
搜索:
刪除與批量刪除:
在ProductController控制器中添加兩個Action,一個用於渲染添加頁面,另一個用於響應保存功能,代碼如下:
// 新增,渲染出新增界面
@RequestMapping("/add")
public String add(Model model) {
// 與form綁定的模型
model.addAttribute("product", new Product());
// 用於生成下拉列表
model.addAttribute("productTypes", productTypeService.getAllProductTypes());
return "product/add";
}
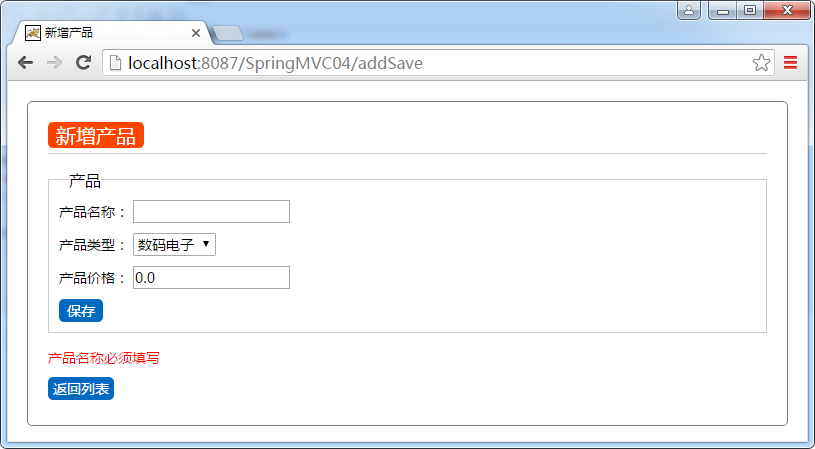
// 新增保存,如果新增成功轉回列表頁,如果失敗回新增頁,保持頁面數據
@RequestMapping("/addSave")
public String addSave(Model model,Product product) {
try {
//根據類型的編號獲得類型對象
product.setProductType(productTypeService.getProductTypeById(product.getProductType().getId()));
productService.addProduct(product);
return "redirect:/";
} catch (Exception exp) {
// 與form綁定的模型
model.addAttribute("product", product);
// 用於生成下拉列表
model.addAttribute("productTypes", productTypeService.getAllProductTypes());
//錯誤消息
model.addAttribute("message", exp.getMessage());
return "product/add";
}
}
在views/product目錄下新增視圖add.jsp頁面,頁面腳本如下:
<%@ page language="java" contentType="text/html; charset=UTF-8" pageEncoding="UTF-8"%>
<%@taglib prefix="c" uri="http://java.sun.com/jsp/jstl/core"%>
<%@taglib prefix="form" uri="http://www.springframework.org/tags/form" %>
<!DOCTYPE html>
<html>
<head>
<meta http-equiv="Content-Type" content="text/html;charset=UTF-8">
<link href="styles/main.css" type="text/css" rel="stylesheet" />
<title>新增產品</title>
</head>
<body>
    <div class="main">
        <h2 class="title"><span>新增產品</span></h2>
        <form:form action="addSave" modelAttribute="product">
        <fieldset>
            <legend>產品</legend>
            <p>
                <label for="name">產品名稱:</label>
                <form:input path="name"/>
            </p>
            <p>
                <label for="title">產品類型:</label>
                <form:select path="productType.id" items="${productTypes}"  itemLabel="name" itemValue="id">
                </form:select>
            </p>
            <p>
                <label for="price">產品價格:</label>
                <form:input path="price"/>
            </p>
            <p>
              <input type="submit" value="保存" class="btn out">
            </p>
        </fieldset>
        </form:form>
        <p >${message}</p>
        <p>
            <a href="<c:url value="/" />"  class="abtn out">返回列表</a>
        </p>
    </div>
</body>
</html>
運行結果:
在ProductController控制器中添加兩個Action,一個用於渲染編輯頁面,根據要編輯的產品編號獲得產品對象,另一個用於響應保存功能,代碼如下:
// 編輯,渲染出編輯界面,路徑變量id是用戶要編輯的產品編號
@RequestMapping("/edit/{id}")
public String edit(Model model,@PathVariable int id) {
// 與form綁定的模型
model.addAttribute("product", productService.getProductById(id));
// 用於生成下拉列表
model.addAttribute("productTypes", productTypeService.getAllProductTypes());
return "product/edit";
}
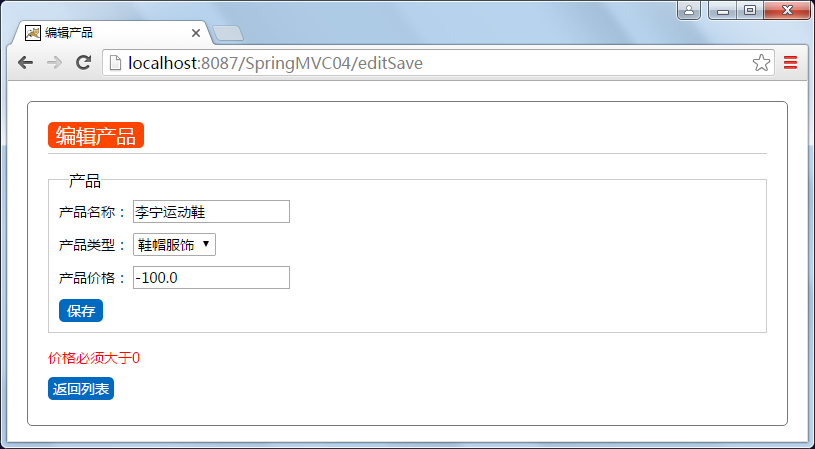
// 編輯後保存,如果更新成功轉回列表頁,如果失敗回編輯頁,保持頁面數據
@RequestMapping("/editSave")
public String editSave(Model model,Product product) {
try {
//根據類型的編號獲得類型對象
product.setProductType(productTypeService.getProductTypeById(product.getProductType().getId()));
productService.updateProduct(product);
return "redirect:/";
} catch (Exception exp) {
// 與form綁定的模型
model.addAttribute("product", product);
// 用於生成下拉列表
model.addAttribute("productTypes", productTypeService.getAllProductTypes());
//錯誤消息
model.addAttribute("message", exp.getMessage());
return "product/edit";
}
}
在views/product目錄下新增視圖edit.jsp頁面,頁面腳本如下:
<%@ page language="java" contentType="text/html; charset=UTF-8" pageEncoding="UTF-8"%>
<%@taglib prefix="c" uri="http://java.sun.com/jsp/jstl/core"%>
<%@taglib prefix="form" uri="http://www.springframework.org/tags/form" %>
<!DOCTYPE html>
<html>
<head>
<meta http-equiv="Content-Type" content="text/html;charset=UTF-8">
<link href="<c:url value="/styles/main.css" />" type="text/css" rel="stylesheet" />
<title>編輯產品</title>
</head>
<body>
    <div class="main">
        <h2 class="title"><span>編輯產品</span></h2>
        <form:form action="${pageContext.request.contextPath}/editSave" modelAttribute="product">
        <fieldset>
            <legend>產品</legend>
            <p>
                <label for="name">產品名稱:</label>
                <form:input path="name"/>
            </p>
            <p>
                <label for="title">產品類型:</label>
                <form:select path="productType.id" items="${productTypes}"  itemLabel="name" itemValue="id">
                </form:select>
            </p>
            <p>
                <label for="price">產品價格:</label>
                <form:input path="price"/>
            </p>
            <p>
              <form:hidden path="id"/>
              <input type="submit" value="保存" class="btn out">
            </p>
        </fieldset>
        </form:form>
        <p >${message}</p>
        <p>
            <a href="<c:url value="/" />"  class="abtn out">返回列表</a>
        </p>
    </div>
</body>
</html>
這裡要注意路徑問題使用c:url不能嵌套在form標簽中,所以使用了${ctx},運行結果如下:
完成整個功能後的控制器代碼如下:
點擊下載