適用於:本文適用於有一定微信開發基礎的用戶
引言:
花了300大洋申請了微信公眾平台後,發現不能使用微信公眾號登錄網站(非微信打開)獲得微信帳號。仔細研究後才發現還要再花300大洋申請微信開放平台才能接入網站的登錄。於是做為屌絲程序員的我想到了自己做一個登錄接口。
工具和環境:
1. VS2013 .net4.0 C# MVC4.0 Razor
2.插件
A. Microsoft.AspNet.SignalR;時時獲取後台數據
B.Gma.QrCodeNet.Encoding;文本生成二維碼
實現的目標
1. 在電腦上打開網站登錄頁,提示用戶使用微信掃描登錄確認。
2.用戶通過微信掃描確認後,電腦自動收到確認信息跳轉到網站主頁。
原理分析
1.SignalR是一個神奇的工具,能從浏覽器A發送信息到服務器,服務器自動推送消息到指定的浏覽器B。那麼我的計劃是用電腦的浏覽器打開登錄頁,生成一個二維碼(內容為帶有微信公眾平台網頁用戶受權的網址),用微信的描碼功能打開這個網站。將獲取的微信用戶OPENID通過SignalR發送到電腦浏覽器,實現登錄功能
實現過程
1.微信公從平台的注冊和權限(略過...)
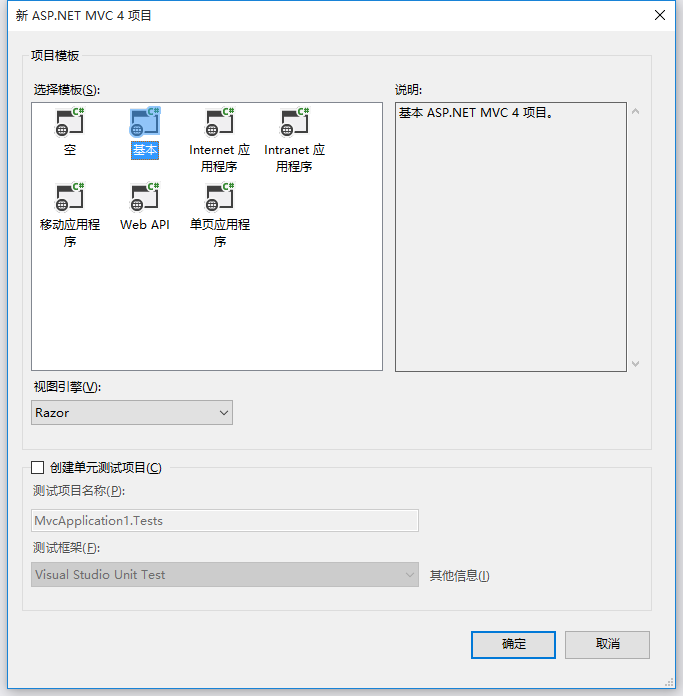
2.VS2013中新建MVC網站,我用的環境為.NET4.0 C# MVC4.0 Razor引擎(個人習慣)。
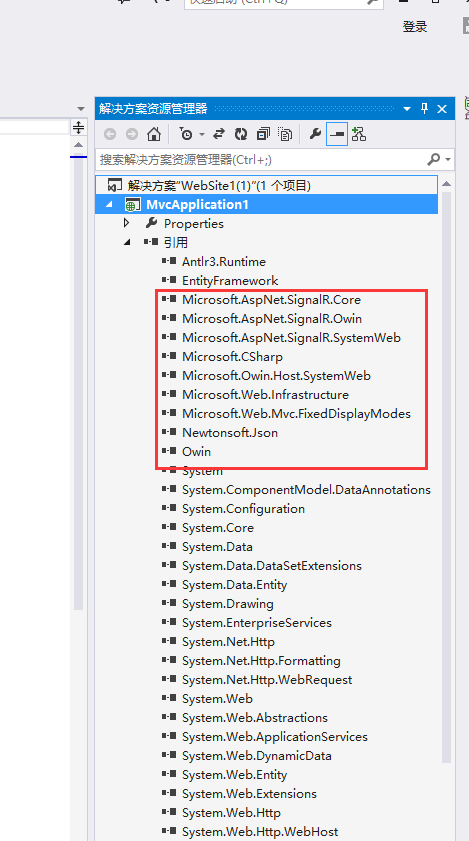
3.安裝 SignalR
VS2013 點擊工具 ==> 庫程序包管理器 ==> 程序包管理控制台
輸入以下命令:
Install-Package Microsoft.AspNet.SignalR -Version 1.1.4
.net4.0 Mvc4環境下建議安裝1.1.4高版本安裝不上
安裝 SingnalR成功
設置SignalR
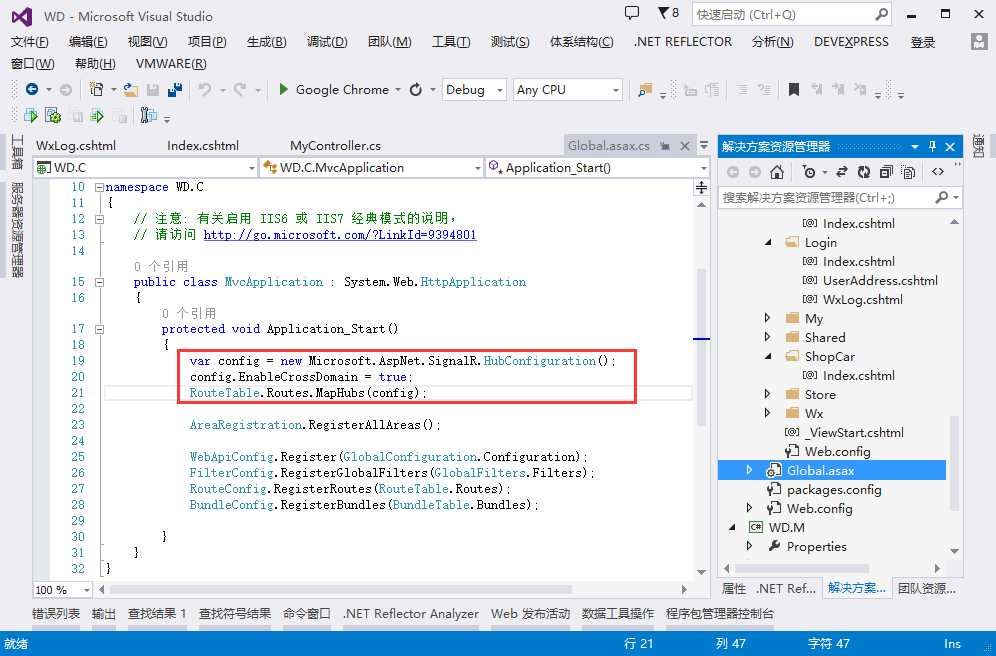
var config = new Microsoft.AspNet.SignalR.HubConfiguration();
config.EnableCrossDomain = true;
RouteTable.Routes.MapHubs(config);
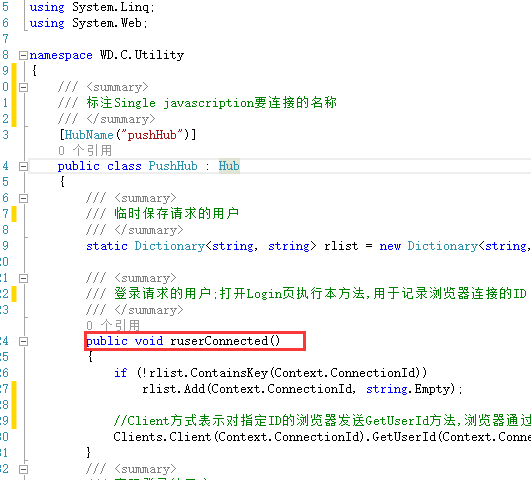
新建一個類 PushHub.cs
using Microsoft.AspNet.SignalR;
using Microsoft.AspNet.SignalR.Hubs;
using System;
using System.Collections.Generic;
using System.Linq;
using System.Web;
namespace WD.C.Utility
{
/// <summary>
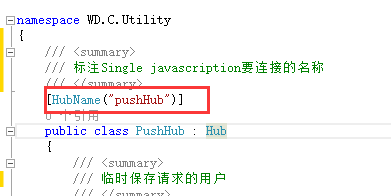
/// 標注Single javascription要連接的名稱
/// </summary>
[HubName("pushHub")]
public class PushHub : Hub
{
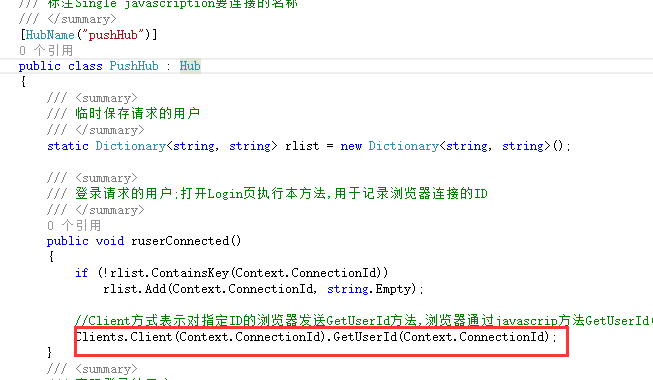
/// <summary>
/// 臨時保存請求的用戶
/// </summary>
static Dictionary<string, string> rlist = new Dictionary<string, string>();
/// <summary>
/// 登錄請求的用戶;打開Login頁執行本方法,用於記錄浏覽器連接的ID
/// </summary>
public void ruserConnected()
{
if (!rlist.ContainsKey(Context.ConnectionId))
rlist.Add(Context.ConnectionId, string.Empty);
//Client方式表示對指定ID的浏覽器發送GetUserId方法,浏覽器通過javascrip方法GetUserId(string)得到後台發來的Context.ConnectionId
Clients.Client(Context.ConnectionId).GetUserId(Context.ConnectionId);
}
/// <summary>
/// 實際登錄的用戶
/// </summary>
/// <param name="ruser">請求的用戶ID</param>
/// <param name="logUserID">微信OPENID</param>
public void logUserConnected(string ruser, string logUserID)
{
if (rlist.ContainsKey(ruser))
{
rlist.Remove(ruser);
//Client方式表示對指定ID的浏覽器發送GetUserId方法,浏覽器通過javascrip方法userLoginSuccessful(bool,string)得到後台發來的登錄成功,和微信OPENID
Clients.Client(ruser).userLoginSuccessful(true, logUserID);
}
}
}
}
新建一個MVC控制器"LoginController.cs",這個不會看別的教程;
using System;
using System.Collections.Generic;
using System.Linq;
using System.Web;
using System.Web.Mvc;

namespace WD.C.Controllers
{
 public class LoginController : Controller
 {
 //
 // GET: /Login/

 /// <summary>
 /// 登錄主頁,電腦端打開
 /// </summary>
 /// <returns></returns>
 public ActionResult Index()
 {
 /*參考 https://mp.weixin.qq.com/wiki?t=resource/res_main&id=mp1421140842&token=&lang=zh_CN
 *1.URL用於生成二維碼給微信掃描
 *2.格式參考微信公從平台幫助
 * https://open.weixin.qq.com/connect/oauth2/authorize?appid=APPID&redirect_uri=REDIRECT_URI&response_type=code&scope=SCOPE&state=STATE#wechat_redirect 若提示“該鏈接無法訪問”,請檢查參數是否填寫錯誤,是否擁有scope參數對應的授權作用域權限。
 *3.REDIRECT_URI內容為返回地址,需要開發者需要先到公眾平台官網中的“開發 - 接口權限 - 網頁服務 - 網頁帳號 - 網頁授權獲取用戶基本信息”的配置選項中,修改授權回調域名
 *4.REDIRECT_URI應回調到WxLog頁並進行URLEncode編碼,如: redirect_uri=GetURLEncode("http://你的網站/Login/WxLog?ruser="); ruser為PushHub中的Context.ConnectionId到View中配置
 *
 */
 ViewBag.Url = string.Format("https://open.weixin.qq.com/connect/oauth2/authorize?appid={0}&redirect_uri={1}&response_type=code&scope=snsapi_base&state={2}#wechat_redirect", B.Helper.AppID, GetURLEncode("http://你的網站/Login/WxLog?ruser="), Guid.NewGuid());
 return View();
 }

 /// <summary>
 /// 登錄確認頁,微信端打開
 /// </summary>
 /// <param name="ruser"></param>
 /// <returns></returns>
 public ActionResult WxLog(string ruser)
 {
//使用微信登錄
if (!string.IsNullOrEmpty(code))
 {
 string loguser= B.Helper.GetOpenIDByCode(code);
 Session["LogUserID"] =loguser;
 ViewBag.LogUserID = loguser;
 }

 ViewBag.ruser = ruser;
 return View();

 }


 }
}
控制器 "QRController.cs"用於文本生成二維碼
using System;
using System.Collections.Generic;
using System.Linq;
using System.Web;
using System.Web.Mvc;

namespace WD.C.Controllers
{
 public class QRController : Controller
 {
 //
 // GET: /QR/

 public ActionResult Index()
 {
 return View();
 }
 /// <summary>
 /// 獲得2維碼圖片
 /// </summary>
 /// <param name="str"></param>
 /// <returns></returns>
 public ActionResult GetQRCodeImg(string str)
 {
 using (var ms = new System.IO.MemoryStream())
 {

 string stringtest = str;
 GetQRCode(stringtest, ms);
 Response.ContentType = "image/Png";
 Response.OutputStream.Write(ms.GetBuffer(), 0, (int)ms.Length);
 System.Drawing.Bitmap img = new System.Drawing.Bitmap(100, 100);
 img.Save(ms, System.Drawing.Imaging.ImageFormat.Jpeg);
 Response.End();
 return File(ms.ToArray(), @"image/jpeg");
 }
 }
 private static bool GetQRCode(string strContent, System.IO.MemoryStream ms)
 {

 Gma.QrCodeNet.Encoding.ErrorCorrectionLevel Ecl = Gma.QrCodeNet.Encoding.ErrorCorrectionLevel.M; //誤差校正水平
 string Content = strContent;//待編碼內容
 Gma.QrCodeNet.Encoding.Windows.Render.QuietZoneModules QuietZones = Gma.QrCodeNet.Encoding.Windows.Render.QuietZoneModules.Two; //空白區域
 int ModuleSize = 12;//大小
 var encoder = new Gma.QrCodeNet.Encoding.QrEncoder(Ecl);
 Gma.QrCodeNet.Encoding.QrCode qr;
 if (encoder.TryEncode(Content, out qr))//對內容進行編碼,並保存生成的矩陣
 {
 var render = new Gma.QrCodeNet.Encoding.Windows.Render.GraphicsRenderer(new Gma.QrCodeNet.Encoding.Windows.Render.FixedModuleSize(ModuleSize, QuietZones));
 render.WriteToStream(qr.Matrix, System.Drawing.Imaging.ImageFormat.Png, ms);
 }
 else
 {
 return false;
 }
 return true;
 }
 }
}
視圖 開啟SignalR
var chat = $.connection.pushHub;
$.connection.hub.start().done(function () {
chat.server.ruserConnected();
});
$.connection.pushHub對應
chat.server.ruserConnected();對應
表示調用"pushHub"運行後執行 runserConnected方法,在臨時表中增加當前浏覽器的ConnectionID
chat.client.getUserId = function (ruserid)
{

  //二維碼生成的文本
$("#loga").attr("src", "@ViewBag.Url" + ruserid);
}
表示台後數據
收到數據後返回到游覽器
chat.client.userLoginSuccessful = function (r, userid) {
 if (r) {
 $.post("/Login/AddSession/", { userid: userid }, function (r2) {
 if (r2) {
 location.href = "/Home/";
 }
 })
 }
 };
用戶通過微信登錄後

接收微信OpenID
$.post("/Login/AddSession/", { userid: userid }, function (r2) {
if (r2) {
location.href = "/Home/";
}
})
執行 Post到後台增加登錄信息,成功後轉到/Home/主頁
/// <summary>
 /// 保存微信確認登錄後返回的OPENID,做為網站的Session["LogUserID"]
 /// </summary>
 /// <param name="userid"></param>
 /// <returns></returns>
 public JsonResult AddSession(string userid)
 {
 Session["LogUserID"] = userid;
 return Json(true);
 }
Login/WxLog.cshtml 本頁在微信上打開
@{
 ViewBag.Title = "WxLog";
}
<script src="~/Scripts/jquery.signalR-1.1.4.min.js"></script>
<script src="~/signalr/hubs"></script>
<script>
 $(function () {
 //連接SignalR pushHab
 var chat = $.connection.pushHub;
 //啟動
 $.connection.hub.start().done();

 $("#btnLog").click(function () {
 //登錄,發送信息到服務器
 chat.server.logUserConnected("@ViewBag.ruser","@ViewBag.LogUserID");
 });
 });
</script>
<h2>WxLog</h2>

<a href="#" id="btnLog">登錄</a>


@{
 ViewBag.Title = "Index";
}
 @Scripts.Render("~/bundles/jquery")
<script src="~/Scripts/jquery.signalR-1.1.4.min.js"></script>
<script src="~/signalr/hubs"></script>

<script type='text/javascript'>
 $(function () {
 var chat = $.connection.pushHub;
 $.connection.hub.start().done(function () {
 chat.server.ruserConnected();
 });
 chat.client.getUserId = function (ruserid)
 {
 $("#loga").attr("src", "@ViewBag.Url" + ruserid);
 }
 chat.client.userLoginSuccessful = function (r, userid) {
 if (r) {
 location.href = "/Home/";
 })
 }
 };
 });

</script>
<header>
 <a href="~/Home/" class="iconfont backIcon"><</a>
 <h1>用戶登錄</h1>
</header>
<div style="height:1rem;"></div>
請使用微信登錄掃描以下二維碼生產圖片
<div>
 <img id="loga" src="#" width="90%" />
</div>

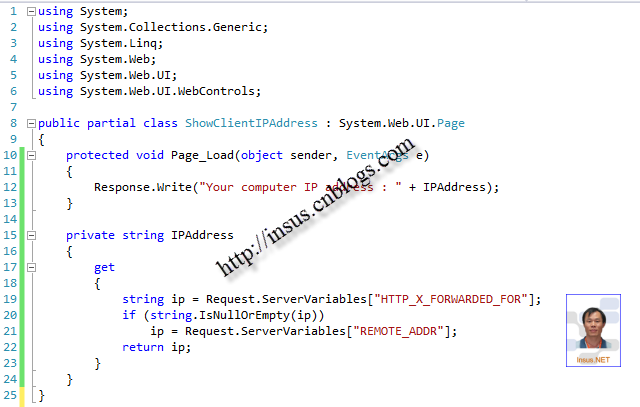
GetOpenIDByCode(code)方法
參考 https://mp.weixin.qq.com/wiki?t=resource/res_main&id=mp1421140842&token=&lang=zh_CN
對於已關注公眾號的用戶,如果用戶從公眾號的會話或者自定義菜單進入本公眾號的網頁授權頁,即使是scope為snsapi_userinfo,也是靜默授權,用戶無感知。
具體而言,網頁授權流程分為四步:
1、引導用戶進入授權頁面同意授權,獲取code
2、通過code換取網頁授權access_token(與基礎支持中的access_token不同)
3、如果需要,開發者可以刷新網頁授權access_token,避免過期
4、通過網頁授權access_token和openid獲取用戶基本信息(支持UnionID機制)
 public static string GetOpenIDByCode(string code)
 {
 string url =string.Format( "https://api.weixin.qq.com/sns/oauth2/access_token?appid={0}&secret={1}&code={2}&grant_type=authorization_code",AppID,AppSecret, code);
 using (System.Net.WebClient client = new System.Net.WebClient())
 {
 string tempstr= client.DownloadString( url);
 var regex= new Regex(@"\""openid\"":\""[^\""]+?\"",", RegexOptions.IgnoreCase);
 string tempstr2= regex.Match(tempstr).Value;
 return tempstr2.Substring(10, tempstr2.Length - 12);
 }
 }
精彩專題分享:ASP.NET微信開發教程匯總,歡迎大家學習。
以上就是本文的全部內容,希望對大家的學習有所幫助,也希望大家多多支持腳本之家。