Refers to the data by visual representation,He closely related to the data analysis,而數據分析指的是使用代碼來探索數據集的規律和關聯,Data sets can be expressed in a single line of code can small digital list,It can also be thousands of megabytes of data.
舉例:
使用Matplotlib繪制簡單的圖表,We only need to provide several,MatplotlibWill finish the work:
import matplotlib.pyplot as plt#導入pyplot模塊,Contains many used to generate the chart function
squares=[1,4,9,16,25]
fig,ax=plt.subplots()#fig表示整張圖片,ax表示圖片中的各個圖表
#調用函數subplots
ax.plot(squares)#調用方法plot(),It attempts to according to the given data chart is drawn in a meaningful way
plt.show()#打開Matplotlib查看器並顯示繪制的圖表
繪制結果如下圖所示: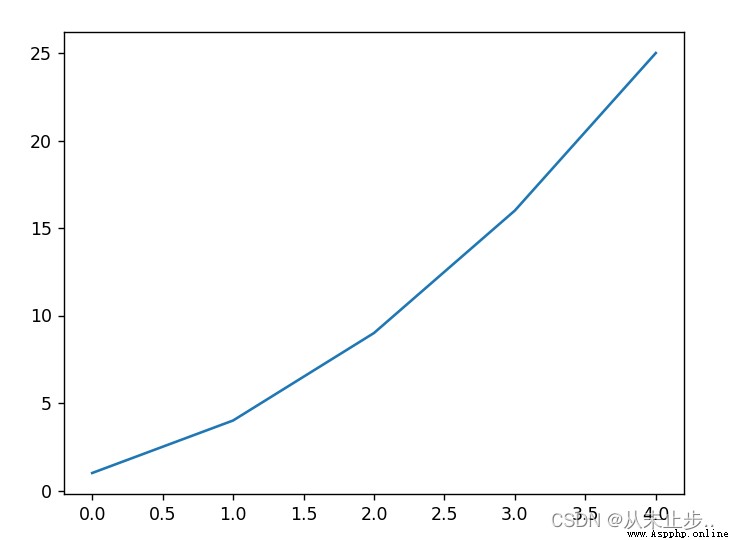
We now by changing the code,To improve the readability of the chart:
import matplotlib.pyplot as plt
squares=[1,4,9,16,25]
fig,ax=plt.subplots()
ax.plot(squares,linewidth=3)
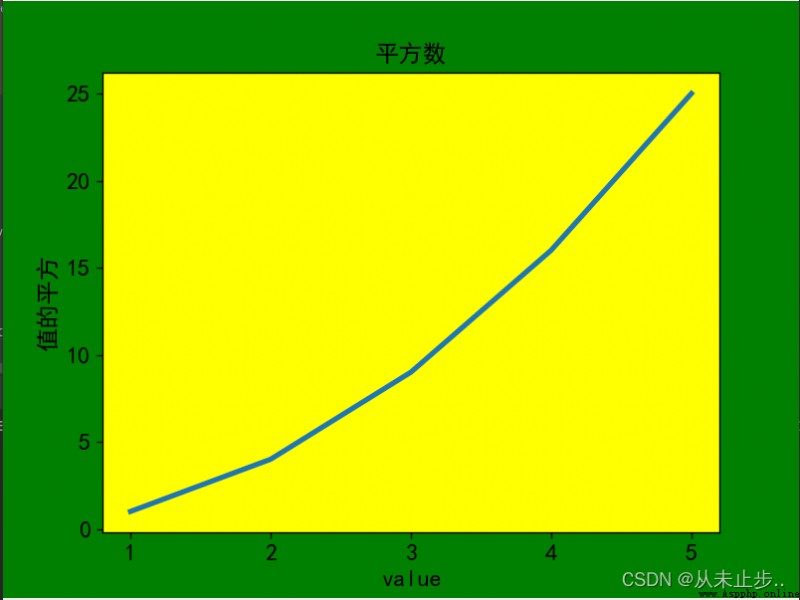
ax.set_title("平方數",fontsize=24)
ax.set_xlabel("value",fontsize=14)
ax.set_ylabel("值的平方",fontsize=14)
ax.tick_params(axis='both',labelsize=14)
plt.show()
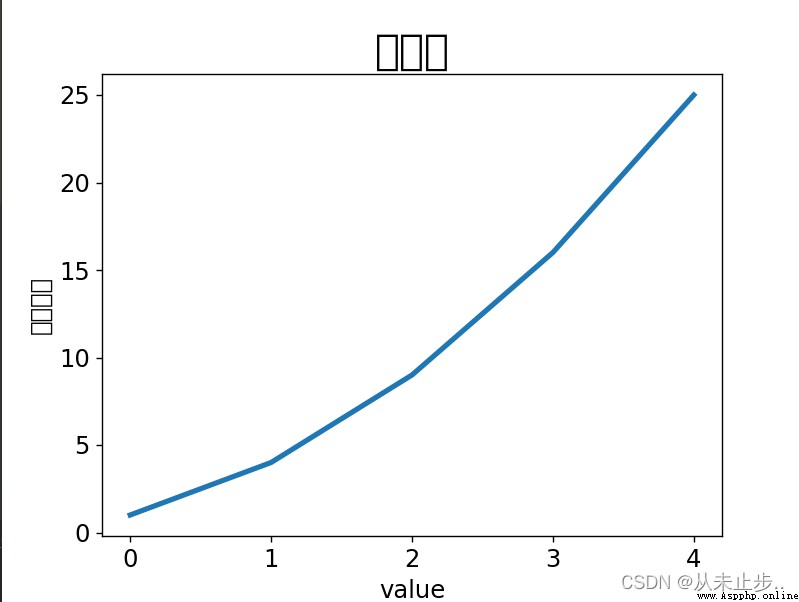 通過輸出結果我們發現,The title of the shaft to be displayed very well in English,The title for Chinese axis is displayed in the form of stil.
為什麼會出現亂碼呢?
This is due to the user configuration,matlabCan not find the default font,於是使用了Helvetica字體.
如何解決這個問題呢?
我們可通過修改pltThe configuration parameters to meet the demand of drawing,修改參數方法如下:
plt.rcParams[‘配置參數’]=[修改值]
The above examples can be modified to:
import matplotlib.pyplot as plt
plt.rcParams['font.sans-serif']=['SimHei']#Run the configuration parameters of the font(font)為黑體(SimHei)
squares=[1,4,9,16,25]
fig,ax=plt.subplots()
ax.plot(squares,linewidth=3)
ax.set_title("平方數",fontsize=24)
ax.set_xlabel("value",fontsize=14)
ax.set_ylabel("值的平方",fontsize=14)
ax.tick_params(axis='both',labelsize=14)
plt.show()
The chart presented line more thick at this time,Also easier to read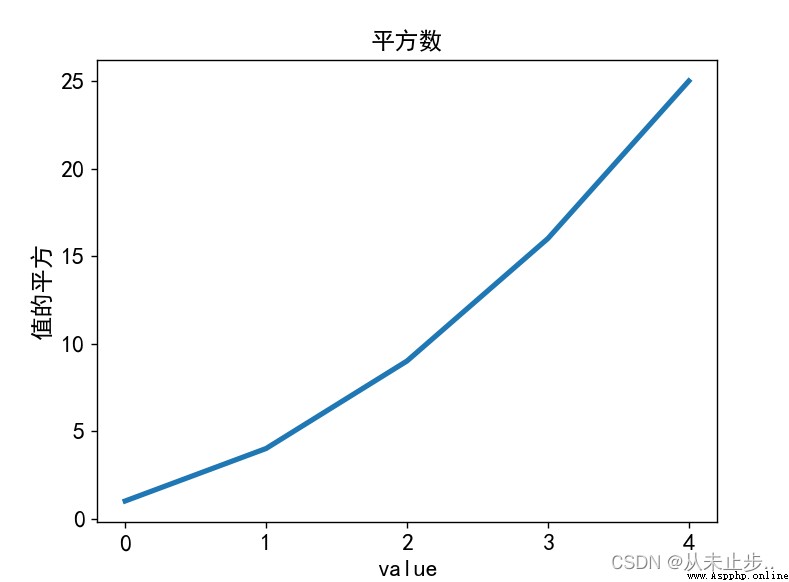
新細明體:PMingLiU
細明體:MingLiU
標楷體:DFKai-SB
黑體:SimHei
宋體:SimSun
新宋體:NSimSun
仿宋:FangSong
楷體:KaiTi
仿宋_GB2312:FangSong_GB2312
楷體_GB2312:KaiTi_GB2312
微軟正黑體:Microsoft JhengHei
微軟雅黑體:Microsoft YaHei
Can choose a suitable font display in Chinese
After image become more clear,Believe that careful friend already see our map data is a problem,Broken line shows4.0The sum of the squares of the unexpectedly as25!
Let's fix this problem,現在我們向plot()Provide a series of number,It assumes that the first data corresponding to thex軸坐標為0,But with the first point herex值為1,為改變這種默認行為,可向plot()At the same time provide input and output values.
import matplotlib.pyplot as plt
plt.rcParams['font.sans-serif']=['SimHei']#Run the configuration parameters of the font(font)為黑體(SimHei)
input_values=[1,2,3,4,5]#Provide the square number corresponding values
squares=[1,4,9,16,25]
fig,ax=plt.subplots()
ax.plot(input_values,squares,linewidth=3)
---snip---
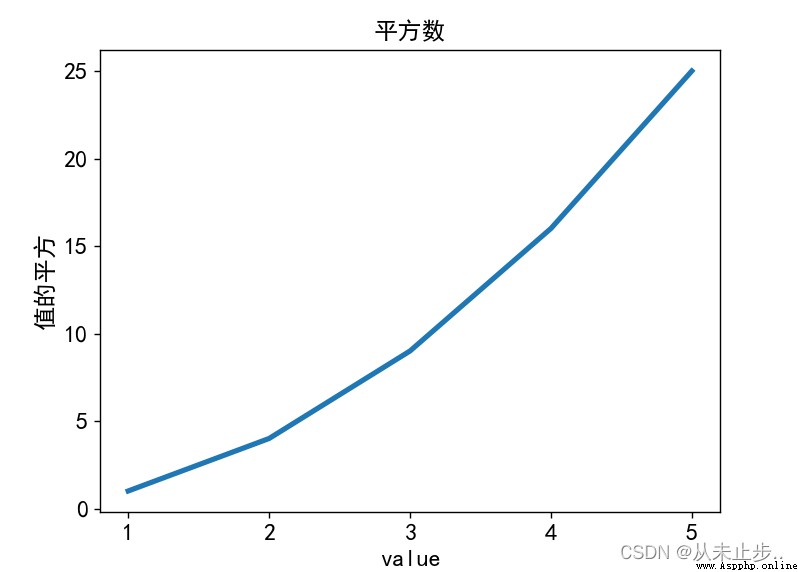
Now draw the chart data presentation is right.
Matplotlib提供了很多已經定義好的樣式,例如:背景色,網格線,線條粗細,字體,Set font size, etc.
舉例:
import matplotlib.pyplot as plt
plt.rcParams['font.sans-serif']=['SimHei']#Run the configuration parameters of the font(font)為黑體(SimHei)
plt.rcParams['axes.facecolor']='yellow'#Set the background color of the chart to yellow
plt.rcParams['figure.facecolor']='green'#Set the background color of the whole picture for the green
---snip---
import matplotlib.pyplot as plt
from matplotlib import style
print(plt.style.available)
['Solarize_Light2', '_classic_test_patch', '_mpl-gallery', '_mpl-gallery-nogrid', 'bmh', 'classic', 'dark_background', 'fast', 'fivethirtyeight', 'ggplot', 'grayscale', 'seaborn', 'seaborn-bright', 'seaborn-colorblind', 'seaborn-dark', 'seaborn-dark-palette', 'seaborn-darkgrid', 'seaborn-deep', 'seaborn-muted', 'seaborn-notebook', 'seaborn-paper', 'seaborn-pastel', 'seaborn-poster', 'seaborn-talk', 'seaborn-ticks', 'seaborn-white', 'seaborn-whitegrid', 'tableau-colorblind10']
For data range under the condition of larger,If we want to realize different data within the scope of use different color,此時就可以使用scatter()To set up a single point,使用方法:
ax.scatter(x坐標,y坐標)
import matplotlib.pyplot as plt
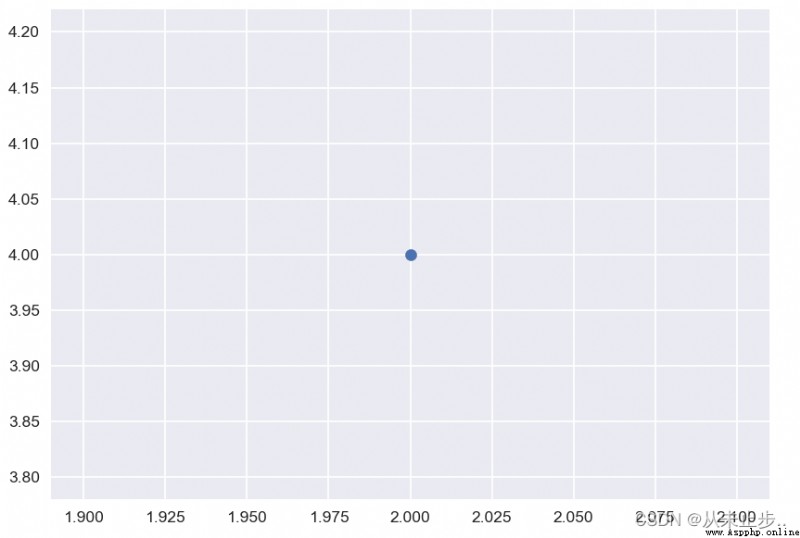
plt.style.use("seaborn")#Choose grid style
fig,ax=plt.subplots()
ax.scatter(2,4)#Draw us specify the point(2,4)
plt.show()
ax.scatter(2,4,s=200)#通過第三個參數s,We can also specify the size of the point
圖示如下: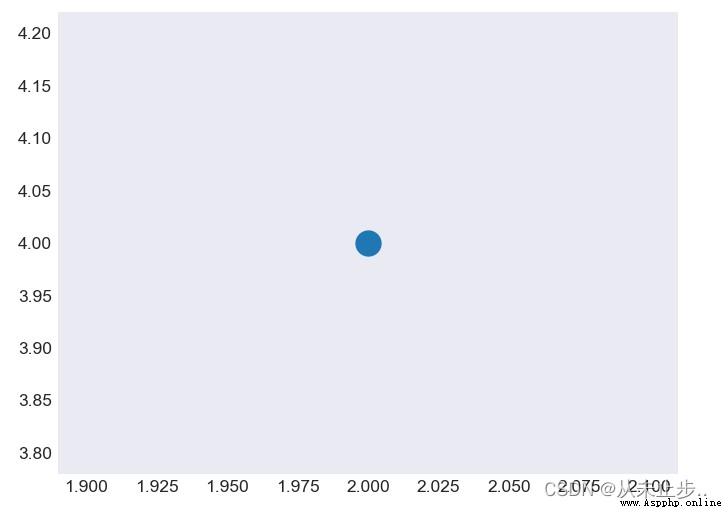
import matplotlib.pyplot as plt
plt.style.use("seaborn-dark")
fig,ax=plt.subplots()
ax.scatter(2,4,s=200)
#axis表示x軸和yShaft set at the same timelabelsize用於設置刻度線標簽的字體大小
ax.tick_params(axis='both',which="major",labelsize=14)#which一共三個參數['major','minor','both']
#默認是majorSaid the main scale,Followed by distribution for time scale and scale are primary and secondary display
plt.show()
圖示如下: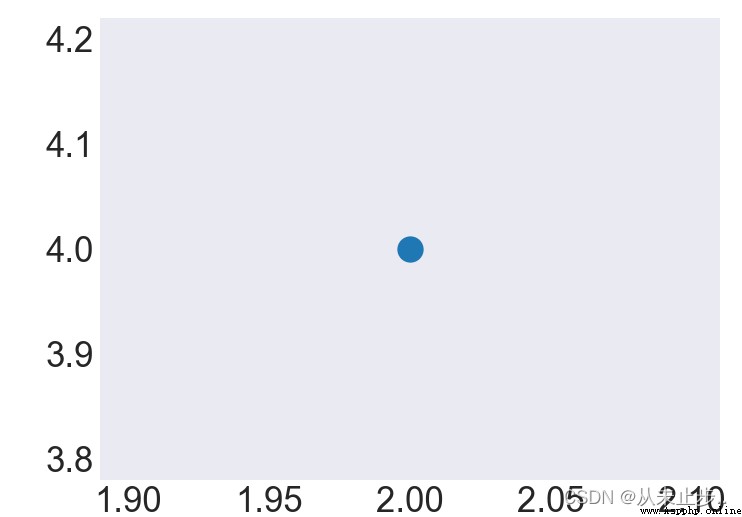
要繪制一系列的點,可向scatter()傳遞兩個分別包含x值和y值的列表,如下圖示:
import matplotlib.pyplot as plt
#To set values through the list stored
x_values=[1,2,3,4,5]
y_values=[1,4,9,16,25]
plt.style.use("seaborn")
fig,ax=plt.subplots()
ax.scatter(x_values,y_values,s=100)#將x_values和y_valuesIncluded in the set point
plt.show()
如圖所示: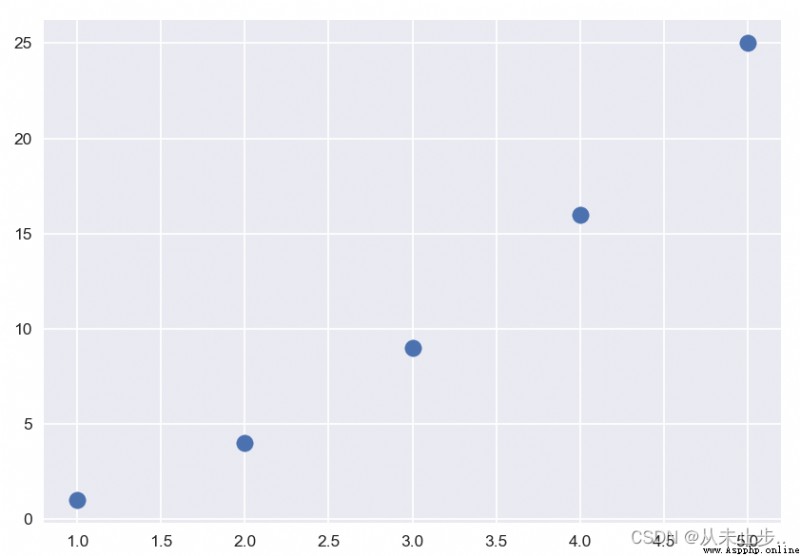
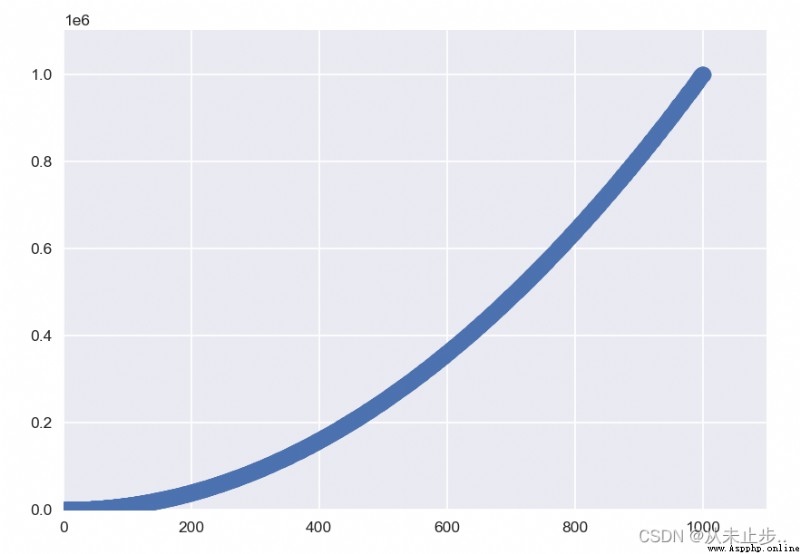
When drawing point a lot,Manual calculation list to include the value of efficiency will be lower,但好在PythonCan through the loop to help us achieve this function.
Below we added data:
import matplotlib.pyplot as plt
x_values=range(1,1001)#Using a loop to determine the abscissa values
y_values=[x**2 for x in x_values]#Ordinate values asx的平方,而x為x_values裡面的值
plt.style.use("seaborn")
fig,ax=plt.subplots()
ax.scatter(x_values,y_values,s=100)
ax.axis([0,1100,0,1100000])#設置每個坐標軸的取值范圍:x的取值范圍:0---1100,y的取值范圍0----1 100 000
plt.show()
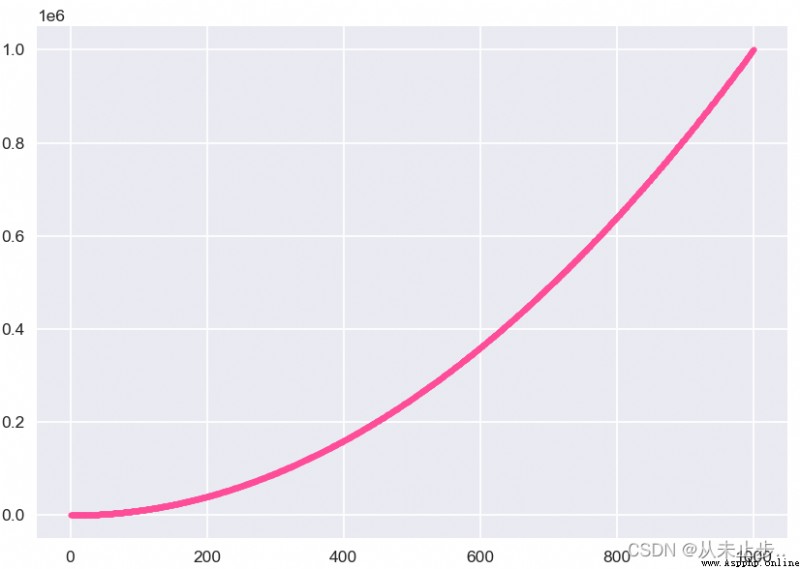
要修改數據點的顏色,可向scatter()傳遞參數c,並將其設置為要使用的顏色的名稱(放在引號內),如下所示:
import matplotlib.pyplot as plt
x_values=range(1,1001)
y_values=[x**2 for x in x_values]
plt.style.use("seaborn")
fig,ax=plt.subplots()
ax.scatter(x_values,y_values,c='yellow',s=10)#c="The color of the need to set up”
plt.show()
 此外,我們還可使用RGB顏色模式自定義顏色,要指定自定義顏色,可傳遞參數c,And set it to a tuple,其中包含三個0-1的數值,分別表示紅色,Green and blue component.
舉例:
ax.scatter(x_values,y_values,c=(1,0.3,0.6),s=10)#通過調整cThe value of the three parameters to adjust the depth of the color,The three parameters respectively red,Green and blue component
#值越接近0,指定的顏色越深,值越接近1,指定的顏色越淺
顏色映射是一系列顏色,從起始顏色漸變到結束顏色,在可視化中,顏色映射用於突出數據的規律,例如,你可以With the shallow value to display the smaller,And the use of deep value shows that the larger the value.
模塊pyplot內置了一組顏色映射,要使用這些顏色映射,需要告訴pyplot該如何設置數據集中每個點的顏色.
舉例:
import matplotlib.pyplot as plt
x_values=range(1,1001)
y_values=[x**2 for x in x_values]
plt.style.use("seaborn")
fig,ax=plt.subplots()
ax.scatter(x_values,y_values,c=y_values,cmap=plt.cm.Reds,s=10)#使用參數cmap告訴pyplotUse the color mapping
#將ySmaller values set to pink,The larger set to red
plt.show()
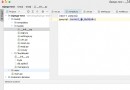
如下圖所示: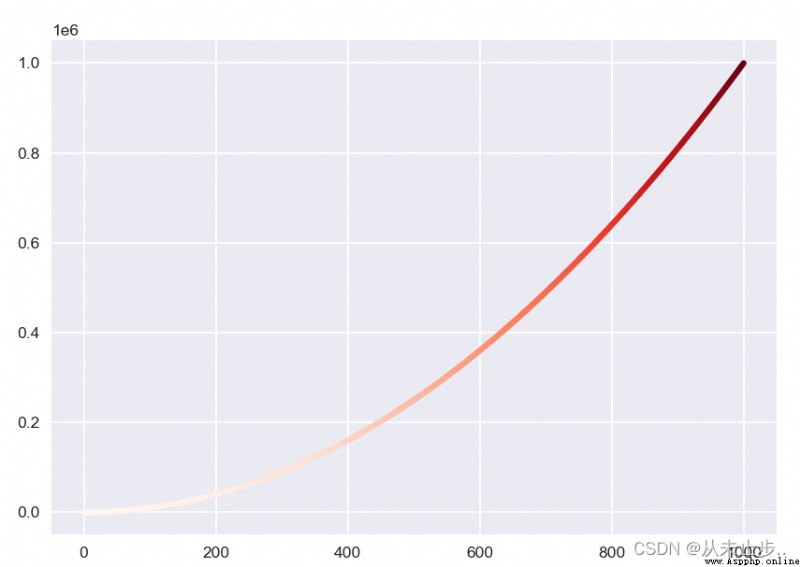 如果你還想了解pyplot中所有的顏色映射,可通過訪問Matplotlib網站主頁,單擊Examples,向下滾動到color,再單擊Colormaps reference
訪問主頁: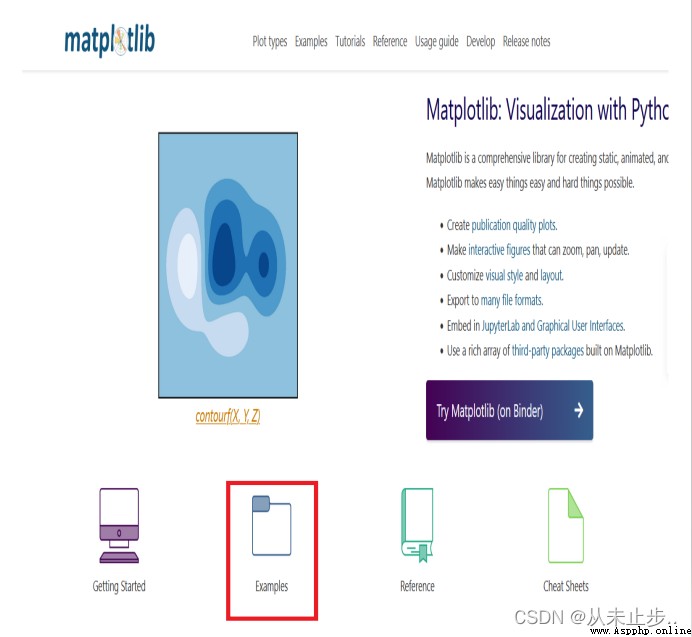 在Examples中找到color,再點擊color reference:
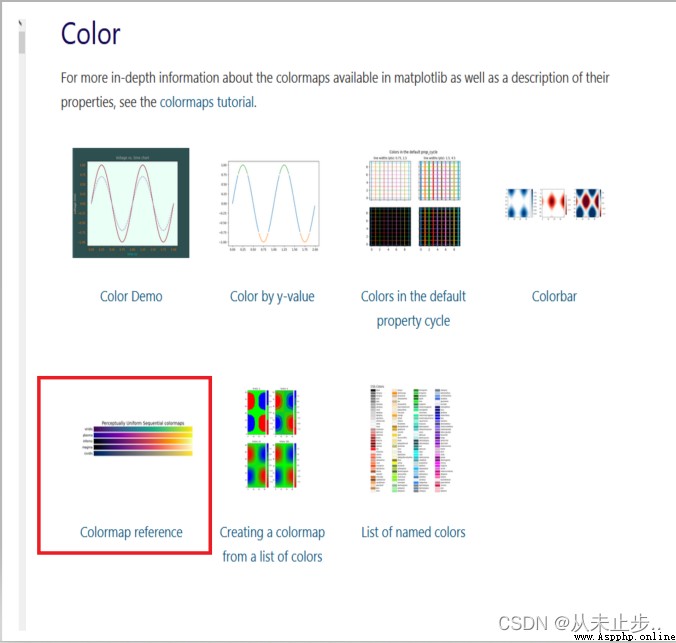 All sorts of color is obvious:
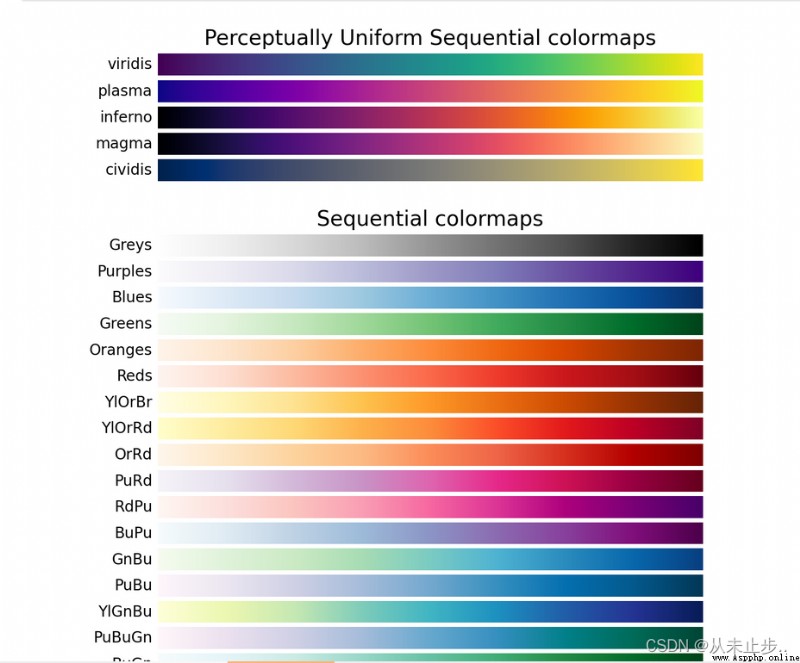
要讓程序自動將圖表保存到文件中,Can be calledplt.savefig():
#第一個參數(squres_plot.png)Specify what file save chart,執行代碼後,The picture will be saved to the project directory
#The second parameter specifies the chart redundant white space cut off,If you want to keep chart redundant white space around,You just need to omit this argument
plt.savefig("squres_plot.png",bbox_inches="tight")
打開改文件,如下圖所示:
Random walk is to get the path to walk:Every time walking are completely random,沒有明確的方向,The result is determined by a series of random decision,You can see random walk as grasshoppers in the case of dizzy,Every time the route along random direction.
那麼它到底有什麼作用呢?
By writing the code we can,Simulation of many real world,比如:Floating on the water droplets of pollen by continuous extrusion by water molecules move above the water,And molecular motion of droplets is random,因此花粉在水面上的運動路徑猶如隨機漫步.
為模擬隨機漫步,將創建一個名為RandomWalk的類,The choice of its random direction,This class has three properties:One is stored the variable is the number of random walk,The other two are list,分別存儲隨機漫步經過的每個點的x坐標和y坐標.
RandomWalkA class contains only two methods:方法__init__()和fill_walk()
舉例:
from random import choice
class RandonWalk:#Random walk data class
def __init__(self,num_points=5000):#初始化隨機漫步的屬性
self.num_points=num_points
#All of the random walk starting from the origin of the coordinate axes
self.x_values=[0]
self.y_values=[0]
使用RandomWalk類的另外一個方法,fill——walk()To determine each time walking in the direction of the.
舉例:
 def fill_walk(self):
#計算隨機漫步包含的所有點:Decisions about the four directions and walking distance
while len(self.x_values,)<self.num_points:#不斷漫步,直到列表達到指定的長度
#決定前進方向以及沿這個方向前進的距離
x_direction=choice([1,-1])
x_distance=choice([0,1,2,3,4])
#如果x_stepIs moving into the right,為負向左移動,Zero vertical movement
x_step=x_direction*x_distance#距離*方向,確定x軸移動的距離
y_direction=choice([1,-1])
y_distance=choice([0,1,2,3,4])
#如果y_step為正向上移動,為負向下移動,為0水平移動
y_step=y_direction*y_distance#同理如上
if x_step==0 and y_step==0:#拒絕原地踏步
continue
#將x_step/y_step與x_values/y_valuesIn the last value addition,計算下一個點的x值和y值
x=self.x_values[-1]+x_step
y=self.y_values[-1]+y_step
self.x_values.append(x)#Will calculate good value added to the list
self.y_values.append(y)
代碼:
#導入pyplot模塊和RandomWalk類
import matplotlib.pyplot as plt
from project1 import RandomWalk
#創建關於RandomWalk的實例,並調用其中的方法
rw=RandomWalk()
rw.fill_walk()
plt.style.use("classic")#Choose a built-in style“classic”
fig,ax=plt.subplots()
ax.scatter(rw.x_values,rw.y_values,s=15,c="green")
plt.show()
Make sure not to use many way to run the program and implement the previous code was used to simulate multiple random walk,One way is to the code in a loop:
操作如下:
 keep_running=input("Make another walk?(y/n):")
if keep_running=='n':
break
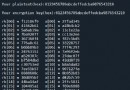
Add the statement later,When on a random walk,In the dialog box will appear:
Make another walk?(y/n):y#輸入y,On a random walk again
Make another walk?(y/n):n#輸入n,Walk the end
Through the above elements of random walk,It is easy to find elements distribution is very messy,This will lead to very troublesome when we on the analysis of the data.
We can be more specific elements for processing,Such as a starting point to walk,The finish and so on.
操作如下:
---snip---
fig,ax=plt.subplots()
point_numbers=range(rw.num_points)
ax.scatter(rw.x_values,rw.y_values,s=15,c=point_numbers,cmap=plt.cm.Blues,edgecolors="none")
#將參數c設置為point_numbers,指定使用顏色映射Blues,Outline and delete
plt.show()
---snip---
如圖所示: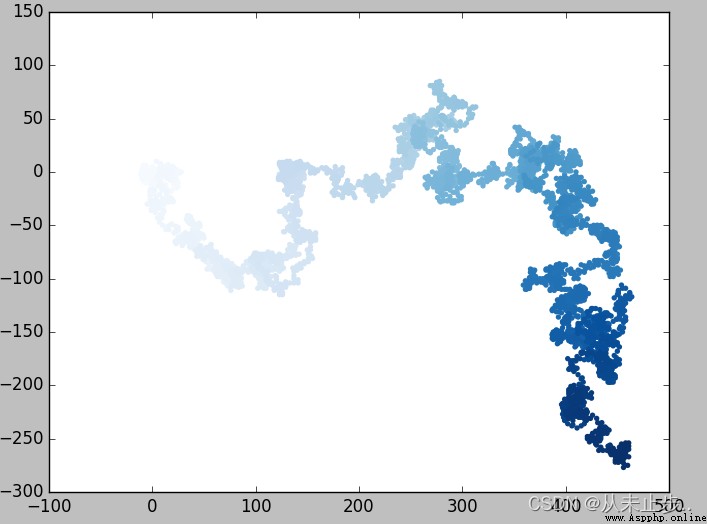
操作如下:
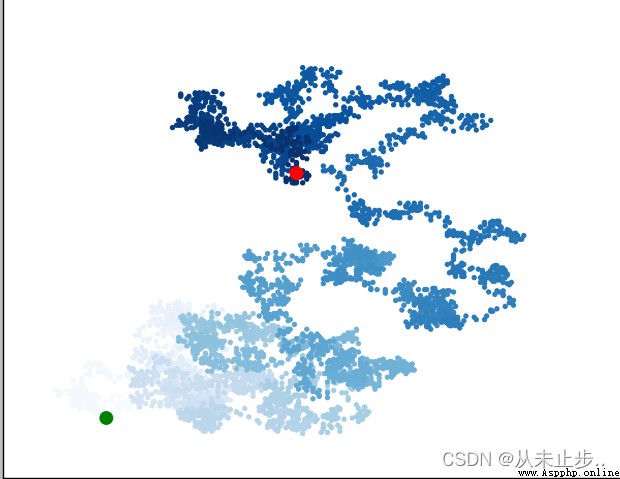
#突出起點和終點,通過使用scatter(),Set a single point
ax.scatter(0,0,c="green",edgecolors="none",s=100)#Set the starting point of value
ax.scatter(rw.x_values[-1],rw.y_values[-1],c='red',edgecolor="none",s=100)#Set the value at the end of
如圖所示: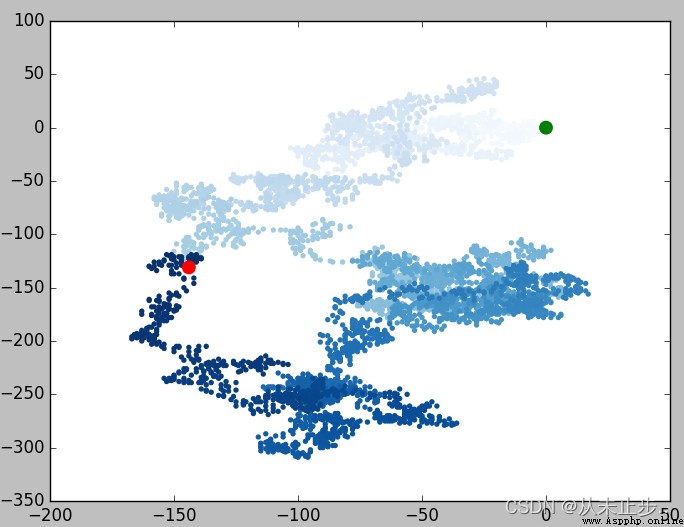
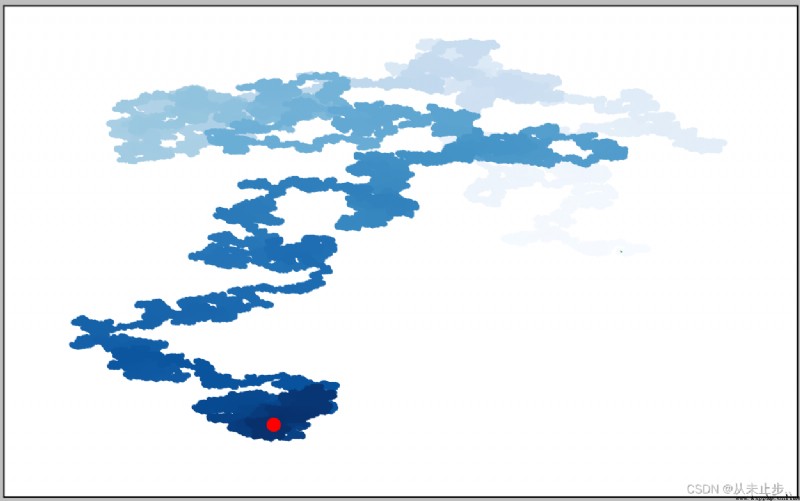
To hide the axis,可使用如下代碼:
#Set the visibility of each axes toFaslse
ax.get_xaxis().set_visible(False)
ax.get_yaxis().set_visible(False)
輸出如圖所示:
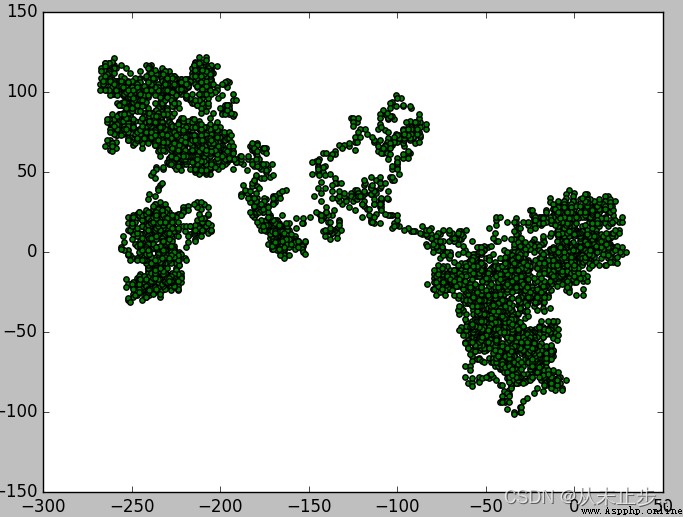
To provide more data,We can increase when creating an instancenum_points的值,And adjust the size of each point when drawing:
import matplotlib.pyplot as plt
from project1 import RandomWalk
while True:
rw=RandomWalk(50_000)#描繪5w個點
rw.fill_walk()
plt.style.use("classic")
fig,ax=plt.subplots()
point_numbers=range(rw.num_points)
ax.scatter(rw.x_values,rw.y_values,s=15,c=point_numbers,cmap=plt.cm.Blues,edgecolors="none")
ax.scatter(0,0,c="green",edgecolors="none",s=1)#Sets the point size to1
---snip---
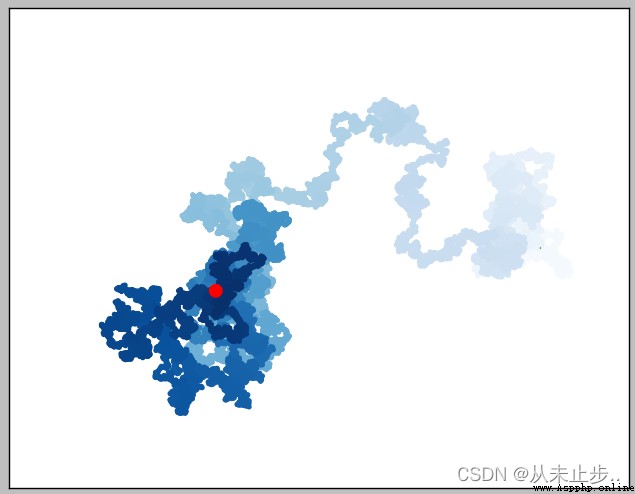
By directly specify the size of the chart,即給figsizeSpecify a tuple,通過參數dpi向plt.subplots()傳遞該分辨率.
舉例:
fig,ax=plt.subplots(figsize=(10,6),dpi=128)
輸出結果如下圖所示: