Many students will use pagoda panels python Project manager deployment django/flask etc. python project . But for the use of python Project manager installed python Where is the , And how to make the installation python It is not clear that it can be applied to the overall system , Today we will talk about the pagoda panel python Use .
step 1: install Python Project management plug in
After this installation is successful , We're on the left ‘ Software store ’ Interior selection ‘ Pagoda plugin ’, find ‘Python project management ’ Install this plug-in .
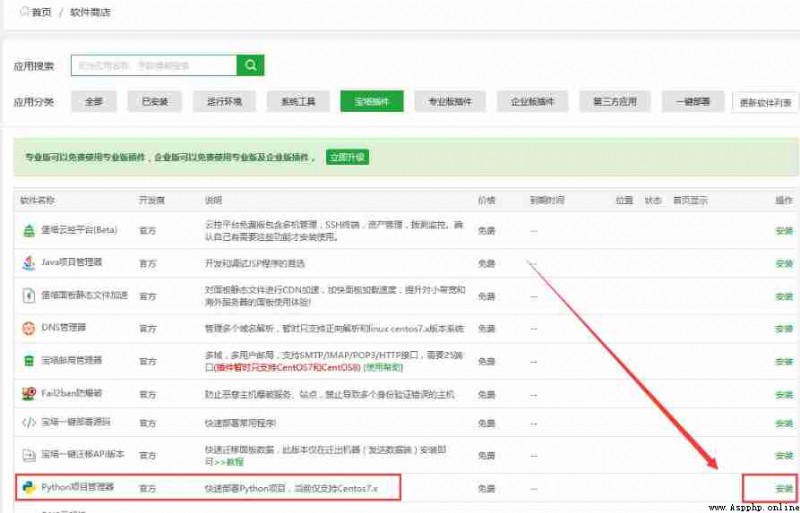
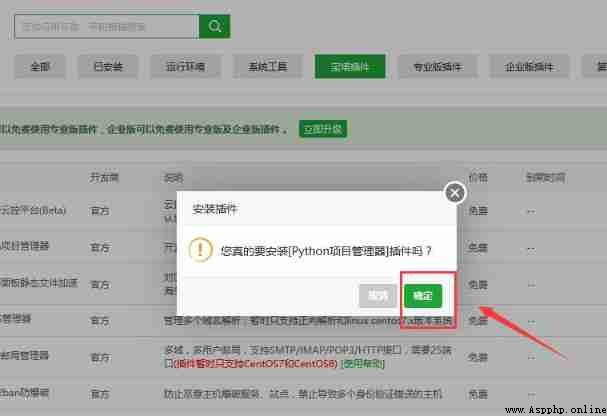
( Be careful : The latest pagoda version has been updated , When installing the project manager, you will be asked to choose the version to install , Recommended election 1.9 Of .)
7、 Required to install the project Python edition .
After successful installation , We click settings .
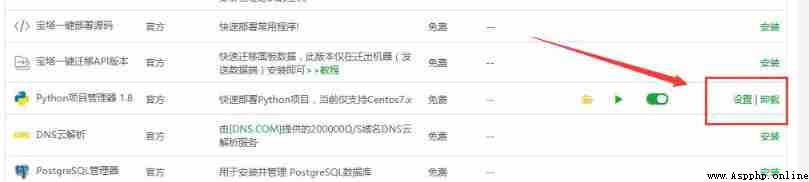
Then the following interface appears :
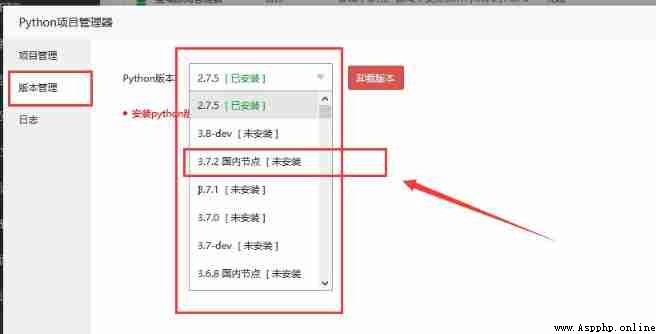
We install what we need in version management Python edition . Here I use 3.7.2 For example , Domestic nodes are selected , The installation of domestic nodes will be faster . It will be installed successfully in a moment .
Use command “ps -aux|grep python” You can find python Relevant document information , Find out python Project manager installed python stay /www/server/panel/pyenv Directory .
[[email protected] ~]# python3
-bash: python3: command not found
[[email protected] ~]# ps -aux|grep python
root 1042 0.0 0.4 573928 19292 ? Ssl 10:36 0:01 /usr/bin/python2 -Es /usr/sbin/tuned -l -P
root 3371 0.0 1.5 510676 63048 ? Sl 10:50 0:17 /www/server/panel/pyenv/bin/python /www/server/panel/BT-Panel
root 3393 0.0 1.1 1050596 47096 ? Sl 10:50 0:03 /www/server/panel/pyenv/bin/python /www/server/panel/BT-Task
root 3604 0.0 0.8 362988 33772 ? Ssl 10:50 0:01 /usr/bin/python2 -Es /usr/sbin/firewalld --nofork --nopid
root 30873 0.1 0.0 0 0 ? Z 15:50 0:00 [python] <defunct>
root 30988 0.0 0.0 112816 976 pts/0 S+ 15:52 0:00 grep --color=auto python


The installed python, But it cannot be used in the system .

How can I use my own installation python Version? ? Of course, add the soft connection command ! The order is as follows :
ln -s /www/server/panel/pyenv/bin/python3.7 /usr/bin/python3
ln -s /www/server/panel/pyenv/bin/pip3 /usr/bin/pip3
After the command is run, you can use python3 and pip3 Call the installed python, As shown in the figure :
The above operation solves python3.7 Call problem of , But the system opens by default python still python2, In this case, if we use virtualenv Virtual environment running python project , Created by default python2 Virtual environment for , This is obviously inconvenient .
# echo $PATH Output current environment variables , Obviously not python3.7
[[email protected] bin]# echo $PATH
/usr/local/sbin:/usr/local/bin:/usr/sbin:/usr/bin:/root/bin
How to configure virtualenv When , Find... First python3.7 The environment is base What about the environment? ? Only need to python3.7 The directory of is placed at the top of the environment variable , because path The path search of has priority !!!
Open the file that configures environment variables /etc/profile, take python3.7 Write path to file /etc/profile in , Run again source /etc/profile # Read this file , Give Way python3 Effective every login will automatically take effect .

[[email protected] bin]# vim /etc/profile
[[email protected] bin]# echo $PATH
/usr/local/sbin:/usr/local/bin:/usr/sbin:/usr/bin:/root/bin
[[email protected] bin]# source /etc/profile
[[email protected] bin]# echo $PATH
/www/server/panel/pyenv/bin/:/usr/local/sbin:/usr/local/bin:/usr/sbin:/usr/bin:/root/bin
[[email protected] bin]#
At this time, it can be used correctly python3 La !
You will find no need to write “python3” and “pip3”, direct writing “python” and “pip” The result is a new installation python.

How to access the original system default python2 Well , Of course, enter the command “python2” La !
virtualenv/virtualenvwrapper Use The installation command is as follows , Can be used after installation pip list Command check for successful installation .
pip install virtualenv
pip install virtualenvwrapper
see virtualenvwrapper Installation position :
[[email protected] bin]# find / -name virtualenvwrapper
/www/server/panel/pyenv/lib/python3.7/site-packages/virtualenvwrapper
If you want the current machine to support virtualenvwrapper, You need to perform virtualenvwrapper.sh Script files , But there's a problem , After restart , After exiting the session , This function fails . How can we ensure that it is always effective ? Certainly : Configure global variables , Every time you log in linux When , Just load this virtualenvwrapper.sh Script files , bring virtualenvwrapper This tool works .
Open the user environment variable configuration file ~/.bashrc, Write the following information ,export It's just reading a paragraph shell Variable command
vim ~/.bashrc # This file represents the user environment variables , Load every time you log in
# Set up virtualenv The unified management catalog pytonEnvs , The generated virtual environment will be in /www/pytonEnvs Under the table of contents
export WORKON_HOME=/www/pytonEnvs
# add to virtualenvwrapper Parameters of , Create a clean and isolated environment , Some versions do not add --no-site-packages Parameters
#export VIRTUALENVWRAPPER_VIRTUALENV_ARGS='--no-site-packages'
export VIRTUALENVWRAPPER_VIRTUALENV_ARGS='' # No parameter
# Appoint python Interpreter ,( This has to be matched according to your own machine environment )
export VIRTUALENVWRAPPER_PYTHON=/www/server/panel/pyenv/bin/python3.7
# Lookup location :find / -name virtualenvwrapper.sh
source /www/server/panel/pyenv/bin/virtualenvwrapper.sh
After completing the configuration information , Read the file , Make effective , Now you can use virtalenvwrapper
source ~/.bashrcafter , You can start using it virtualenvwrapper, Create a virtual environment
[[email protected] www]# mkvirtualenv test1
created virtual environment CPython3.7.9.final.0-64 in 640ms
creator CPython3Posix(dest=/www/pytonEnvs/test1, clear=False, no_vcs_ignore=False,
………………
virtualenvwrapper.user_scripts creating /www/pytonEnvs/test1/bin/postactivate
virtualenvwrapper.user_scripts creating /www/pytonEnvs/test1/bin/get_env_details
(test1) [[email protected] www]# workon
test1
(test1) [[email protected] www]# workon test1
(test1) [[email protected] www]# which python
/www/pytonEnvs/test1/bin/python
(test1) [[email protected] www]# which pip
/www/pytonEnvs/test1/bin/pip
(test1) [[email protected] www]# pip list
Package Version
---------- -------
pip 21.3.1
setuptools 60.2.0
wheel 0.37.1
The installation uses virtualenvwrapper You don't need to install it manually virtualenv 了 , And the command will be much simpler , Common commands are as follows :
mkvirtualenv venv1 # This step creates venv1, And put it in WORKON_HOME Variable definition directory , And automatically activate the virtual environment
lsvirtualenv # View all the virtual environments of the current machine
deactivate # Exit virtual environment
workon venv2 # Used to activate the virtual environment , Also used to switch back and forth in multiple virtual environments ,
rmvirtualenv venv3 # For deleting virtual environments , It will also automatically find all virtual environments
cdvirtualenv # Directory for direct access to the virtual environment , This command needs to activate the virtual environment
cdsitepackages # For direct access to pip3 The contents of the package
.
Last , about virtualenv and virtualenvwrappe For further detailed understanding and use, please refer to :Linux System 05 python Environment configuration 02 And virtualenv And virtualenvwrappe as well as freeze_ A blog of Yue Wangchao -CSDN Blog thinking : In the use of Python In the process of development , After more projects , Will you encounter the following problems : Different projects rely on different versions of the Library , How to make a machine run different at the same time python or django edition ; During the development process, we don't want to fill the physical environment with all kinds of libraries , Cause future dependency disaster . If you want to make the environment of each developer consistent , How to manage simply . here , We need to use different virtual environments for different projects to keep the development environment and host environment clean . here , Be grand ...https://blog.csdn.net/qq_36564503/article/details/104959266