Hello , I'm yuechuang . I was in CSDN Wrote a development Python Library Tutorial , Someone added some questions I asked , Let me update this article :https://blog.csdn.net/qq_33254766/article/details/119874997
The new version of the article is launched :https://bornforthis.cn/posts/18.html

Hello , I'm yuechuang .
Hello, I’m Yue Chuang.
I want to start developing recently Python Third party Library , But I found that there are too few such tutorials in China , So let me write it !
I recently wanted to start developing Python third-party libraries, but found that there are too few such tutorials in the country, so I will write them instead!
There was also a time when I wanted to create Python library , Whether it's for your team or some open source projects online ? In this blog , You will learn how to operate !
Ever wanted to create a Python library, albeit for your team at work or for some open source project online? In this blog you will learn how to!
When you use the same development tools Pycharm , You will be the easiest to follow my tutorial , Of course, you can also use different tools .
The tutorial is easiest to follow when you are using the same tools, however it is also possible for you to use different ones.
The tools used in this article are :
The tools used in this tutorial are:
Open a command prompt and create a folder , Where you will create Python library .
Open your command prompt and create a folder in which you will create your Python library.
please remember :
Remember:
pwd You can see your current working directory . 「With pwd you can see your present working directory.」
ls You can list folders and files in the current directory . 「With ls you can list the folders and files in your directory.」
cd <path> You can change the current directory . 「With cd <path> you can change the current present directory you are in.」
mkdir <folder> You can create a new folder in the current working directory . 「With mkdir <folder> you can create a new folder in your working directory.」
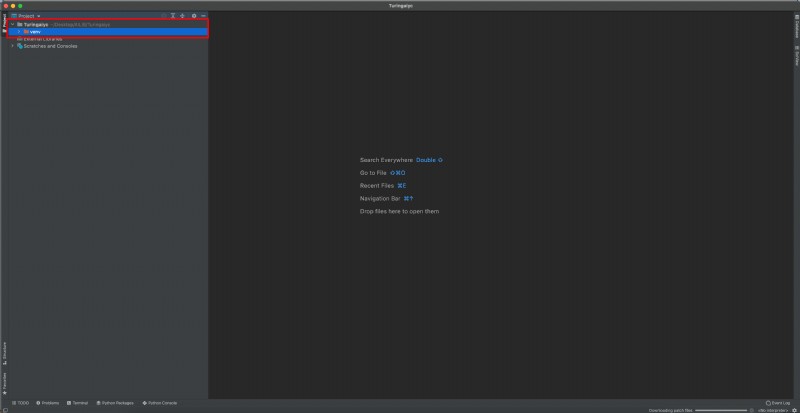
I created a folder named :Turingaiyc, This name is also the name of the library I will publish later , Be careful not to be too common because it will repeat , Repetition will lead to Failed to publish Library .
I created a folder called Turingaiyc, which is actually the name of the library I will publish later. Be careful not to make it too common because it will be repetitive, which will cause the library to fail.
「PS: If you Win System words , You can use the following command , If it is MacOS I actually prefer command line creation .」
I created a folder called Turingaiyc, which is actually the name of the library I will publish later. Be careful not to make it too common because it will be repetitive, which will cause the library to fail.
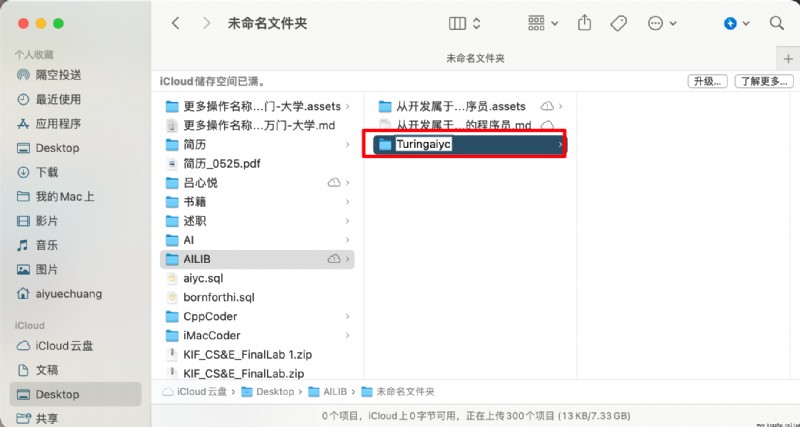
As far as I'm concerned , The folder I will use is Turingaiyc. Change the current working directory to your folder .
In my case, the folder I will be working with is
Turingaiyc. Change the present working directory to be your folder.
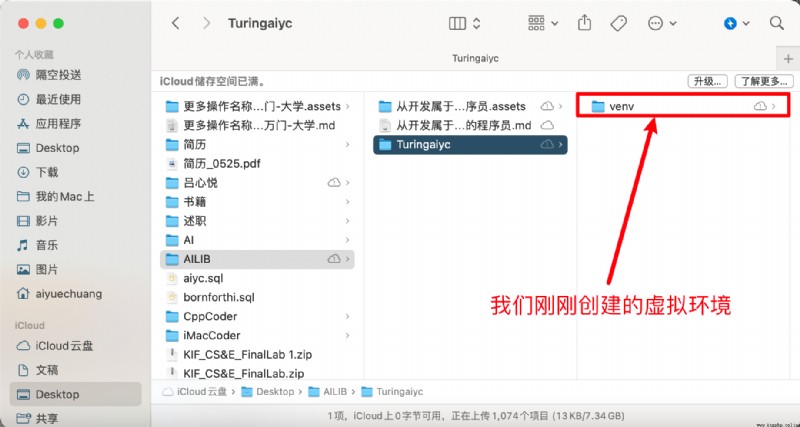
When starting your project , It is always a good idea to create a virtual environment to encapsulate your project . The virtual environment consists of a Python Version and some libraries .
When starting your project, it is always a good idea to create a virtual environment to encapsulate your project. A virtual environment consists of a certain Python version and some libraries.
Reference resources : So complete Python A virtual environment ? It's a pity not to see !
Reference: Such a full Python virtual environment? What a pity!
Virtual environments prevent future dependency problems . for example , In older projects , You may be using an older version of numpy library . Some old code that has worked well may be updated before you numpy The version will not work properly . Creating a virtual environment can prevent this , When you collaborate with others , Virtual environments also ensure that your programs work on other people's computers . vice versa .
Virtual environments prevent the issue of running into dependency issues later on. For example, in older projects you might have worked with older versions of the
numpylibrary. Some old code, that once worked beautifully, might stop working once you update its version. Perhaps parts ofnumpyare no longer compatible with other parts of your program. Creating virtual environments prevents this. They are also useful in cases when you are collaborating with someone else, and you want to make sure that your application is working on their computer, and vice versa.
Next , Make sure that your current working directory is the one you just created ,( cd <path/to/folder> ) Created in Python Library folder .)
(Make sure you changed the present working directory to the folder you are going to create your Python library in (
cd <path/to/folder>).)
Continue and create the virtual environment by typing :
Go ahead and create a virtual environment by typing:
python3 -m venv venv

[ Failed to transfer the external chain picture , The origin station may have anti-theft chain mechanism , It is suggested to save the pictures and upload them directly (img-yy0tslPL-1656388442132)(./18.assets/image-20220617224826141.png)]
After creation , You must now activate the environment using the following command :
Once it is created, you must now activate the environment by using:
source venv/bin/activate

Activating the virtual environment will modify PATH and shell The variable of , To point to the specific virtual environment you created Python Set up .PATH yes MacOS/Linux And other classes Unix Environment variables in the operating system , It tells shell In response to a command from a user , Which directories to search Python execution environment ( That is, the program ready to run ). The command prompt will change to by adding ( yourenvname) To indicate your current virtual environment .
Activating a virtual environment modifies the PATH and shell variables to point to the specific isolated Python set-up you created. PATH is an environmental variable in Linux and other Unix-like operating systems that tells the shell which directories to search for executable files (i.e., ready-to-run programs) in response to commands issued by a user. The command prompt will change to indicate which virtual environment you are currently in by prepending (
yourenvname).
You need to make sure that your environment has been installed pip、wheel、setuptools、twine. We will need them later to build our Python library .
In your environment, make sure you have pip installed
wheel,setuptoolsandtwine. We will need them for later to build our Python library.
pip install wheel
pip install setuptools
pip install twine
Or it can be realized with one life :
Or it can be done with one life:
sudo pip install wheel setuptools twine
I use it MacOS therefore ,Windows Words , Get rid of sudo.
I’m using MacOS so for Windows, get rid of Sudo.
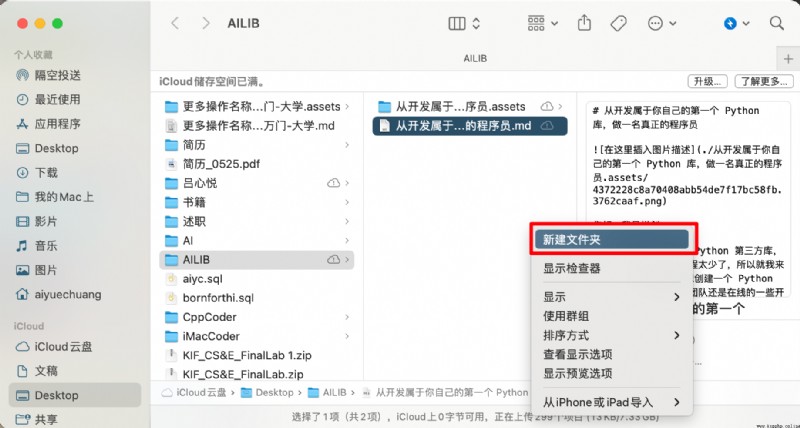
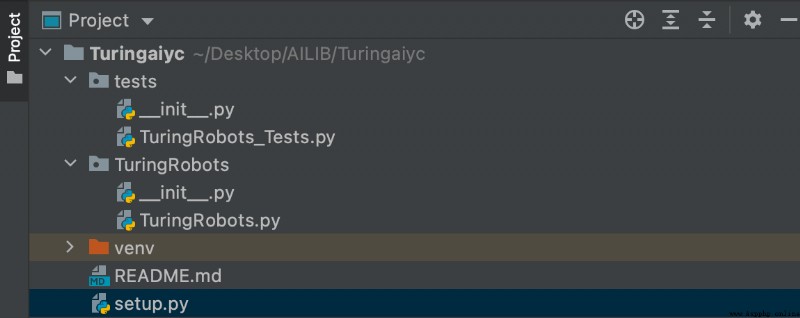
This step , That is, the files needed to create our development library . stay Pycharm in , Open your folder mypythonlibrary( Or you create your own folder name ). It should be like this :
In Pycharm, open your folder mypythonlibrary (or any name you have given your folder). It should look something like this:
You can now start adding folders and files to the project . You can use the command prompt or at Pycharm Do this in itself .
You now can start adding folders and files to your project. You can do this either through the command prompt or in Pycharm itself.
setup.py Empty file , This is the creation of Python Library is one of the most important files !「Create an empty file called setup.py. This is one of the most important files when creating a Python library!」README.md Empty file , You can write... Here Markdown To describe our library content to other users .「Create an empty file called README.md. This is the place where you can write markdown to describe the contents of your library for other users.」TuringRobots , Or whatever you want in pip Call... During installation Python Library folder .( If you want to post it later , The name in pip It's supposed to be the only one .)「Create a folder called TuringRobots, or whatever you want your Python library to be called when you pip install it. (The name should be unique on pip if you want to publish it later.)」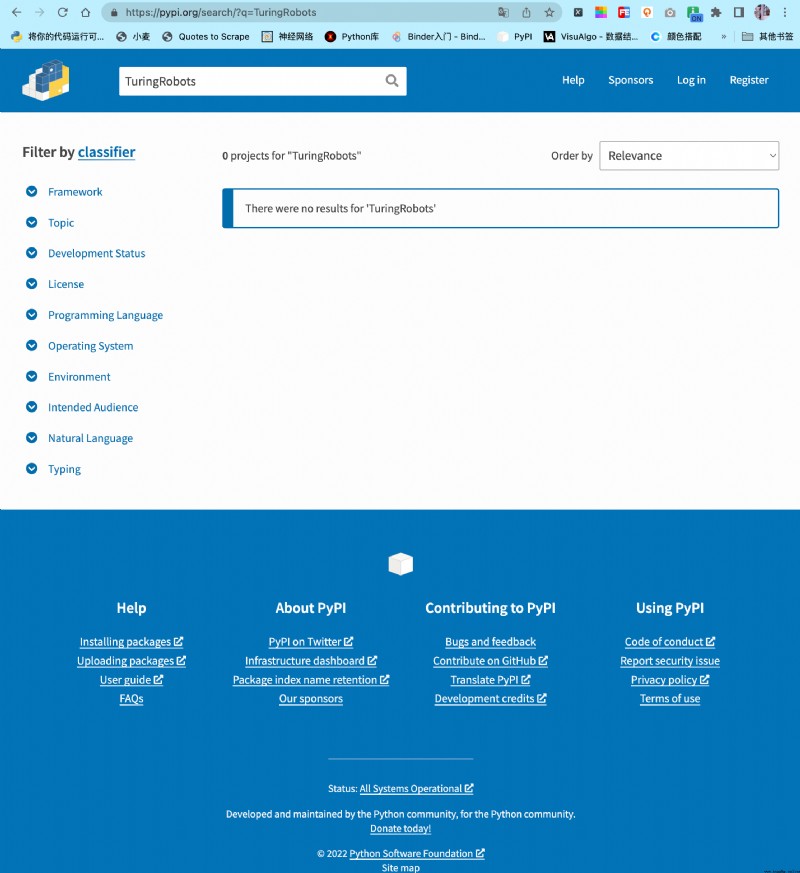
TuringRobots In the folder , Create a __init__.py Empty file . Basically , Any containing files __init__.py Folder , When we build it , Will be included in the library . Most of the time , You can use __init__.py Leave the file blank , That is, you don't have to write code . At the time of import , Among them __init__.py The code inside will be executed , So it should contain only the minimum amount of code needed to run the project . Now? , We keep it as it is .「Create an empty file inside mypythonlib that is called __init__.py. Basically, any folder that has an __init__.py file in it, will be included in the library when we build it. Most of the time, you can leave the __init__.py files empty. Upon import, the code within __init__.py gets executed, so it should contain only the minimal amount of code that is needed to be able to run your project. For now, we will leave them as is.」TuringRobots In the folder , Create a file called TuringRobots.py 「Also, in the same folder, create a file called TuringRobots.py.」__init__.py File and an empty test_myfunctions.py 「And, finally, create a folder tests in your root folder. Inside, create an empty __init__.py file and an empty test_myfunctions.py.」The folders and code files you created , Now it should look like this :
Your set-up should now look something like this:
To put a function into a library , You can put them in TuringRobots.py In file . for example , Copy files TuringRobots function :
To put functions inside your library, you can place them in the
TuringRobots.pyfile. For example, copy the TuringRobots function in your file:
# -*- coding: utf-8 -*-
# @Time : 2022/6/18 11:34
# @Author : AI Yuechuang
# @FileName: TuringRobots.py
# @Software: PyCharm
# @Blog :https://bornforthis.cn/
import json
import urllib.request
import os
from dotenv import load_dotenv
def TuringRobots(text, over_print=True):
load_dotenv()
api_url = "http://openapi.tuling123.com/openapi/api/v2"
req = {
"reqType": 0,
"perception":
{
"inputText":
{
"text": text
},
"selfInfo":
{
"location":
{
"city": " Xiamen ",
"province": " Xiamen ",
"street": " Haicang District "
}
}
},
"userInfo":
{
"apiKey": os.getenv("API_KEY"),
"userId": "OnlyUseAlphabet"
}
}
# print(req)
# Put the dictionary in req Encoded as utf8
req = json.dumps(req).encode('utf8')
# print(req)
http_post = urllib.request.Request(api_url, data=req, headers={
'content-type': 'application/json'})
response = urllib.request.urlopen(http_post)
response_str = response.read().decode('utf8')
# print(response_str)
response_dic = json.loads(response_str)
# print(response_dic)
intent_code = response_dic['intent']['code']
results_text = response_dic['results'][0]['values']['text']
if over_print:
print('Turing Answer :')
print('code:' + str(intent_code))
print('text:' + results_text)
else:
return (str(intent_code), results_text)
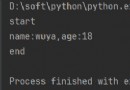
if __name__ == '__main__':
text = input(" Please enter your conversation :")
code, content = TuringRobots(text, over_print=False)
print(code, content)
The above implements a simple robot dialogue , about Python test , have access to pytest and pytest-runner library . Install libraries in a virtual environment :
A simple robot dialogue is implemented above, For testing with Python you can use the libraries
pytestandpytest-runner. Install the library in your virtual environment:
pip install pytest
pip install pytest-runner
pip install python-dotenv
Let's create a small test for the project , Test the following :
Let’s create a small test for the project that looks like this:
TuringRobots_Tests.py
from TuringRobots import TuringRobots
def test_TuringRobots():
assert TuringRobots.TuringRobots(" I'm a genius , How about you ?", over_print=True)
Last , Let's create a setup.py file , It will help us build libraries .setup.py The contents of are as follows :
Finally, let’s create a
setup.pyfile, that will help us to build the library. A limited version ofsetup.pywill look something like this:
from setuptools import find_packages, setup
setup(
name='mypythonlib',
packages=find_packages(),
version='0.1.0',
description='My first Python library',
author='Me',
license='MIT',
)
My settings :【 Just look at the simple configuration 】
# -*- coding: utf-8 -*-
# !/usr/bin/env python
# @Time : 2022/6/18 11:51
# @Author : AI Yuechuang
# @FileName: setup.py
# @Software: PyCharm
# @Blog :https://bornforthis.cn/
# Note: To use the 'upload' functionality of this file, you must:
# $ pipenv install twine --dev
import io
import os
import sys
from shutil import rmtree
from setuptools import find_packages, setup, Command
# Package meta-data.
NAME = 'TuringRobots'
DESCRIPTION = 'Simple dialogue test Turing robot.'
URL = 'https://github.com/AndersonHJB/TuringRobots'
EMAIL = '[email protected]'
AUTHOR = 'Bornforthis'
REQUIRES_PYTHON = '>=3.6.0'
VERSION = '1.2.5'
# What packages are required for this module to be executed?
REQUIRED = [
# 'dotenv==0.0.5',
]
# What packages are optional?
EXTRAS = {

# 'fancy feature': ['django'],
}
# The rest you shouldn't have to touch too much :)
# ------------------------------------------------
# Except, perhaps the License and Trove Classifiers!
# If you do change the License, remember to change the Trove Classifier for that!
here = os.path.abspath(os.path.dirname(__file__))
# Import the README and use it as the long-description.
# Note: this will only work if 'README.md' is present in your MANIFEST.in file!
try:
with io.open(os.path.join(here, 'README.md'), encoding='utf-8') as f:
long_description = '\n' + f.read()
except FileNotFoundError:
long_description = DESCRIPTION
# Load the package's __version__.py module as a dictionary.
about = {
}
if not VERSION:
project_slug = NAME.lower().replace("-", "_").replace(" ", "_")
with open(os.path.join(here, project_slug, '__version__.py')) as f:
exec(f.read(), about)
else:
about['__version__'] = VERSION
class UploadCommand(Command):
"""Support setup.py upload."""
description = 'Build and publish the package.'
user_options = []
@staticmethod
def status(s):
"""Prints things in bold."""
print('\033[1m{0}\033[0m'.format(s))
def initialize_options(self):
pass
def finalize_options(self):
pass
def run(self):
try:
self.status('Removing previous builds…')
rmtree(os.path.join(here, 'dist'))
except OSError:
pass
self.status('Building Source and Wheel (universal) distribution…')
os.system('python3 -m build')
# os.system('{0} setup.py sdist bdist_wheel --universal'.format(sys.executable))
# os.system('{0} setup.py sdist build --universal'.format(sys.executable))
# os.system('{0} setup.py sdist build --universal'.format(sys.executable))
self.status('Uploading the package to PyPI via Twine…')
os.system('twine upload dist/*')
self.status('Pushing git tags…')
os.system('git tag v{0}'.format(about['__version__']))
os.system('git push --tags')
sys.exit()
# Where the magic happens:
setup(
name=NAME,
version=about['__version__'],
description=DESCRIPTION,
long_description=long_description,
long_description_content_type='text/markdown',
author=AUTHOR,
author_email=EMAIL,
python_requires=REQUIRES_PYTHON,
url=URL,
# packages=find_packages(exclude=["tests", "*.tests", "*.tests.*", "tests.*"]),
# packages=find_packages(exclude=["TuringRobots", ]),
packages=find_packages(include=["TuringRobots",]),
# If your package is a single module, use this instead of 'packages':
# py_modules=['mypackage'],
# entry_points={

# 'console_scripts': ['mycli=mymodule:cli'],
# },
install_requires=REQUIRED,
# setup_requires=['pytest-runner'],
# tests_require=['pytest'],
# tests_require=['pytest', 'dotenv'],
test_suite='tests',
extras_require=EXTRAS,
include_package_data=True,
license='MIT',
classifiers=[
# Trove classifiers
# Full list: https://pypi.python.org/pypi?%3Aaction=list_classifiers
'License :: OSI Approved :: MIT License',
'Programming Language :: Python',
'Programming Language :: Python :: 3',
'Programming Language :: Python :: 3.6',
'Programming Language :: Python :: Implementation :: CPython',
'Programming Language :: Python :: Implementation :: PyPy'
],
# $ setup.py publish support.
cmdclass={

'upload': UploadCommand,
},
)
setup Medium name The variable holds whatever name you want the package round file to have . For convenience , We named it the same name as the folder .
The name variable in setup holds whatever name you want your package wheel file to have. To make it easy, we will gave it the same name as the folder.
Although in principle find_packages() Can be used without any parameters , But this can lead to the inclusion of unwanted packages . therefore , We can write like this :
for example , If you are in tests/ The catalog contains __init__.py , That's what happens . in addition , You can also use the exclude Parameters explicitly prevent the inclusion of tests in the package , But this is slightly less robust . Let's change it to the following :
from setuptools import find_packages, setup
setup(
name='mypythonlib',
packages=find_packages(include=['mypythonlib']),
version='0.1.0',
description='My first Python library',
author='Me',
license'MIT',
)
Be careful , When your project is installed as a dependency by someone else ,pip Can't use requirements.yml/ requirements.txt. Usually , So , You must be in setup.py Of documents install_requires and tests_require Specify the dependency in the parameter .
Note that pip does not use
requirements.yml/requirements.txtwhen your project is installed as a dependency by others. Generally, for that, you will have to specify dependencies in theinstall_requiresandtests_requirearguments in yoursetup.pyfile.
Install_requires It should be limited to the absolutely necessary list of packages . This is because you don't want users to install unnecessary packages . Attention, please. , You don't need to list criteria Python Library package .
Install_requiresshould be limited to the list of packages that are absolutely needed. This is because you do not want to make users install unnecessary packages. Also note that you do not need to list packages that are part of the standard Python library.
If you're using a Python A library of its own , There is no need to write , And ensure that the library is up to now Python This version can be used . Maybe you remember us pytest 、numpy This library has been installed before . Of course , You don't want to add pytest Dependencies . Users of this package do not need it . To install it automatically only when you run the test , You can add the following to your setup.py:
from setuptools import find_packages, setup
setup(
name='mypythonlib',
packages=find_packages(include=['mypythonlib']),
version='0.1.0',
description='My first Python library',
author='Me',
license='MIT',
install_requires=[],
setup_requires=['pytest-runner'],
tests_require=['pytest==4.4.1'],
test_suite='tests',
)
function : Store the execution in “tests” All tests in the folder .
python setup.py pytest
Running:
> python setup.py pytest
will execute all tests stored in the ‘tests’ folder.
Here is a simple code test output :
(venv) [email protected]:~/Linux_Code/mypythonlibrary$ python setup.py pytest
running pytest
running egg_info
creating mypythonlib.egg-info
writing mypythonlib.egg-info/PKG-INFO
writing dependency_links to mypythonlib.egg-info/dependency_links.txt
writing requirements to mypythonlib.egg-info/requires.txt
writing top-level names to mypythonlib.egg-info/top_level.txt
writing manifest file 'mypythonlib.egg-info/SOURCES.txt'
reading manifest file 'mypythonlib.egg-info/SOURCES.txt'
writing manifest file 'mypythonlib.egg-info/SOURCES.txt'
running build_ext
================================================================ test session starts =================================================================
platform linux -- Python 3.8.10, pytest-6.2.4, py-1.10.0, pluggy-0.13.1
rootdir: /home/aiyc/Linux_Code/mypythonlibrary
collected 1 item
tests/test_myfunctions.py .
Now everything is ready , We are going to build our library . Make sure your current working directory is /path/to/mypythonlibrary( So it is the root folder of the project ). At your command prompt , function :
Now that all the content is there, we want to build our library. Make sure your present working directory is
/path/to/mypythonlibrary(so the root folder of your project). In your command prompt, run:
python setup.py bdist_wheel
Your round file is stored in the now created “dist” In the folder . You can install your libraries using the following methods :
Your wheel file is stored in the “dist” folder that is now created. You can install your library by using:
pip install /path/to/wheelfile.whl
Please note that , You can also publish your libraries to the internal file system on your workplace intranet , Or publish to the official PyPI Repository and install it from there . install Python Behind the library , You can import it using the following command :
Note that you could also publish your library to an internal file system on intranet at your workplace, or to the official PyPI repository and install it from there.Once you have installed your Python library, you can import it using:
import mypythonlib
from mypythonlib import myfunctions
I use the following official build myself :
python3 -m pip install --upgrade build
python3 -m build
# Test code
python setup.py pytest
# Submission code
python setup.py upload
Welcome to my official account :AI Yuechuang , There are more and more fun waiting for you to find !
::: details official account :AI Yuechuang 【 QR code 】
::: info AI Yuechuang · Programming one-to-one
AI Yuechuang · Launch the tutorial class , Include 「Python Language tutoring class 、C++ The tutorial class 、java The tutorial class 、 Algorithm / Data structure tutorial class 、 Children programming 、pygame Game development 」, It's all one-on-one teaching : One on one coaching + One on one + Homework assignment + Project practice, etc . Of course , Also take photography courses offline 、Photoshop、Premiere One on one teaching 、QQ、 Wechat Online , Be ready to respond ! WeChat :Jiabcdefh
C++ Information Olympiad solution , Long term renewal ! Long term recruitment of one-to-one primary and secondary school information Olympiad training , Putian 、 Xiamen has the opportunity to visit offline , Other regional online . WeChat :Jiabcdefh
Method 1 :QQ
Method 2 : WeChat :Jiabcdefh