The first 8 Chapter Radio button controls (Radiobutton)
Radiobutton, It can be called a radio button , Wireless button or tick button . The function of the radio button is to select one from many , Select one of the options to be selected . The prompt information of radio button can be text or image , The appearance of radio buttons also comes in many styles . In order to handle radio buttons more flexibly , You can also bind a callback function , Used to deal with complex situations . When the radio button is clicked , The system will call this function automatically .
Only one font can be used for the text of radio buttons . If the prompt text message is too long , Can be displayed in line break . You can also underline one of these characters , Used to indicate shortcut keys . By default , have access to Tab Key to move the focus to the radio button control .
Each group of radio buttons can only be associated with the same variable . Each option represents one of the possible values of this variable . These values cannot be repeated , Repeated radio buttons don't make any sense .
8.1 Radio button control properties
import tkinter as tk
root=tk.Tk()
root.geometry('300x240')
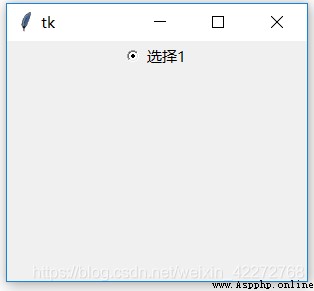
b1 = tk.Radiobutton(root,text=' choice 1',activebackground='red',activeforeground='yellow')
b1.pack()
root.mainloop()
result :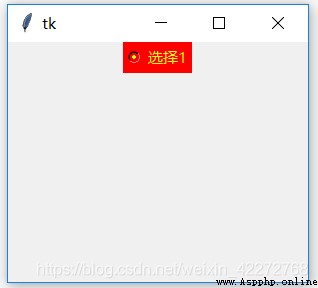
8.1.2 anchor
Set how to display text or image prompt information . The options are :N, NE, E, SE, S, SW, W, NW, CENTER. If you use a string to assign values directly , Lowercase letters are required . such as anchor=’ne’.
anchor Property if it is to work , In the use of pack Layout manager , Need to set up expand=True as well as fill=X、fill=Y perhaps fill=BOTH. otherwise anchor It probably won't work .
If you use grid Layout manager , Need to set up rowconfigure and columnconfigure, Simultaneous setting sticky=’nsew’. See code description for details .
pack Layout management code :
import tkinter as tk
root=tk.Tk()
root.geometry('300x240')
b1 = tk.Radiobutton(root,text=' choice 1',anchor=tk.S+tk.W)
b1.pack(fill=tk.BOTH,expand=True)
root.mainloop()
result :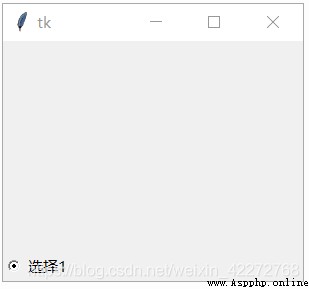
explain :fill=tk.BOTH and expand=True The function of is to make the child control can fill the whole window .
grid Layout management code :
import tkinter as tk
root=tk.Tk()
root.geometry('300x240')
root.rowconfigure(0, weight=1)
root.columnconfigure(0, weight=1)
b1 = tk.Radiobutton(root,text=' choice 1',anchor=tk.S+tk.W)
b1.grid(row=0,column=0,sticky='nsew')
root.mainloop()
result :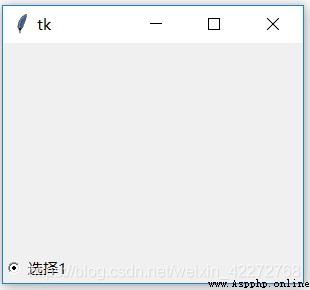
explain :root.rowconfigure(0, weight=1) and root.columnconfigure(0, weight=1) Is to let cells fill the entire window .b1.grid(row=0,column=0,sticky=‘nsew’) Is to have the cell in the lower left corner . What actually works is sticky, instead of anchor.
tkinter Provides a variety of alignments , Some require composition to enable the control to appear at the specified position . This is a tkinter One of the weaknesses of , Another weakness is that the speed is a little slow .
8.1.3 background(bg)
background Set the background color of the radio button .bg Is an abbreviation .
import tkinter as tk
root=tk.Tk()
root.geometry('300x240')
color=tk.IntVar()
b1 = tk.Radiobutton(root,text=' Red ',bg='red',
variable=color,value=0)
b1.pack()
b2 = tk.Radiobutton(root,text=' Blue ',bg='blue',
variable=color,value=1)
b2.pack()
b3 = tk.Radiobutton(root,text=' green ',bg='green',
variable=color,value=2)
b3.pack()
root.mainloop()
result :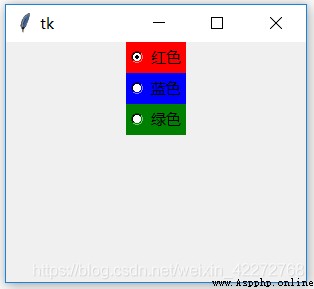
8.1.4 foreground(fg)
Set the color of the radio button text .fg Is an abbreviation .
import tkinter as tk
root=tk.Tk()
root.geometry('300x240')
color=tk.IntVar()
b1 = tk.Radiobutton(root,text=' Red ',fg='red',
variable=color,value=0)
b1.pack()
b2 = tk.Radiobutton(root,text=' Blue ',fg='blue',
variable=color,value=1)
b2.pack()
b3 = tk.Radiobutton(root,text=' green ',fg='green',
variable=color,value=2)
b3.pack()
root.mainloop()
result :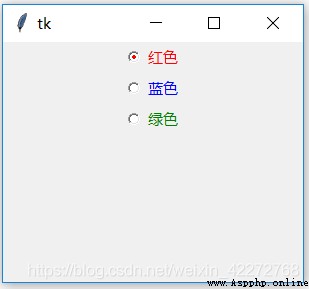
8.1.5 font
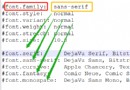
Set the font of the text . The setting method is the same as that in the previous chapter , Only one font can be set . For details, see 3.3.3 section
import tkinter as tk
root=tk.Tk()
root.geometry('300x240')
color=tk.IntVar()
b1 = tk.Radiobutton(root,text=' Red ',fg='red',
font=('times',20,'bold'))
b1.pack()
root.mainloop()
result :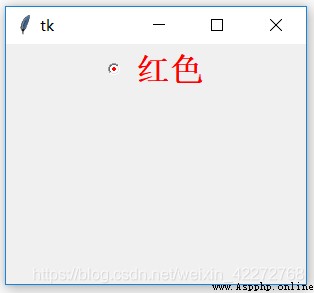
8.1.6 bitmap
Use an early image format to display prompt messages , Has been image replace .
import tkinter as tk
root=tk.Tk()
root.geometry('300x240')
color=tk.IntVar()
b1 = tk.Radiobutton(root,bitmap='error')
b1.pack()
root.mainloop()
result :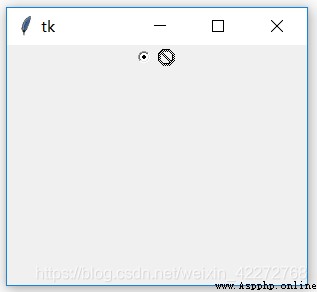
8.1.7 borderwidth(bd)
Set the width of the border . The default border is 1 perhaps 2, Unit is pixel .
import tkinter as tk
root=tk.Tk()
root.geometry('300x240')
color=tk.IntVar()
b1 = tk.Radiobutton(root,text=' Frame ',bd=20)
b1.pack()
root.mainloop()
result :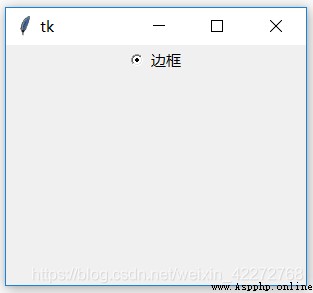
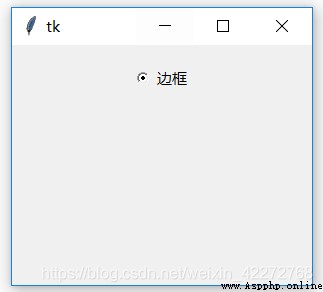
Figure 1 shows the case without a border , The default value used is 2. Figure 2 sets the border to 20, You can see that the radio button moves down significantly . The extra is the width of the border .
8.1.8 state and disabledforeground
state Is to set the status of the radio button . There are three :NORMAL、ACTIVE and DISABLED.NORMAL and ACTIVE State, , Radio buttons can be used normally .DISABLED State, , Radio buttons cannot be used or selected . and disabledforeground Yes set in DISABLED The prompt text color of the radio button in the state , in other words , In case the radio button is disabled , This attribute can be used to prompt the user .
import tkinter as tk
root=tk.Tk()
root.geometry('300x240')
color=tk.IntVar()
b1 = tk.Radiobutton(root,text=' choice 1',state='disabled',
disabledforeground='red')
b1.pack()
root.mainloop()
result :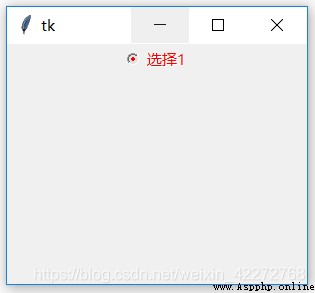
explain : stay state=’disabled’ When , Set up disabledforeground You can change the color of the prompt text .
8.1.9 highlightcolor、highlightbackground and highlightthickness
These three properties deal with the background color of the border when the radio button gets or loses input focus 、 Highlight color and border width . however highlightcolor and highlightbackground Does not work in radio buttons .highlightthickness It works , You can increase the width of the border .
8.1.10 selectcolor
The indicator background color of the radio button . The default is white . You can set the color of the indicator by setting this option .
import tkinter as tk
root=tk.Tk()
root.geometry('300x240')
color=tk.IntVar()
b1 = tk.Radiobutton(root,text=' Red ',bg='red',
variable=color,value=0,
selectcolor='yellow')
b1.pack()
b2 = tk.Radiobutton(root,text=' Blue ',bg='blue',
variable=color,value=1)
b2.pack()
b3 = tk.Radiobutton(root,text=' green ',bg='green',
variable=color,value=2)
b3.pack()
root.mainloop()
result :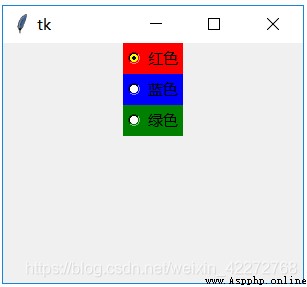
8.1.11 image and selectimage
image Is to use images instead of text as prompt information .selectimage Used to display the picture when the radio button is selected .
import tkinter as tk
root=tk.Tk()
root.geometry('300x240')
color=tk.IntVar()
aimage=tk.PhotoImage(file='a.gif')
bimage=tk.PhotoImage(file='b.gif')
b1 = tk.Radiobutton(root,image=aimage,bg='red',
variable=color,value=0,
selectimage=bimage)
b1.pack()
b2 = tk.Radiobutton(root,text=' Blue ',bg='blue',
variable=color,value=1)
b2.pack()
b3 = tk.Radiobutton(root,text=' green ',bg='green',
variable=color,value=2)
b3.pack()
root.mainloop()
result :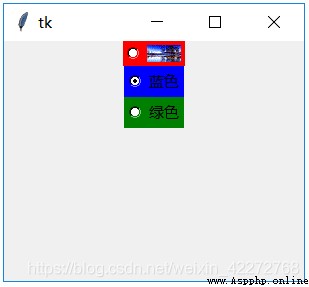

8.1.12 cursor
The shape of the mouse when it passes over the radio button , For a detailed description, see 3.3.6 section .
import tkinter as tk
root=tk.Tk()
root.geometry('300x240')
color=tk.IntVar()
b1 = tk.Radiobutton(root,text=' Red ',bg='red',
variable=color,value=0,
cursor='spider')
b1.pack()
b2 = tk.Radiobutton(root,text=' Blue ',bg='blue',
variable=color,value=1)
b2.pack()
b3 = tk.Radiobutton(root,text=' green ',bg='green',
variable=color,value=2)
b3.pack()
root.mainloop()
result :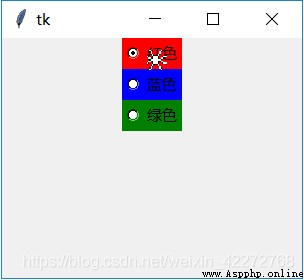
explain :cursor Only one radio button works , For other radio buttons in the same group , There is no effect .
8.1.13 overrelief and relief
relief Is to set the display effect of radio buttons .overrelief Is the display effect of the radio button when the mouse passes . About relief Please refer to 3.3.5 section
import tkinter as tk
root=tk.Tk()
root.geometry('300x240')
b1 = tk.Radiobutton(root,bg='red',text=' Red ',
relief='flat',bd=5)
b1.pack()
b2 = tk.Radiobutton(root,text=' Blue ',bg='blue',
relief='flat',
overrelief='groove',bd=5)
b2.pack()
b3 = tk.Radiobutton(root,text=' green ',bg='green',
relief='flat',bd=5)
b3.pack()
root.mainloop()
result :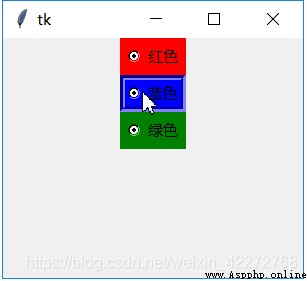
explain :1. The normal display is ’flat’, from relief Set up .
When the mouse passes over the radio button area , The appearance will change . For example, the example shows GROOVE The effect of . This property is defined by overrelief Set up .
8.1.14 indicatoron and offrelief
Under normal circumstances , The use of radio buttons is indicated , It is the circular button in front of the prompt text . However, this indicator may not be used , And use the form of push-button . The button is pressed to indicate that it is selected , The button pops up to indicate that it is not selected . By default ,indicatoron yes False, Indicates the use indicator . If it is set to True, Do not use indicators .
Without the use of indicators , You can set offrelief To set the effect when the button is not selected , At this point, we introduced in the previous section relief It doesn't work .
To highlight the effect , It's better to set the border value larger . The default value is 2, It is recommended to set bd>5.
import tkinter as tk
root=tk.Tk()
root.geometry('300x240')
color=tk.IntVar()
b1 = tk.Radiobutton(root,text=' Red ',bg='red',bd=5,
indicatoron=False,variable=color,
value=0,offrelief='groove',relief='flat')
b1.pack()
b2 = tk.Radiobutton(root,text=' Blue ',bg='blue',bd=5,
indicatoron=False,variable=color,
value=1,offrelief='groove',relief='flat')
b2.pack()
b3 = tk.Radiobutton(root,text=' green ',bg='green',bd=5,
indicatoron=False,variable=color,value=2,
offrelief='groove',relief='flat')
b3.pack()
root.mainloop()
result :
explain :1. indicatoron=False when , Radio buttons do not have the usual indicator .offrelief The setting of works , and relief There is no effect .offrelief=’groove’ and relief=’flat’, You can see that the final effect is GROOVE.
8.1.15 padx and pady
padx and pady Is to define the inner margin of white in the horizontal and vertical directions respectively .
import tkinter as tk
root=tk.Tk()
root.geometry('300x240')
color=tk.IntVar()
b1 = tk.Radiobutton(root,padx=10,pady=15,bg='red',
text=' Red ',variable=color,value=0,)
b1.pack()
b2 = tk.Radiobutton(root,text=' Blue ',bg='blue',
variable=color,value=1)
b2.pack()
b3 = tk.Radiobutton(root,text=' green ',bg='green',
variable=color,value=2)
b3.pack()
root.mainloop()
result :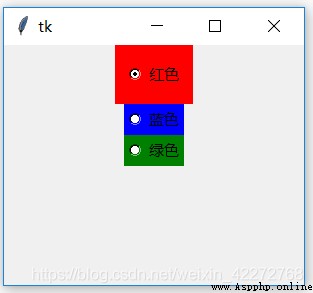
8.1.16 compound
compound Set the method of how to overlay text when using pictures as prompt messages . Yes 5 An option :
LEFT,RIGHT,TOP,BOTTOM,CENTER
If not set compound It is impossible to display text and pictures at the same time . The priority displayed is image > bitmap >text
import tkinter as tk
root=tk.Tk()
root.geometry('300x240')
color=tk.IntVar()
a=tk.PhotoImage(file='a.gif')
b1 = tk.Radiobutton(root,image=a,compound=tk.TOP,
bg='red',text=' Red ',
variable=color,value=0,)
b1.pack()
b2 = tk.Radiobutton(root,text=' Blue ',bg='blue',
variable=color,value=1)
b2.pack()
b3 = tk.Radiobutton(root,text=' green ',bg='green',
variable=color,value=2)
b3.pack()
root.mainloop()
result :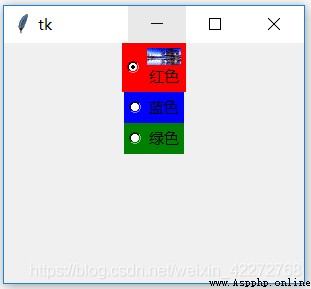
8.1.17 height and width
Set the length and width of radio buttons respectively .width The unit of is character ,height The unit of is row .
import tkinter as tk
root=tk.Tk()
root.geometry('300x240')
color=tk.IntVar()
b1 = tk.Radiobutton(root,height=2,width=3,bg='red',
text=' Red ',variable=color,value=0,)
b1.pack()
b2 = tk.Radiobutton(root,text=' Blue ',bg='blue',
variable=color,value=1)
b2.pack()
b3 = tk.Radiobutton(root,text=' green ',bg='green',
variable=color,value=2)
b3.pack()
root.mainloop()
result :
8.1.18 takefocus
takefocus Is used to define whether radio buttons can be used Tab Key to get input focus . By default, you can .
import tkinter as tk
root=tk.Tk()
root.geometry('300x240')
color=tk.IntVar()
b1 = tk.Radiobutton(root,takefocus=0,height=2,
width=3,bg='red',text=' Red ',
variable=color,value=0,)
b1.pack()
b2 = tk.Radiobutton(root,takefocus=1,text=' Blue ',
bg='blue',variable=color,value=1)
b2.pack()
b3 = tk.Radiobutton(root,text=' green ',bg='green',
variable=color,value=2)
b3.pack()
root.mainloop()
explain :
‘ Red ’ The radio button is not available Tab Get input focus
‘ Blue ’ You can get the input focus by using the radio button of , because takefocus=1
‘ green ’ The input focus can also be obtained by using the radio button of , Because the default is 1.
8.1.19 text and textvariable
There are two ways to set the prompt text for radio buttons . One is to use text, The other is to use textvariable. This attribute is not the value of a radio button , Just set the prompt text for the radio button .
text The attribute is directly assigned .textvariable It needs to be modified and textvariable The associated StringVar Object to assign prompt text .
How to dynamically modify prompt text ? There are also two ways :
(1)radio[‘text’]=’ Prompt text ’
(2)strvar.set(‘ Prompt text ’).strvar It's a StringVar object , And textvariable Related to .
import tkinter as tk
root=tk.Tk()
root.geometry('300x240')
color=tk.IntVar()
strvar=tk.StringVar()
strvar.set(' Blue ')
b1 = tk.Radiobutton(root,height=2,width=3,bg='red',
text=' Red ',variable=color,value=0,)
b1.pack()
b2 = tk.Radiobutton(root,textvariable=strvar,
bg='blue',variable=color,value=1)
b2.pack()
b3 = tk.Radiobutton(root,text=' green ',bg='green',
variable=color,value=2)
b3.pack()
root.mainloop()
import tkinter as tk
root=tk.Tk()
root.geometry('300x240')
color=tk.IntVar()
strvar=tk.StringVar()
strvar.set(' Blue ')
b1 = tk.Radiobutton(root,bg='red',text=' Red ',
variable=color,value=0,)
b1.pack()
b2 = tk.Radiobutton(root,textvariable=strvar,
bg='blue',variable=color,value=1)
b2.pack()
b3 = tk.Radiobutton(root,text=' green ',bg='green',
variable=color,value=2)
b3.pack()
def change_text():
b1['text']=' Prompt text '
strvar.set(' Prompt text ')
b4=tk.Button(root,text=' Modify the prompt text ',command=change_text)
b4.pack()
root.mainloop()
result :
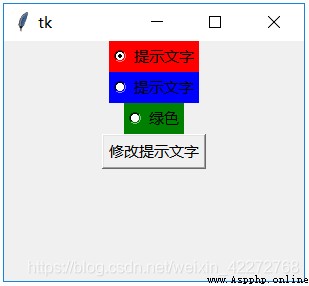
explain : Code 2 in , If you click ’ Modify the prompt text ’ Button will change the prompt text of the red and blue radio buttons .
8.1.20 underline
Mark the underline below the first few prompt words .0 Represents the first character ,1, Represents the second character , And so on .
import tkinter as tk
root=tk.Tk()
root.geometry('300x240')
color=tk.IntVar()
strvar=tk.StringVar()
strvar.set(' Blue ')
b1 = tk.Radiobutton(root,bg='red',underline=3,
text=' Red text ',
variable=color,value=0,)
b1.pack()
b2 = tk.Radiobutton(root,textvariable=strvar,
bg='blue',variable=color,value=1)
b2.pack()
b3 = tk.Radiobutton(root,text=' green ',bg='green'
,variable=color,value=2)
b3.pack()
root.mainloop()
result :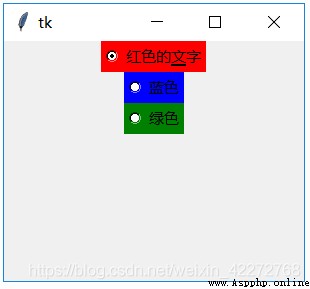
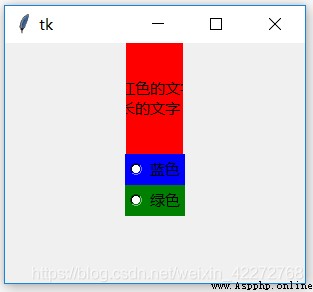
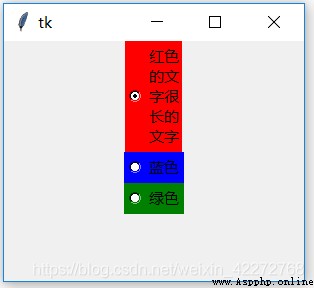
8.1.21 wraplength
Set line break display . In the absence of regulations width and height Under the circumstances , Control automatically calculates the size of the prompt text and displays . But it is stipulated that width Under the circumstances , If the prompt text is too long , There will be some text that cannot be displayed . This is the time , Can be set by wraplength To break line display . But if height The row number setting of is not enough , There will still be cases where characters cannot be displayed . Be careful wraplength Is in pixels , Not characters .
import tkinter as tk
root=tk.Tk()
root.geometry('300x240')
color=tk.IntVar()
strvar=tk.StringVar()
strvar.set(' Blue ')
b1 = tk.Radiobutton(root,takefocus=0,height=5,
width=3,bg='red',underline=3,
text=' Red text long text ',
variable=color,value=0,)
b1.pack()
b2 = tk.Radiobutton(root,takefocus=1,textvariable=strvar,
bg='blue',variable=color,value=1)
b2.pack()
b3 = tk.Radiobutton(root,text=' green ',bg='green',
variable=color,value=2)
b3.pack()
root.mainloop()
import tkinter as tk
root=tk.Tk()
root.geometry('300x240')
color=tk.IntVar()
strvar=tk.StringVar()
strvar.set(' Blue ')
b1 = tk.Radiobutton(root,bg='red',height=5,width=3,
wraplength=90,justify='left',
text=' Red text long text ',
variable=color,value=0,)
b1.pack()
b2 = tk.Radiobutton(root,textvariable=strvar,bg='blue',
variable=color,value=1)
b2.pack()
b3 = tk.Radiobutton(root,text=' green ',bg='green',
variable=color,value=2)
b3.pack()
root.mainloop()
import tkinter as tk
root=tk.Tk()
root.geometry('300x240')
color=tk.IntVar()
strvar=tk.StringVar()
strvar.set(' Blue ')
b1 = tk.Radiobutton(root,bg='red',height=5,width=3,
wraplength=40,justify='left',
text=' Red text long text ',
variable=color,value=0,)
b1.pack()
b2 = tk.Radiobutton(root,textvariable=strvar,bg='blue',
variable=color,value=1)
b2.pack()
b3 = tk.Radiobutton(root,text=' green ',bg='green',
variable=color,value=2)
b3.pack()
root.mainloop()
result :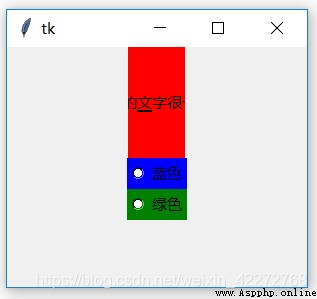
explain :
Code 1 In the case of the radio button width Not wide enough , Therefore, it is not possible to display all prompt text .
Code 2 In the case of... Is set wraplength after , Show line breaks . But because of width Not wide enough , Still can't display all the contents .
Code 3 The case is that all the text is displayed .
8.1.21 justify
justify Is to define how to align in the case of line wrapping , There are three ways :CENTER,LEFT and RIGHT. See Chapter IV for detailed description .
8.1.22 command and value、variable
command Is a callback function that defines radio buttons . When this radio button is triggered , The corresponding function will be called . and value Defines the value of the radio button . In general , An integer number will be defined for the radio button . However, other values can also be defined , Like strings .variable Is associated with a variable , You can get the value of the radio button . Be careful , Multiple radio buttons in the same group use the same and variable Of associated variables .
import tkinter as tk
root=tk.Tk()
root.geometry('300x240')
color=tk.IntVar()
strvar=tk.StringVar()
b4=tk.Entry(root,textvariable=strvar)
def radio():
strvar.set(color.get())
b1 = tk.Radiobutton(root,bg='red',text=' Red ',
variable=color,value=0,command=radio)
b1.pack()
b2 = tk.Radiobutton(root,text=' Blue ',bg='blue',
variable=color,value=1,command=radio)
b2.pack()
b3 = tk.Radiobutton(root,text=' green ',bg='green',
variable=color,value=2,command=radio)
b3.pack()
b4.pack()
root.mainloop()
import tkinter as tk
root=tk.Tk()
root.geometry('300x240')
color=tk.StringVar()
color.set('red')
strvar=tk.StringVar()
b4=tk.Entry(root,textvariable=strvar)
def radio():
strvar.set(color.get())
b1 = tk.Radiobutton(root,bg='red',text=' Red ',
variable=color,value='red',
command=radio)
b1.pack()
b2 = tk.Radiobutton(root,text=' Blue ',bg='blue',
variable=color,value='blue',
command=radio)
b2.pack()
b3 = tk.Radiobutton(root,text=' green ',bg='green',
variable=color,value='green',
command=radio)
b3.pack()
b4.pack()
root.mainloop()
result :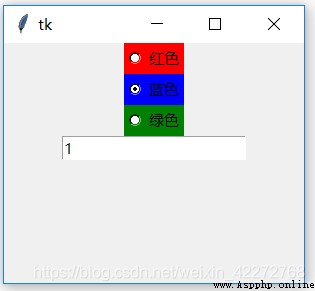
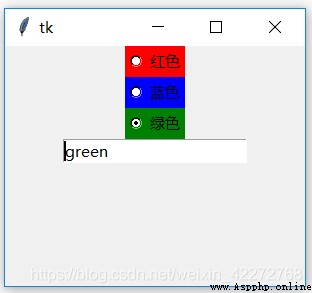
Select different radio buttons , Different values will be displayed in the input box .