# Course link :
new django3 Introduction to project practice ( Zero basis to learn django、 Project development practice 、 College graduation design is available )_ Bili, Bili _bilibili
# Course coverage :
Administrator module _(4-7 ~~~ 4-10 Curriculum )
# (1) The login page
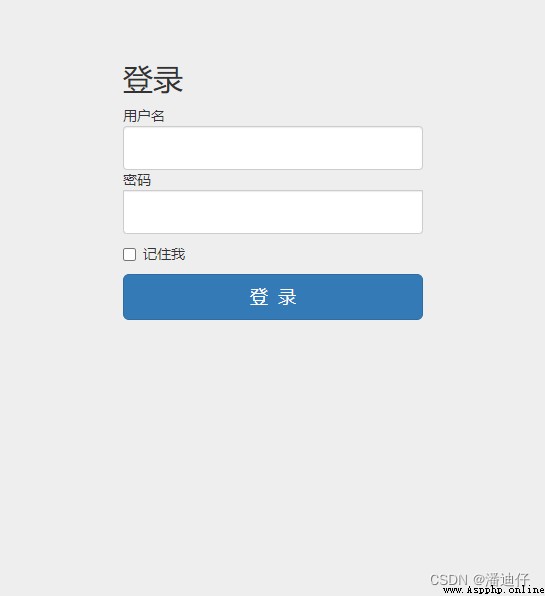
1) Go directly to the landing page here bootstrap Just pull a login template from the official website of . So this is the specific thing ( Of course not so ugly , I changed it ). Concrete html I won't give you the code , It's simple . Then we add... To the routing Corresponding admin/login The routing function of . after render Request to view the page .
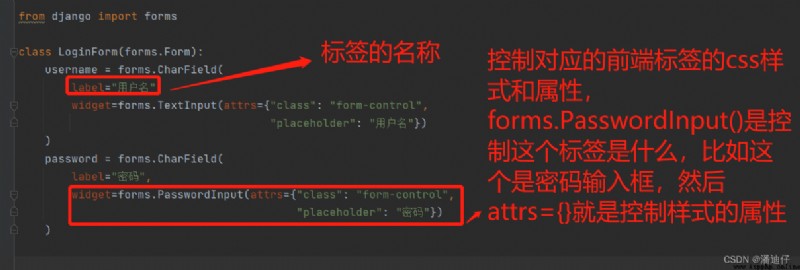
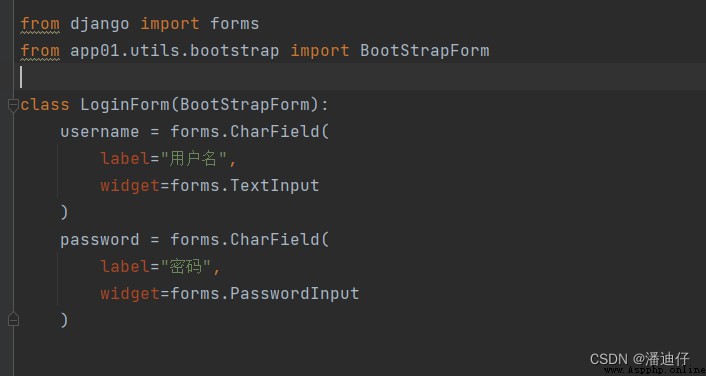
2) Because this time we use forms To do it , So let's first review forms . As shown in the figure below . We can see the placeholder placeholder Not smart enough , So in order to solve this problem , We used the previous package bootstrap Code to do .
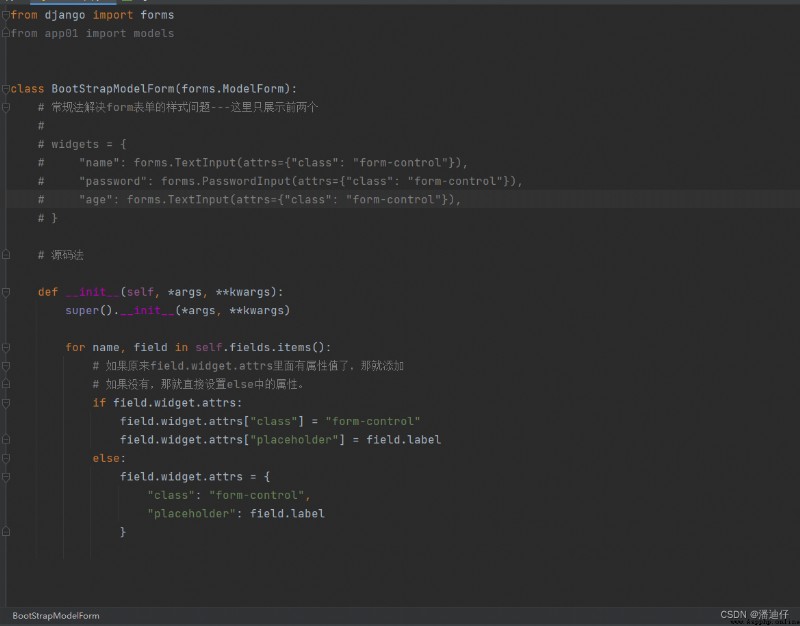
Here are the previous bootstrap Detailed code of , We can see , This is inherited from forms.modelform Written , But for our mission , You must write another one that inherits from forms.Form Of bootstrap Code . However, this leads to code redundancy .
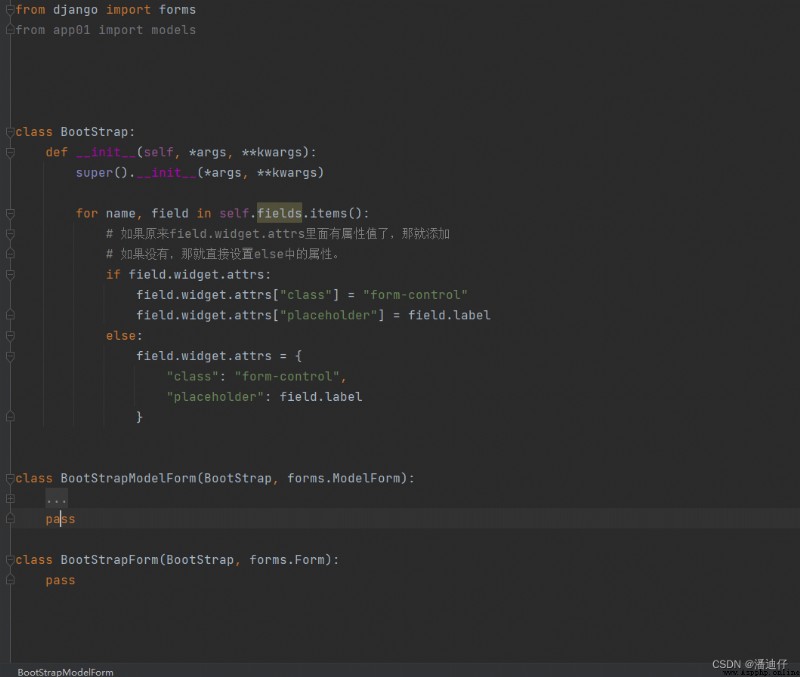
The solution to code redundancy is simple , Because we have two classes above , Using the same code , But the inherited parent class is different , So we can encapsulate a general class , Here is the common code . Then write two more classes , Inherit the above general class and its parent class respectively . That's it . Like the following code
So when we use it again , We only need to use the current routing function Form still ModelForm From the corresponding... Selected by bootstrap Style plug-ins are OK . As you can see below , We directly inherit the modified bootstrap plug-in unit , Because our door uses Form , So we import BootStrapForm
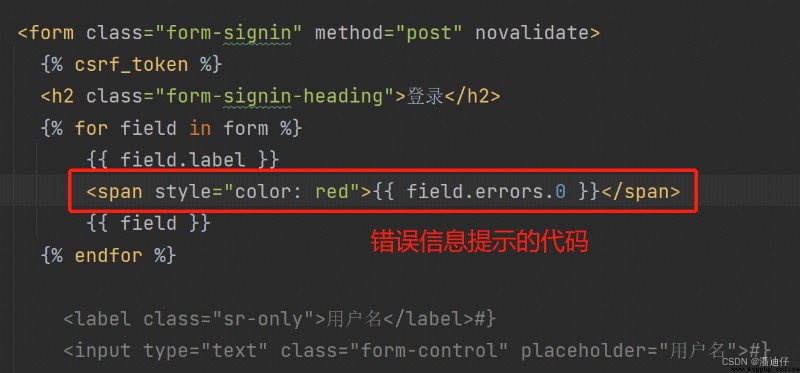
3) Add error message . At the front html On the page , Let's add a span The label wraps this error message { { field.errors.0}} , Actually field.errors It should be an object , It contains a variety of error messages , We just used the first . Of course, before using , We have to turn off the verification provided by the browser , That is to say form In the form novalidate.
therefore , In the back-end routing function , We go straight into post request , Then we instantiate LoginForm(data=request.POST) after , What you get is the information you entered , Whether the input is empty or not . The data is then checked , If it is empty , Let's go back to the login page , And return an error message form . Obviously, if it is not empty , Then we judge the input information ( That is to say form.cleaned_data) Is it in the database , If not , So the return value admin_info by None , In this case , We can use form Custom add error prompt , To add an error prompt . That's the statement form.add_error("a", "b"), among a For field name , b Information for prompt . If
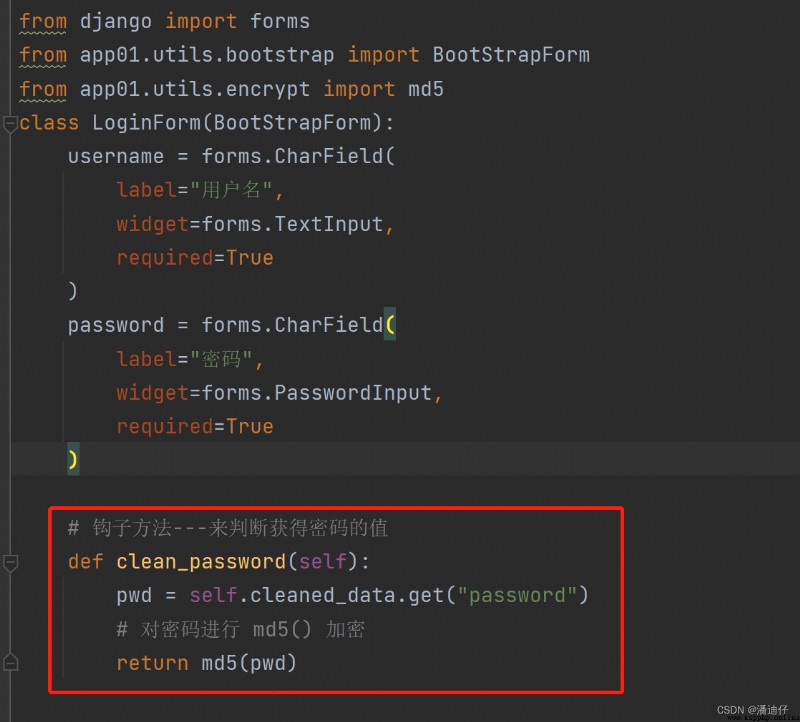
Add here , We have previously carried out a md5() Encrypted . Well, the details should actually be Form Zhongyehe ModelForm The same is to define the corresponding hook method in the class .【 You can see that , The fields we define , Such as username These have a required attribute , If True, It means that this place cannot be empty , The default is True】
# (2)cookie and session Application
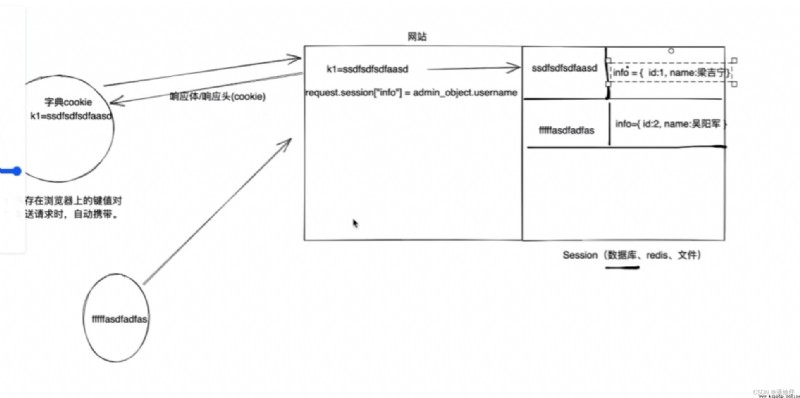
1) I talked about it before. cookie and session The theoretical principle of , That is, the following steps , It can be seen in combination with the figure below .
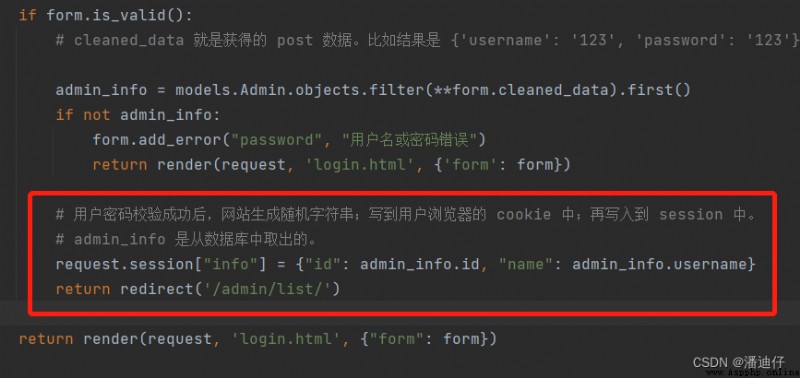
First of all : After the user password is verified successfully , The website generates a random string ;
second : Write to the user's browser cookie in ;
Third : Write it back to session in .
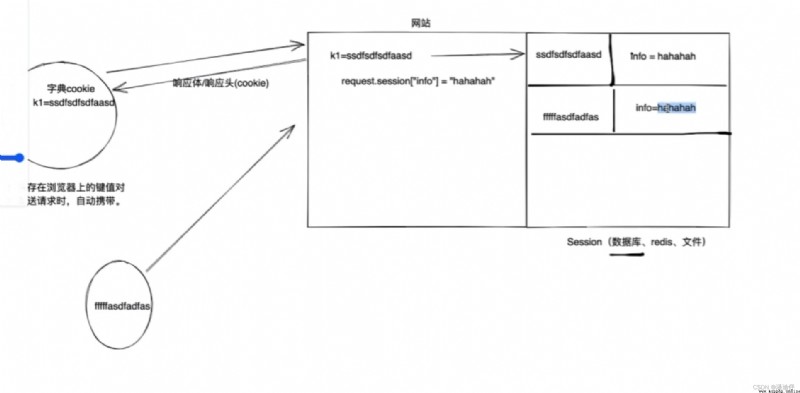
2) Again Django in , In fact, the above steps have been encapsulated , namely request.session["info"] = "xxx" sentence . Then through this statement , We can complete the above steps , And then the corresponding info Namely xxx. For details, please refer to the notes in the previous section . As shown in the figure below , We know session In line , Each block has a credential , Each voucher has its corresponding zone information ( Suppose there is only info ). If we write it down request.session["info"] = "s", So the whole session The information in the area corresponding to different vouchers in the queue is "s", It doesn't make sense .
therefore , We need to get info Fields can be associated with their credentials . Then if it is written in the red box below , For example, the input is " Liang Xu " User information for , After that info It is based on the results obtained from the database , take " Liang Xu " and Its "id" Take out , Put together a dictionary , in other words : {"id": 1, "name": " Liang Xu "}, In this way, the information in the voucher can be dynamic , And is associated with its credentials . Finally, we chose to redirect back to the administrator list .
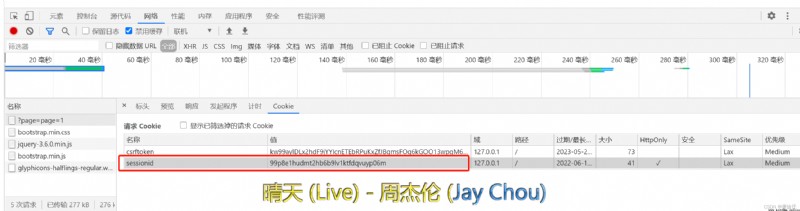
3)Django Implied cookie and session Steps for . How do we view the credentials generated by the browser ( That is, the random strings in the structure diagram ). There are two ways , One is in the browser ; Another is in the database . The following figure shows the browser .
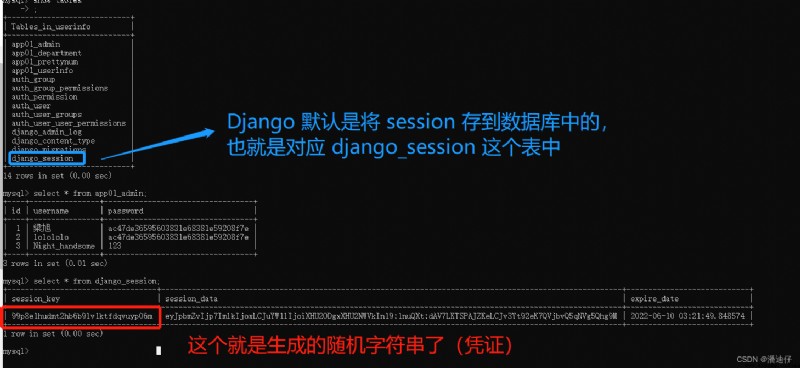
Then the following figure in the database , You can see that the credentials of both the browser and the database are the same . Yes, of course , We can also see in the database , There should also be corresponding after the voucher session_data , It can be understood that what we said earlier info data ( We stored it in the form of a dictionary ) Encrypted , When in use, the system will help us to decrypt , This is not what I care about .
# (1) Before you know middleware .
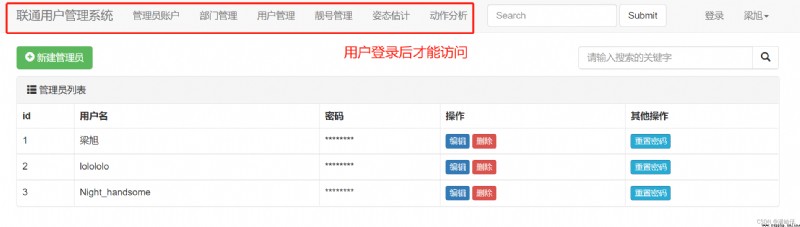
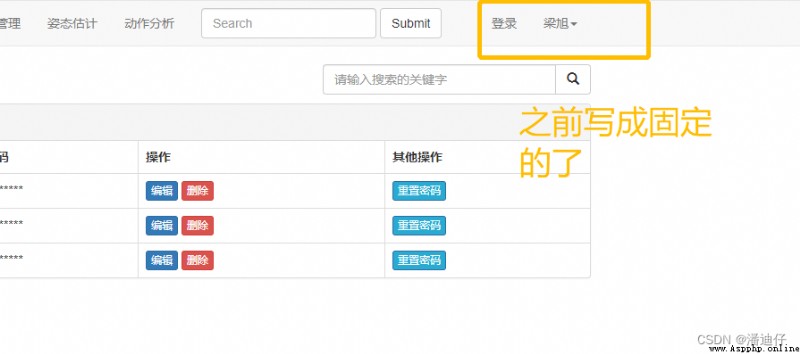
1) We mentioned earlier , If the user is not logged in , Many pages are useless , For example, the option box framed in the following figure . The specific logic is that when clicking on these pages, you need to verify whether there are currently users logged in , If any , You can access ; otherwise , Go to the login page .
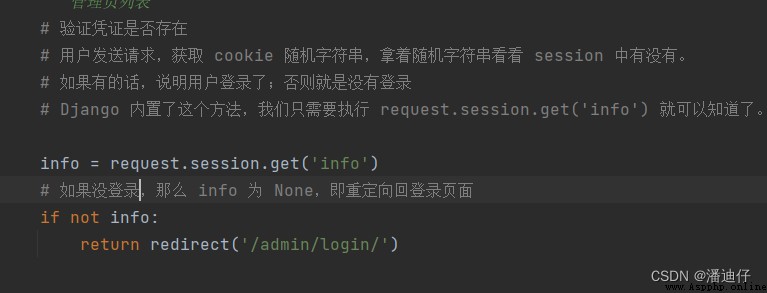
2) Here's the picture , take admin/list For example , See notes for detailed notes . Here's the problem , Why not request.session['info'] , It is request.session.get('info') , This is because the dictionary data class has two values , The former will report an error if it takes a field that does not exist in the dictionary , The latter will return None, Therefore, using the latter can realize process control . If you use this method , We need to make such a process judgment for each page that needs to be logged in to access , This is very tedious .【 In all view functions , Add the following code , This is a very retarded operation , inflexible 】
# (2) Middleware processing ( First time to know )
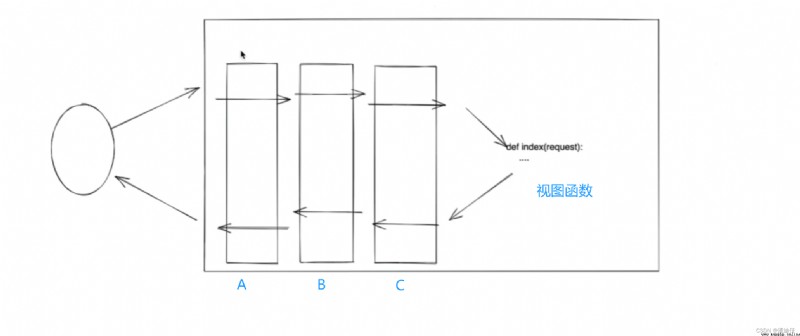
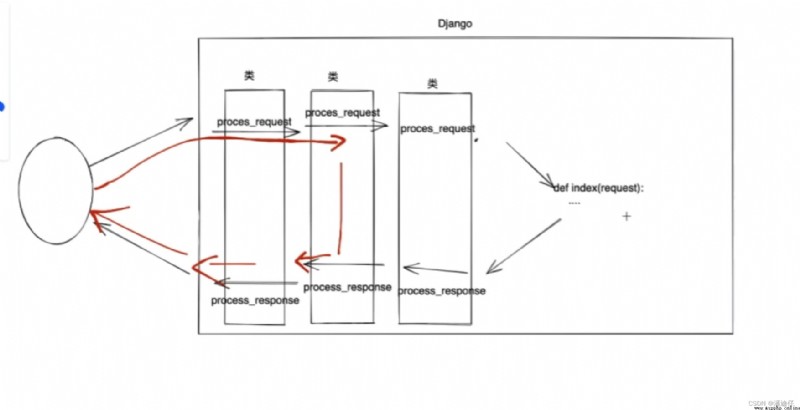
1) In order to solve the above cumbersome problems , We need to understand what middleware is . As shown in the figure below ,A、B、C There are three middleware . Request for browser , Will pass first A、B、C These three middleware , Then execute the view function , Execute view function return After that, it also needs to pass through the three middleware , And back to the browser .
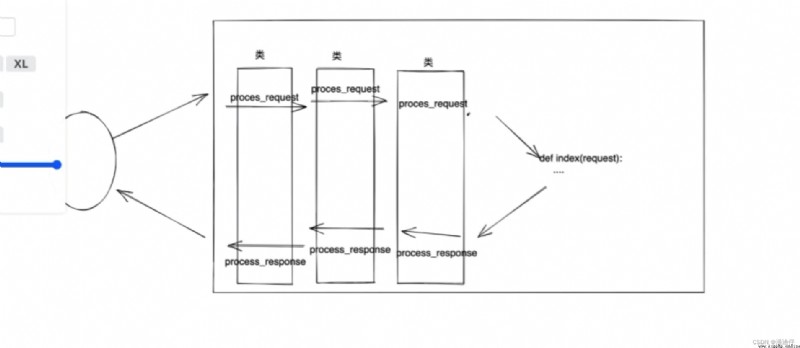
2) Then again Django The middleware in is a class , Then there are two in the class , When I came in process_request() Method , When the view function returns after execution , And then there is process_response() After method execution , This is the process . As shown in the figure below
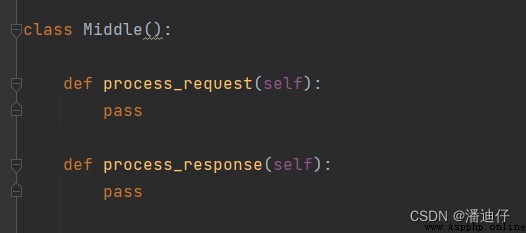
To describe the middleware class in more detail , Like the following code , These are the two methods of a set of middleware .
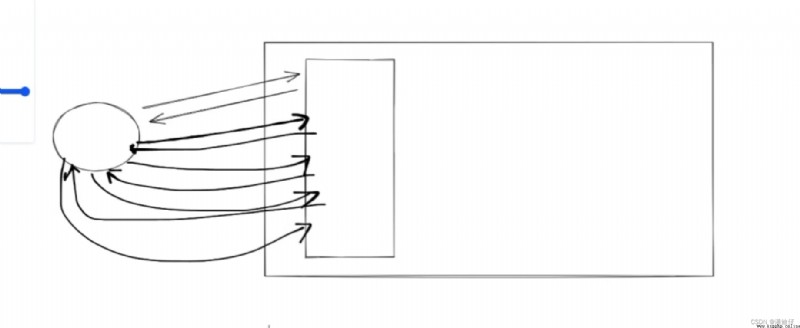
Yes, of course , If a middleware does not allow the request to continue , Then the request is returned directly in the middleware , Unable to reach view function . That is, the following figure . Based on this idea , We can make a middleware to judge whether the user logs in . If you log in , The request continues to the view function , otherwise , Directly from the current middleware response Back .
# (3) Middleware processing ( Experience link )
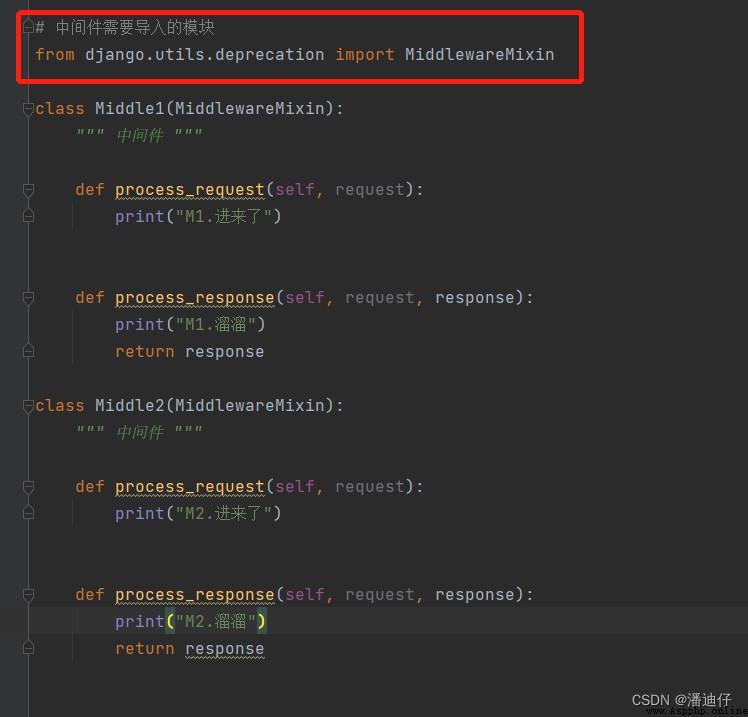
1) Let's get rid of the , Just try middleware . As shown in the figure below , We need to know , The defined middleware needs to inherit from from django.utils.deprecation import MiddlewareMixin .
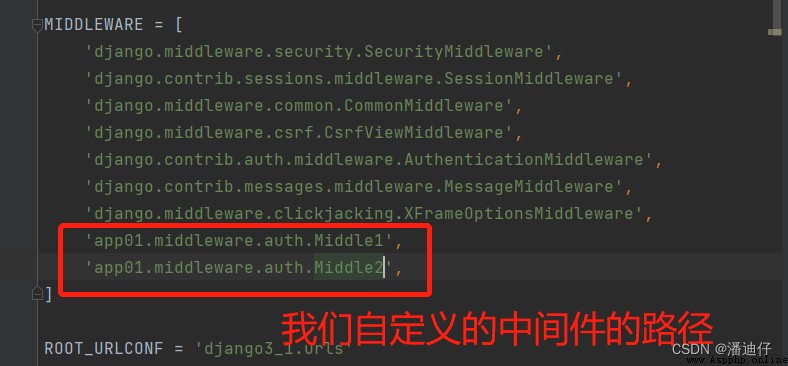
2) When it comes to application , Need to settings.py In the document MIDDLEWARE Add our customized middleware to this list , Whoever is in front will execute the middleware first . As shown in the figure below .
3) For example, we can visit a page at random , You can see the output results as shown in the following figure . You can see that the process is consistent with what we said before .
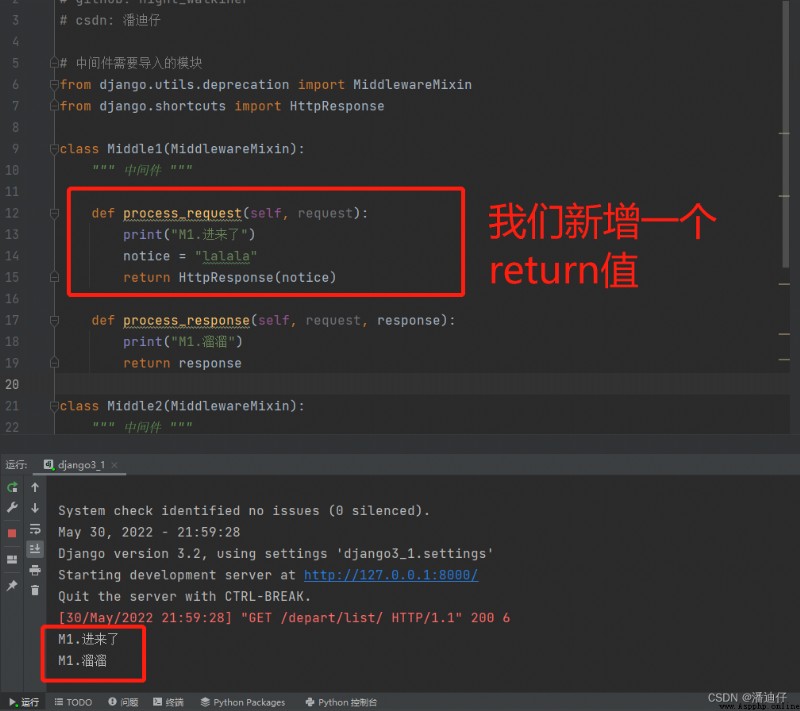
We noticed that , In the middleware class we defined earlier ,process_request() Method has no return value , In fact, it returns None. If we ever process_request() Method defines return Value , After executing the current middleware, you will directly return to the browser , No further execution . So, as shown in the figure below
# (4) Middleware processing ( actual combat )
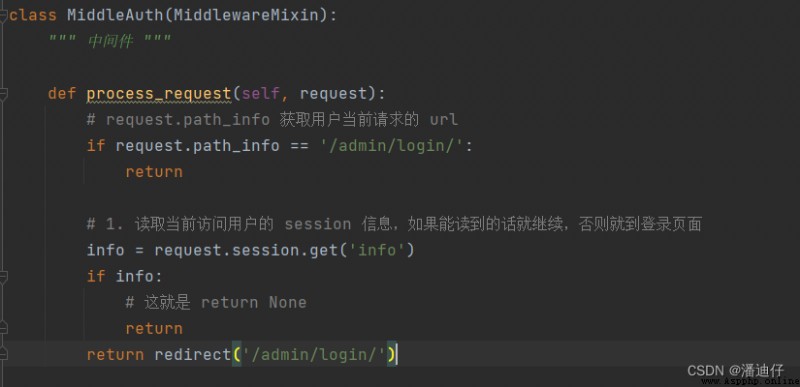
1) stay Django in , When the user is not logged in , When the browser makes a request , The middleware will return the information without login , But the browser does not know the middleware process , So you will continue to try to access the view function , With this infinite loop . therefore , We need to eliminate pages that can be accessed without logging in , in other words , When we visit the browser again , Check the current browser request url, This url That's what we want to eliminate .
2) Code implementation , Be sure to remember to be in settings.py The above registration .
# (1) User logout
1) As shown in the figure below , For the principle of logout .
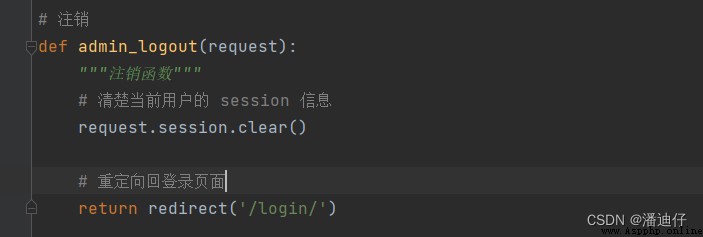
2)Django It is actually very simple to implement this step in , We can use request.session.clear() Method can easily achieve the purpose of logout . We need to define a logout function for the logout function . Then the specific code is as follows . meanwhile , We will be on the relevant master page layout.html Write the path to logout .
# (2) The name of the user login
1) We noticed that , When the user logs in , Anyway, it's Liangxu , This is not what we want . We require the user name. Here, we need to assign the corresponding user name according to the name of the login user .
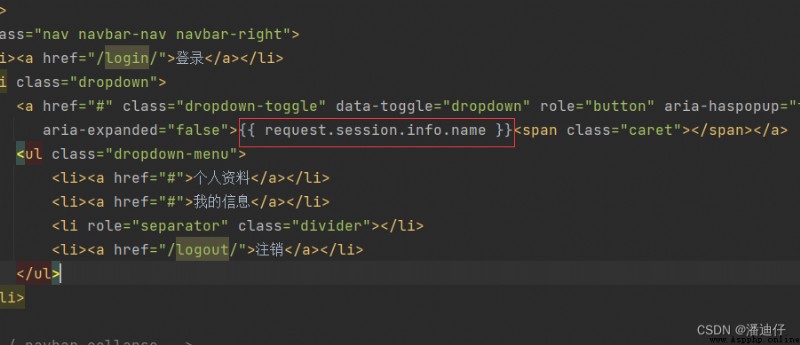
2) At this time, we can use the returned request Parameters , We are on the master layout.html On the page , Add... Directly { {request.session.info.name}} that will do .
Notice why this is info, Because we wrote info This dictionary . As shown in the figure below .
# (1) Image verification code
1) The picture verification code is used to prevent hackers from brutally cracking the user's account password . That's understandable , If there is a verification code, it can let hackers try the password every time , One more job , For example, it is troublesome to fill in the verification code automatically , Unless with ocr To do .【 I'll talk more about it later 】
# (2)pillow Use of modules .
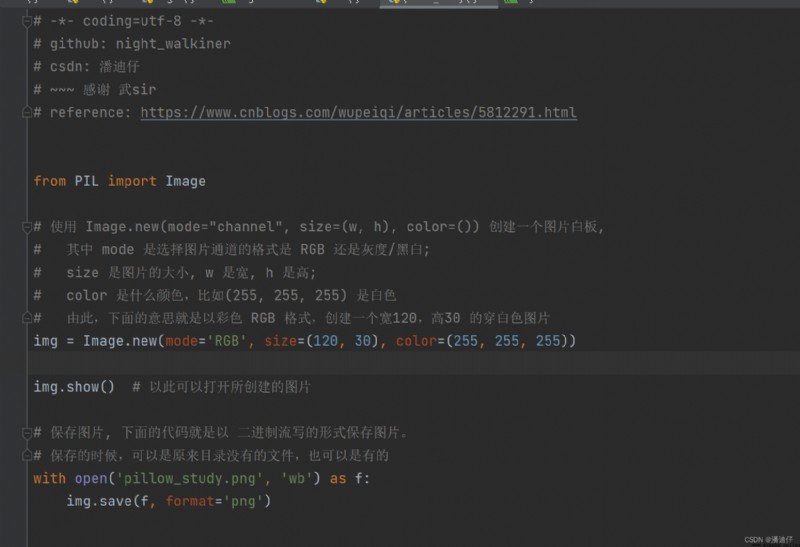
1) The use of basic methods pillow library ( namely PIL) Create a picture , The specific usage is as follows: code and comments .
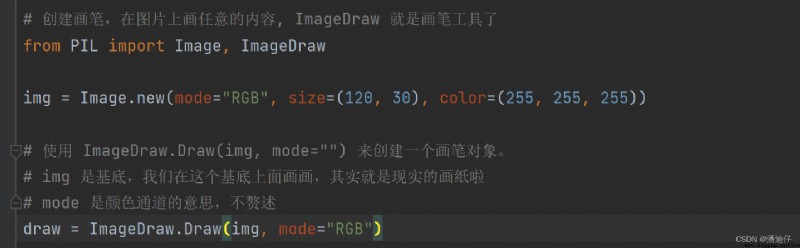
2) Brush Tool ImageDraw, As shown in the figure below
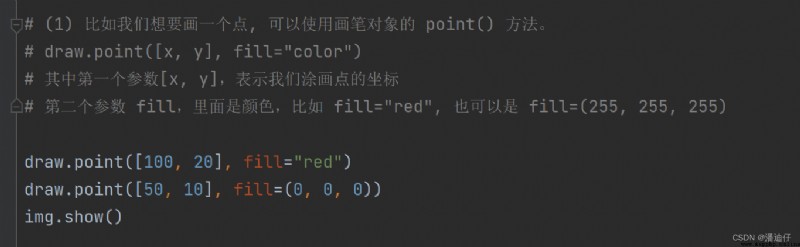
3) Use the brush tool to draw points . stay 2) We use the brush tool ImageDraw.Draw() Method created draw Brush object . Then we can use this brush object to paint . Here is the specific code .
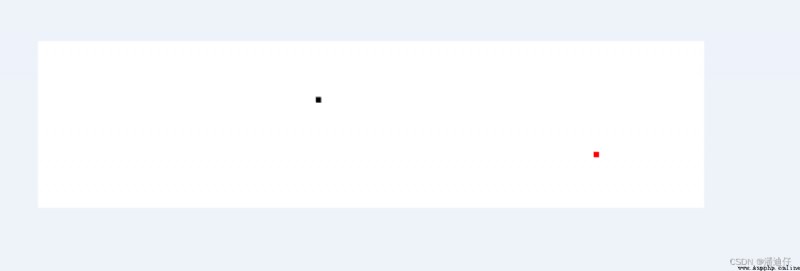
We did img.show() Method to see the actual effect , As shown in the figure below :
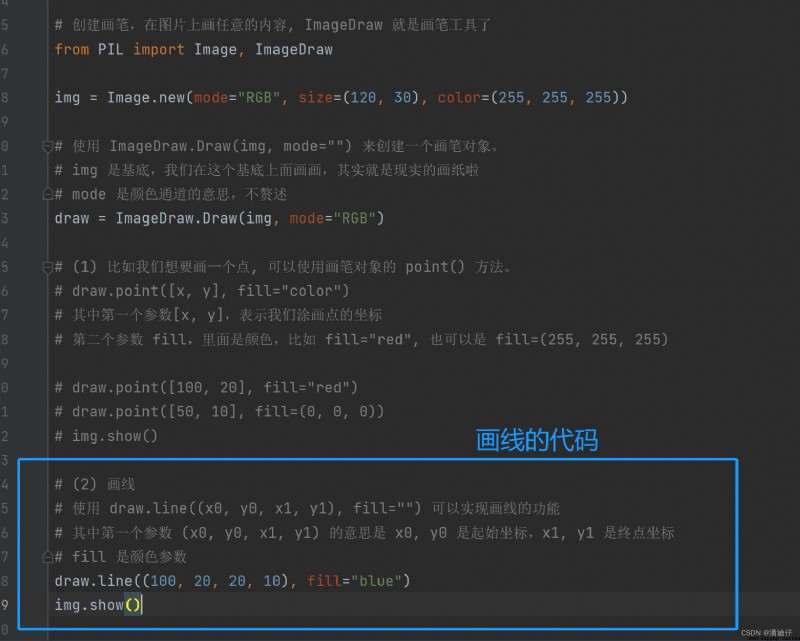
4) Use the brush object to draw lines .
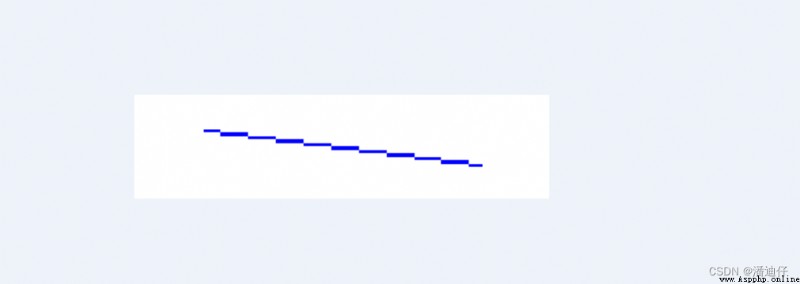
The effect is shown in the figure ,
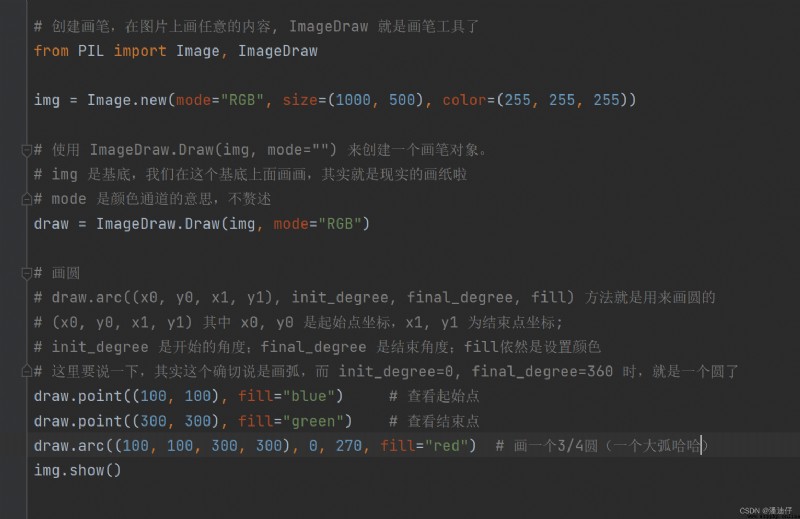
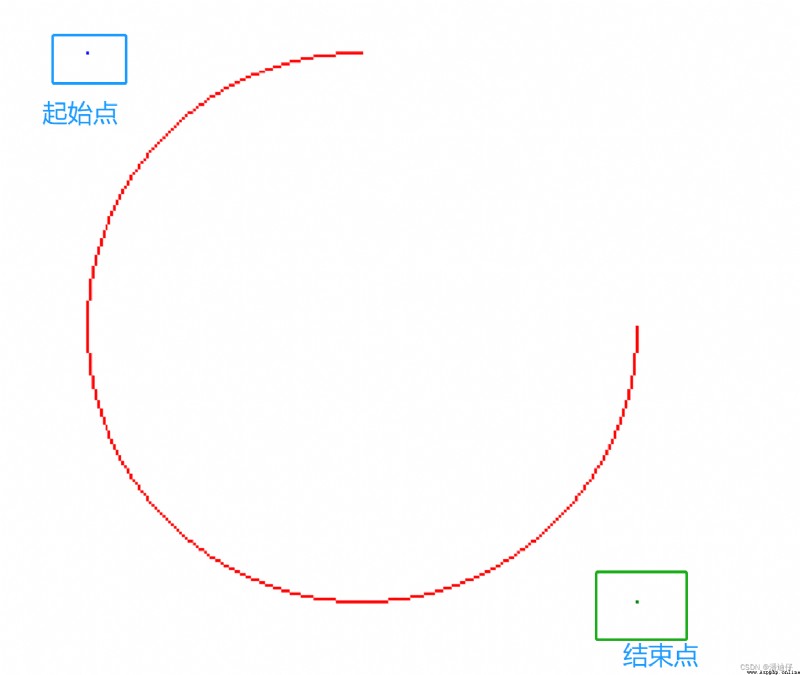
5) Use the brush object to draw a circle . It should be noted that the coordinates of the starting point and the ending point are not the beginning of the circle , But this circle is between these two coordinates . It can be understood as taking (x0, y0) Is the upper-left coordinate ,(x1, y1) The inscribed circle of the square enclosed by the coordinates of the lower right corner .
The results of our specific management are as follows :
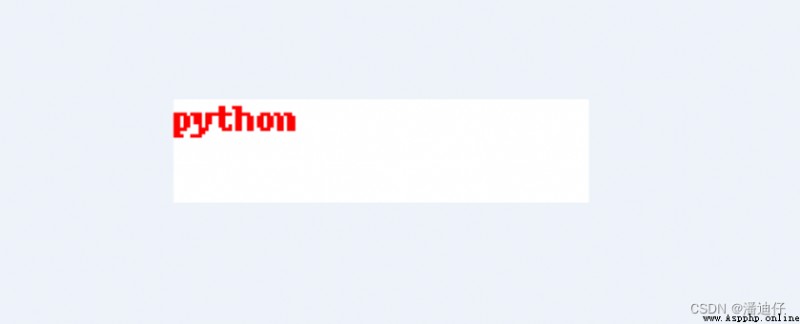
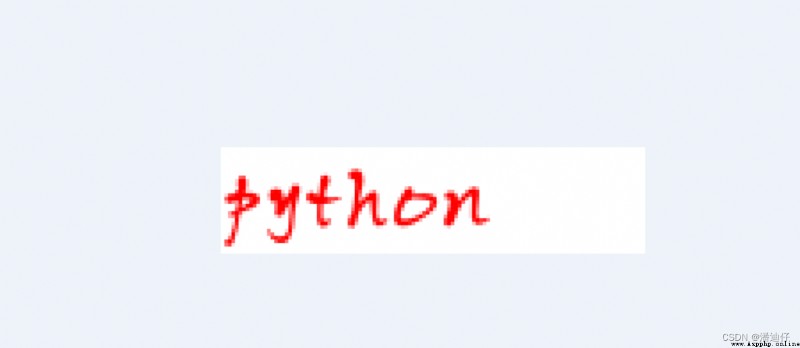
6) Use brush objects to write text
The result is shown in Fig. :
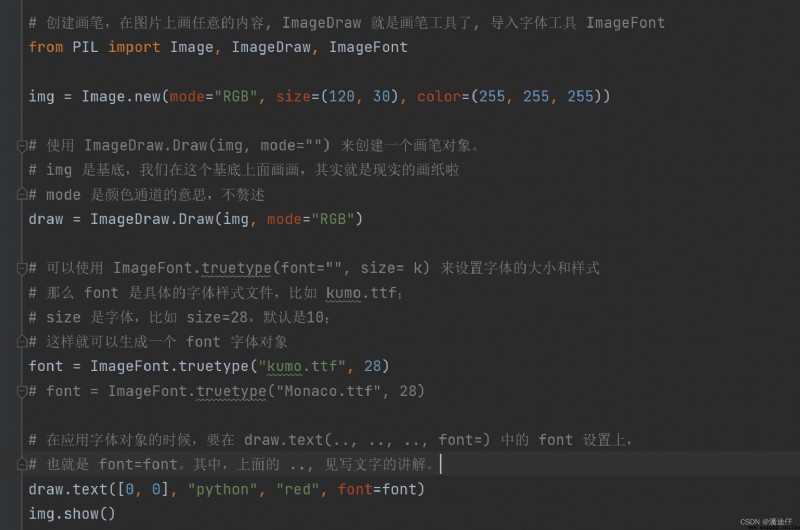
7) Set special font text . See the notes below for details .
The output result is shown in the figure :
# (3) be based on pillow Picture verification code module .
1) Give the code directly . This is from Martial sir Blog park . Then we can make this code into a corresponding plug-in for background use . As for the code logic, it is also very simple , I won't repeat it here . Thank you again for Martial sir !!!
import random
from PIL import Image, ImageDraw, ImageFont, ImageFilter
def check_code(width=120, height=30, char_length=5, font_file='kumo.ttf', font_size=28):
code = []
img = Image.new(mode='RGB', size=(width, height), color=(255, 255, 255))
draw = ImageDraw.Draw(img, mode='RGB')
def rndChar():
"""
Generate random letters
:return:
"""
return chr(random.randint(65, 90))
def rndColor():
"""
Generate random colors
:return:
"""
return (random.randint(0, 255), random.randint(10, 255), random.randint(64, 255))
# Write words
font = ImageFont.truetype(font_file, font_size)
for i in range(char_length):
char = rndChar()
code.append(char)
h = random.randint(0, 4)
draw.text([i * width / char_length, h], char, font=font, fill=rndColor())
# Write interference points
for i in range(40):
draw.point([random.randint(0, width), random.randint(0, height)], fill=rndColor())
# Write interference circles
for i in range(40):
draw.point([random.randint(0, width), random.randint(0, height)], fill=rndColor())
x = random.randint(0, width)
y = random.randint(0, height)
draw.arc((x, y, x + 4, y + 4), 0, 90, fill=rndColor())
# Drew interference
for i in range(5):
x1 = random.randint(0, width)
y1 = random.randint(0, height)
x2 = random.randint(0, width)
y2 = random.randint(0, height)
draw.line((x1, y1, x2, y2), fill=rndColor())
# img.filter() Used for image filtering ,ImageFilter.EDGE_ENHANCE_MORE Is the way of image enhancement , It can strengthen the edge deeply
# Reference material :https://wenku.baidu.com/view/b28e261d64ec102de2bd960590c69ec3d5bbdbab.html
img = img.filter(ImageFilter.EDGE_ENHANCE_MORE)
return img, ''.join(code)
# (4) Code implementation .
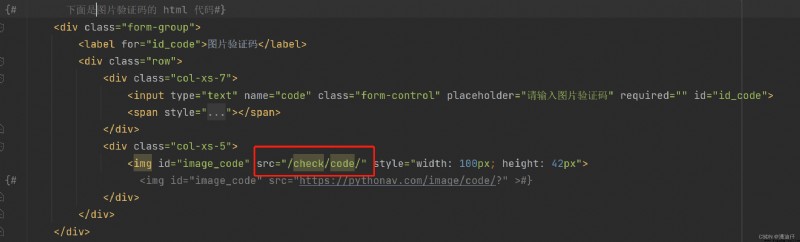
1) Let's go back to the front login.html page , Write down the verification code ( Here we go pythonav The resource network can directly take other people's html The code to use ). The red box below is the view function of our image verification code url.
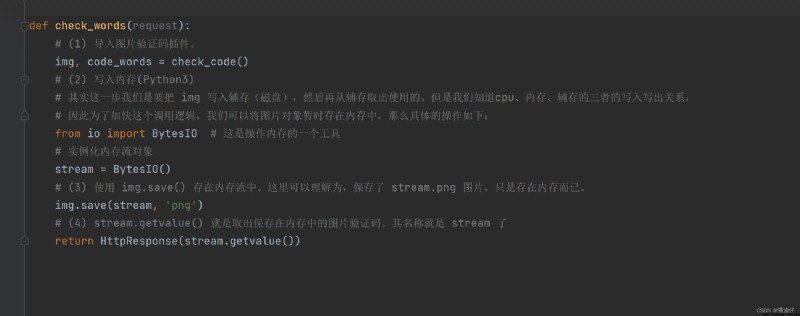
2) The compilation of view function .
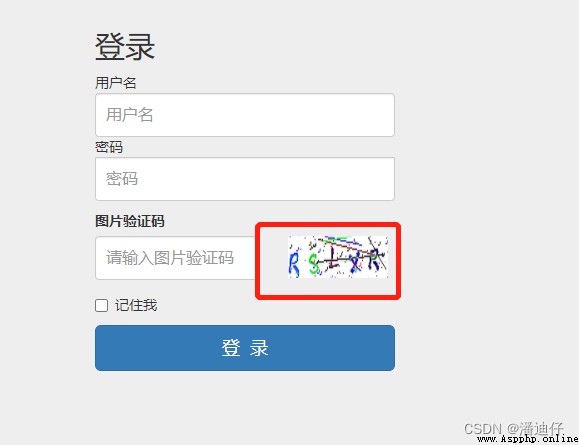
The results are shown in the following figure , The red box is the verification code generated by us :