A good project database management background is necessary , Today I will teach you how to build Django Website backstage , Okay , Start to get to the point
Today, I will take building a personal blog website as an example to explain the construction of the website background
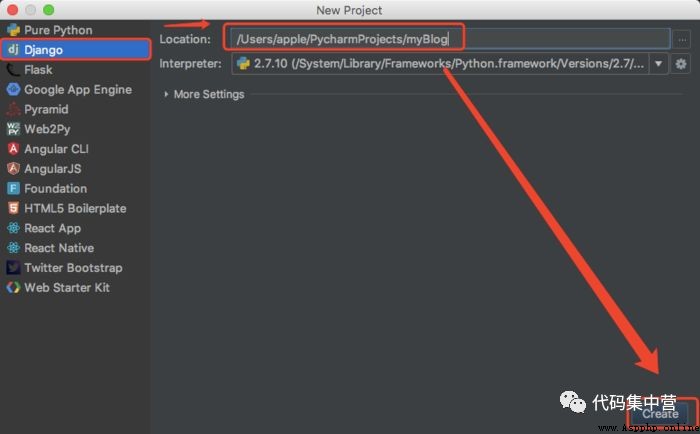
One 、 The creation of blog website
Create project
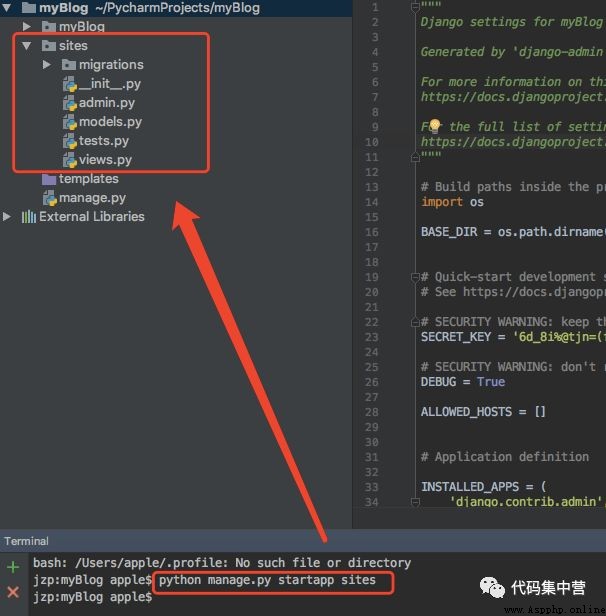
Build site (sites)Model, The first of these two steps is an introduction , This is direct operation
Two 、 Database configuration
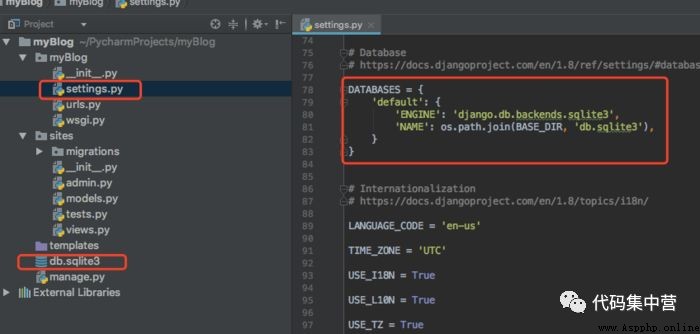
To introduce the database configuration, you need to setting Configure the linked database , Here the system and configuration have been completed , Link to a db.sqlite3 The database of , Maybe some readers will ask , Where is this database , Why didn't I , No problem , You run a project , The system will automatically generate a database , Of course django Also support MySQL Wait for other databases , For the convenience of explanation , Just use the system's own
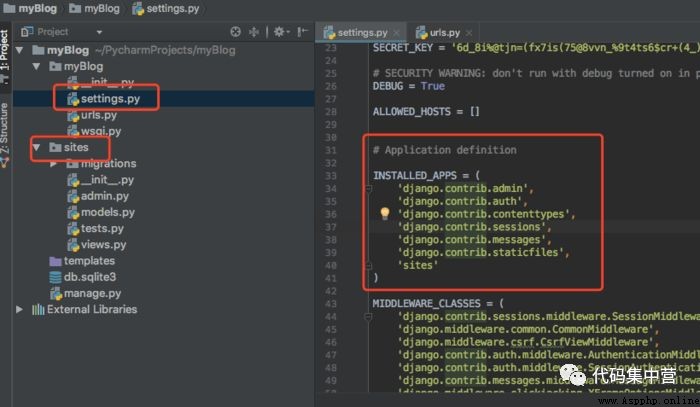
INSTALLED_APPS This parameter is the installation myBlog All used in this project Application, Of course we created sites Also a Application, Add in everything , The following are the frameworks of the system , Default installation
django.contrib.admin —— Manage site
django.contrib.auth —— Authentication system
django.contrib.contenttypes —— Framework for content types
django.contrib.sessions —— Conversational framework
django.contrib.messages —— Message frame
django.contrib.staticfiles —— Manage static file framework
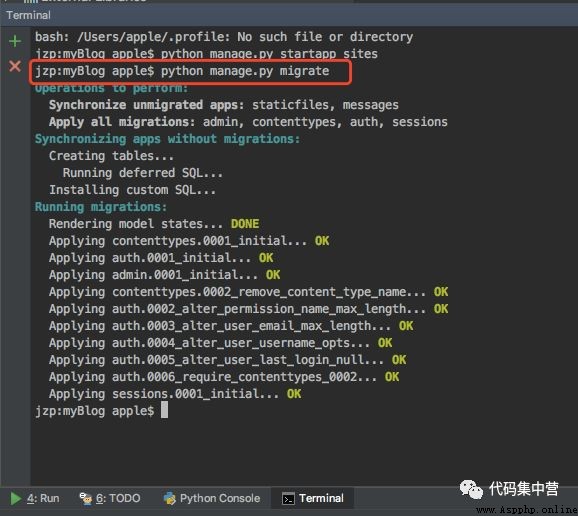
After adding sites To INSTALLED_APPS After that, you need to execute the following terminal commands , migrate Will view INSTALLED_APPS Set up , And according to myBlog/settings.py The database settings in the file create any necessary database tables
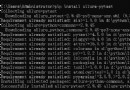
Terminal command :python manage.py migrate
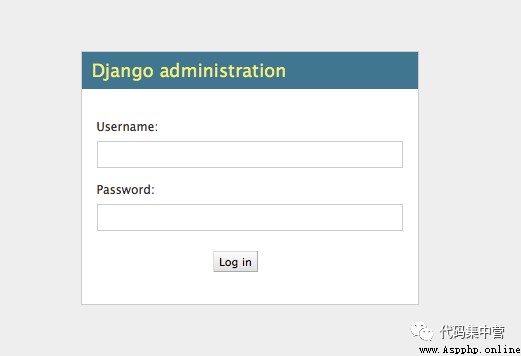
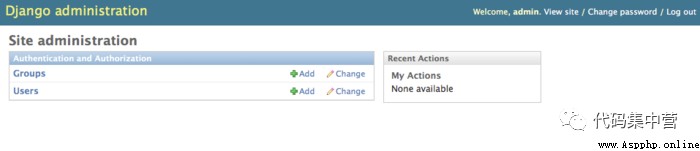
after , Let's run the project , Input http://127.0.0.1:8000/admin Take a look at the effect
3、 ... and 、 Database background construction
By the time the landing page is almost half finished , Next, you need to create an administrator account to log in ,
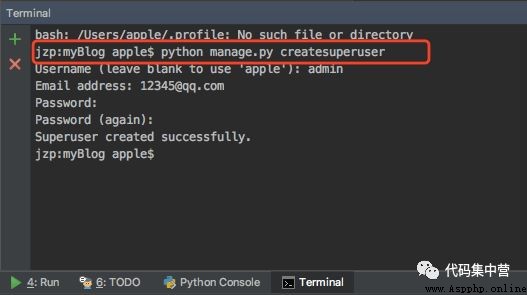
Terminal command :python manage.py createsuperuser
After creating the account, you can log in , The effect is as follows
3. Because it's all in English , You can't stand the code , I want to change it into Chinese settings.py Lieutenant general LANGUAGE_CODE Medium 'en-us' Change to 'zh-Hans', Does this look much more comfortable

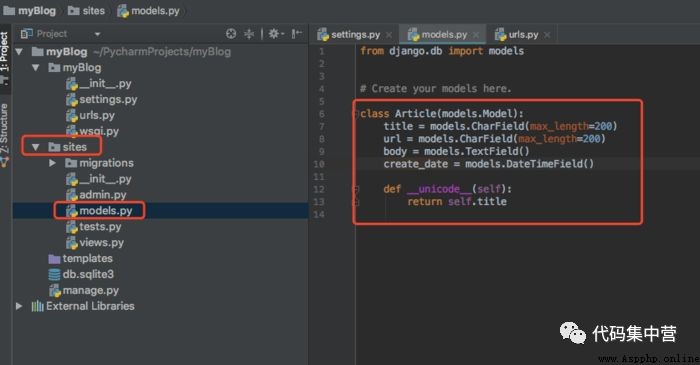
Four 、 Create a database model
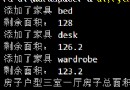
stay sites Medium models Create a model of a database table , Here's the picture , Field has title、url、body、create_date
5、 ... and 、 Activate the model
This step is crucial , Every time you modify model The data in it , The following steps should be performed from the beginning :
stay myBolg/settings.py in , modify INSTALLED_APPS, Import the Application, We have only one sites, It has been quoted , So there is no need to quote
Execute terminal commands :
python manage.py makemigrations
python manage.py migrate
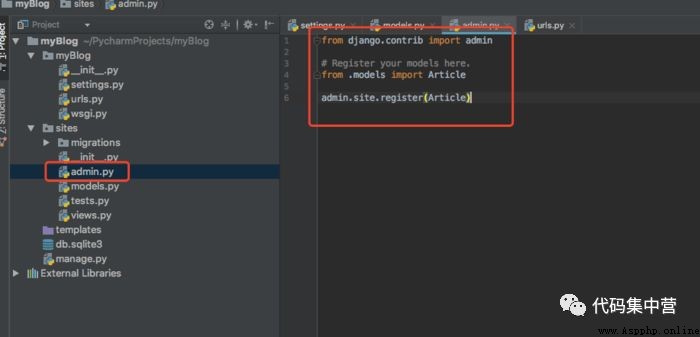
take model Add to sites/admin.py in
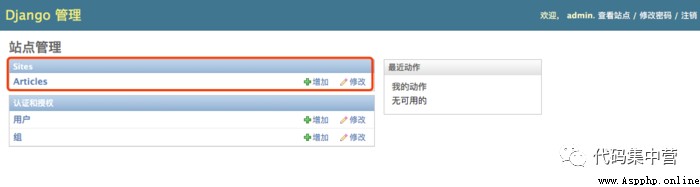
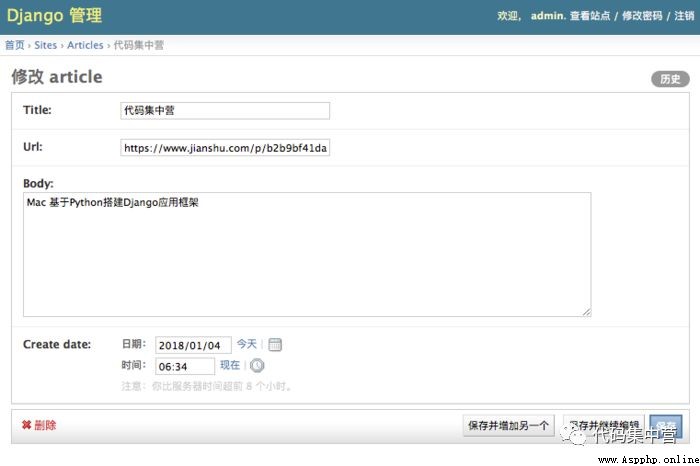
Run the project , Open the management interface , See the effect , Then you can add it at will Article Content http://127.0.0.1:8000/admin

6、 ... and 、 Pit summary
UnicodeEncodeError: 'ascii' codec can't encode characters
Previous model model There's a way in def str(self): This is the method used in the old version ,Django The new version should be changed to def unicode(self):, This solves the problem of string passing errors , The unified code is Unicode character string .
OperationalError no such table / OperationalError table sites_article has no column named test
This is a kind of mistake , That's what I reminded you , We add model Or modify models.py After the code inside , Step 5 needs to be performed again , The function of step 5 is to update the information of the database table , For example, you add model A field in , Database table not updated , Naturally, the above mistakes will be reported
resolvent : Run the terminal command in step 5
python manage.py makemigrations
python manage.py migrate