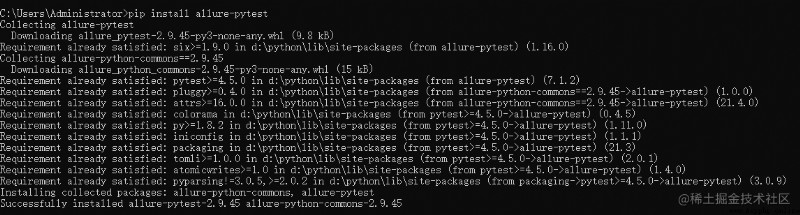
Third party Library , Need to install :pip install allure-pytest perhaps easy_install allure-pytest
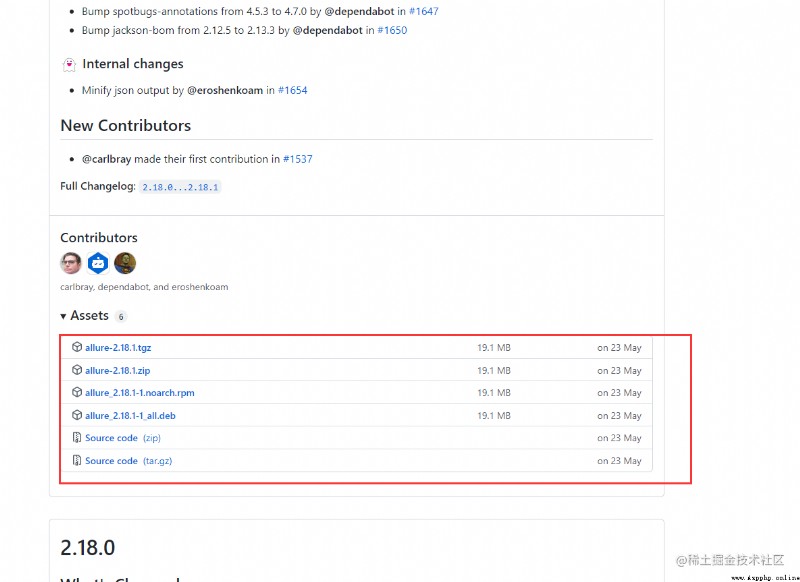
download allure Command tool : Releases · allure-framework/allure2 · GitHub
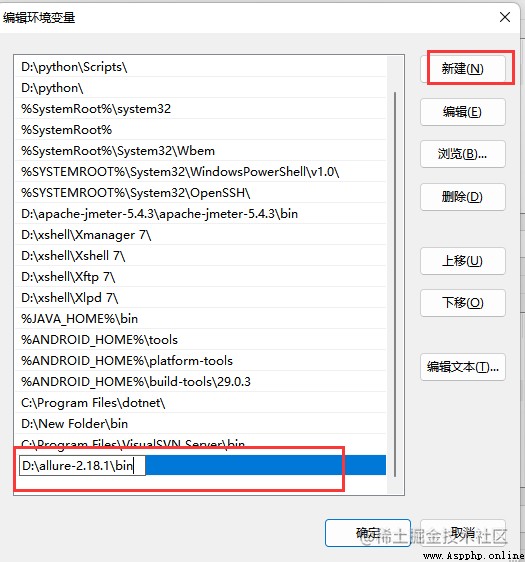
Configure environment variables path: — Destination call allure
path Add allure The installation directory /bin
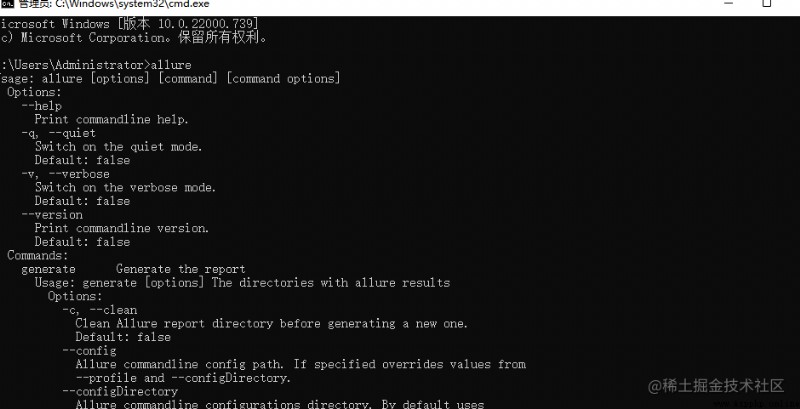
cmd command path
verification :
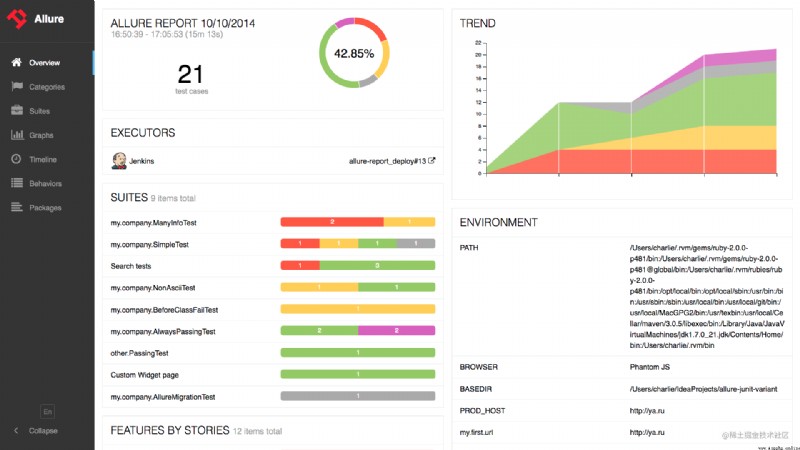
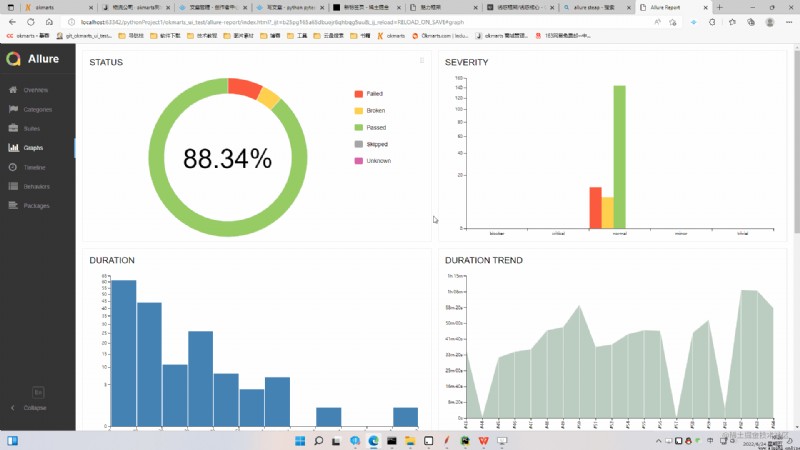
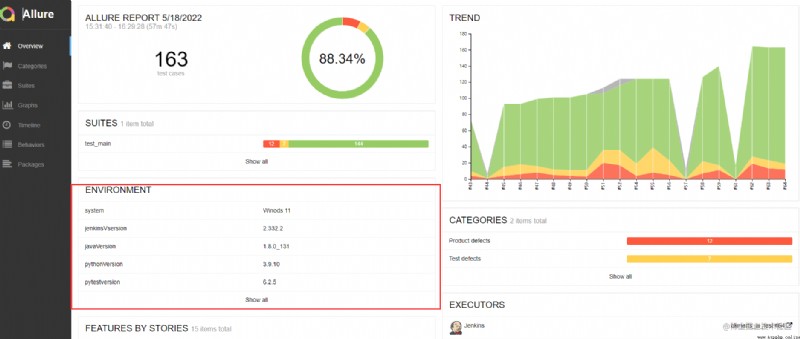
“ summary ” The page contains multiple default widgets , These widgets represent the basic characteristics of the project and test environment .
Home widgets are draggable and configurable . Besides ,Allure Support its own plug-in system , So you can make a completely different widget layout .
The navigation bar is collapsible , It can be used to switch to multiple basic result overview modes .
“ Category ” The tab can also create a method of customizing defect classification to apply test results .
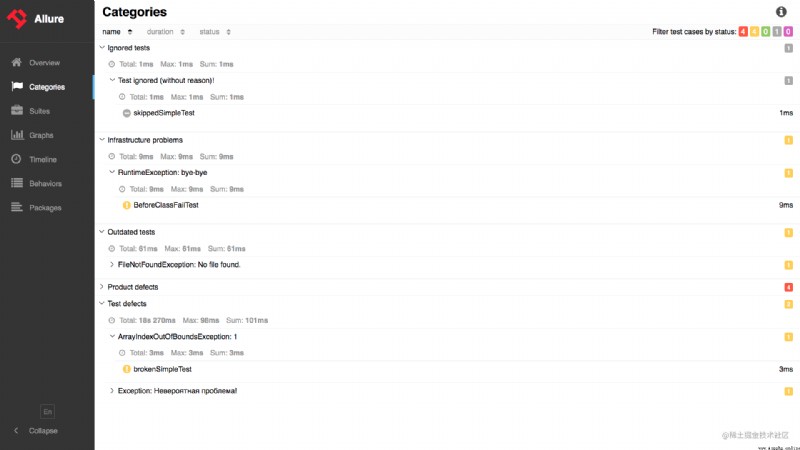
By default , There are two types of defects :
To create a custom defect classification , Please send categories.json Add files to directory allure-results/categories.json in .
categories.json The contents of the document :
[
{
"name": "Ignored tests",
"matchedStatuses": ["skipped"]
},
{
"name": "Infrastructure problems",
"matchedStatuses": ["broken", "failed"],
"messageRegex": ".*bye-bye.*"
},
{
"name": "Outdated tests",
"matchedStatuses": ["broken"],
"traceRegex": ".*FileNotFoundException.*"
},
{
"name": "Product defects",
"matchedStatuses": ["failed"]
},
{
"name": "Test defects",
"matchedStatuses": ["broken"]
}
]
["failed", "broken", "passed", "skipped", "unknown"]messageRegex( Optional ) Regular expression patterns , Used to check test error messages . default ".*"traceRegex( Optional ) Regular expression pattern for checking stack trace . default ".*"If the status of the test result is in the list , And the error message and stack trace match the pattern , Then the test result belongs to this category .
categories.json Files can be stored in Test resource directory in , In case of using allure-maven or allure-gradle plug-in unit .
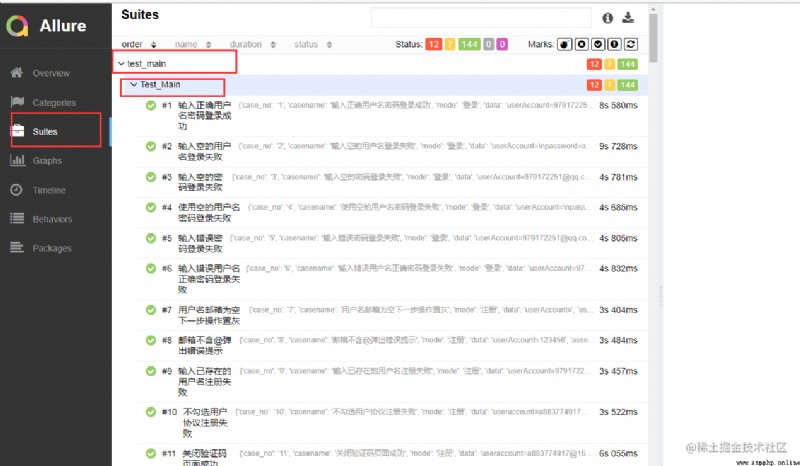
stay “ Kit ” On the tab , You can find the standard structural representation of the executed test , Group by suite and class . Simply put, it shows the original structure , Don't show allure label
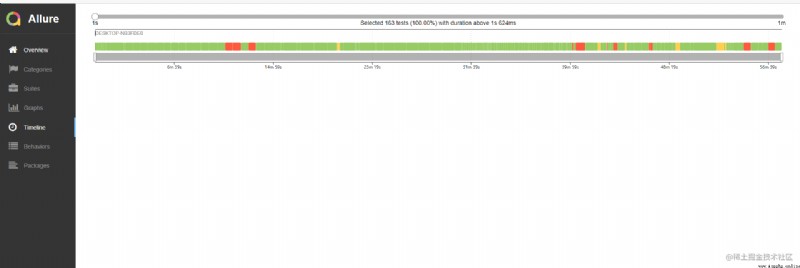
Timeline tab visual test execution Review ,allure The adapter collects the precise timing of the test , On this tab , They are arranged according to their sequence or parallel timing structure .
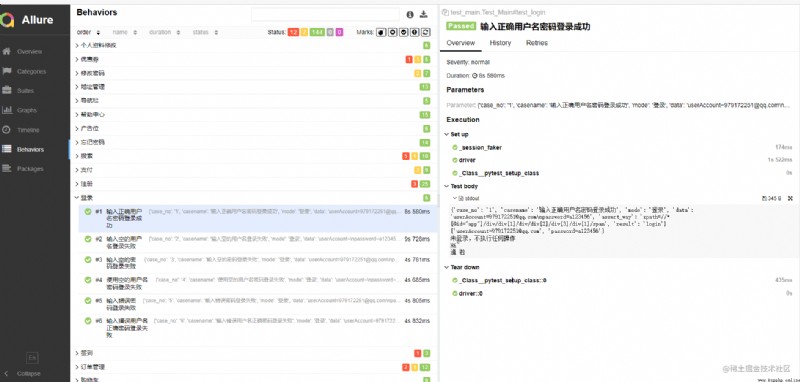
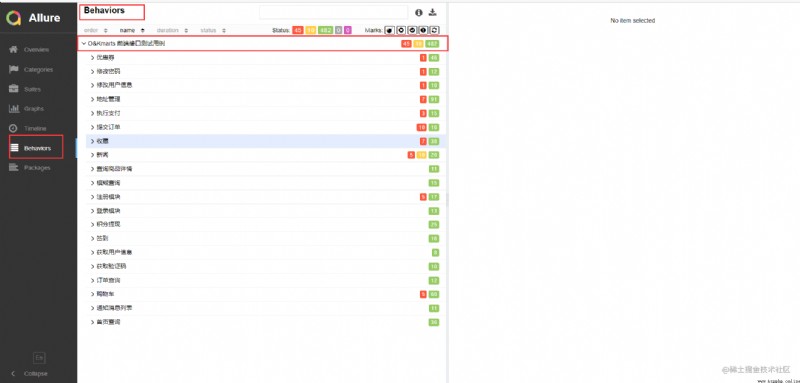
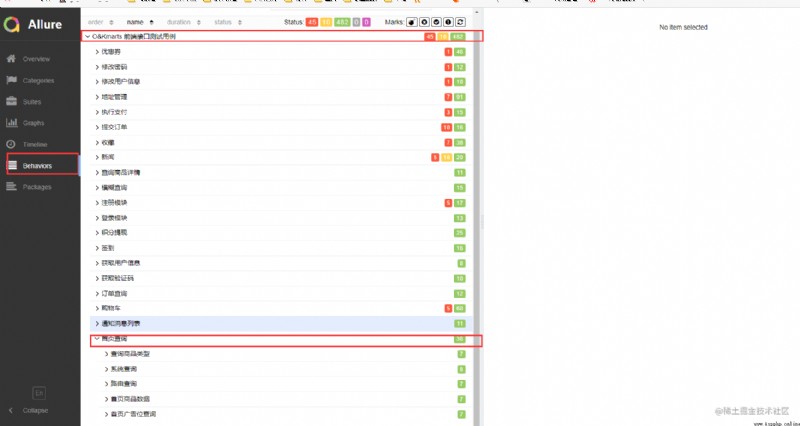
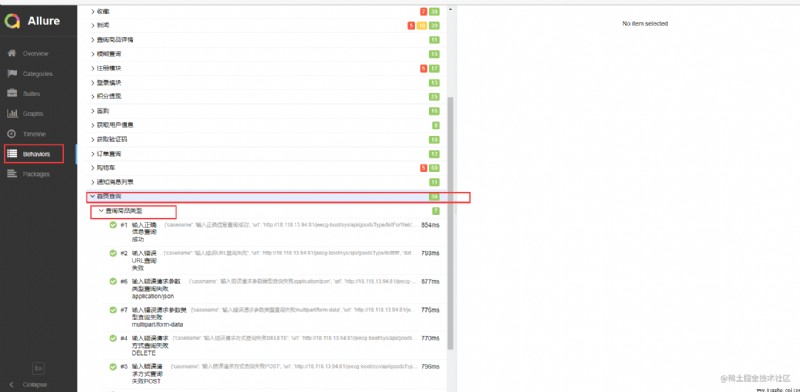
For the behavior driven approach , This tab is based on Epic、Feature and Story Tags group test results .
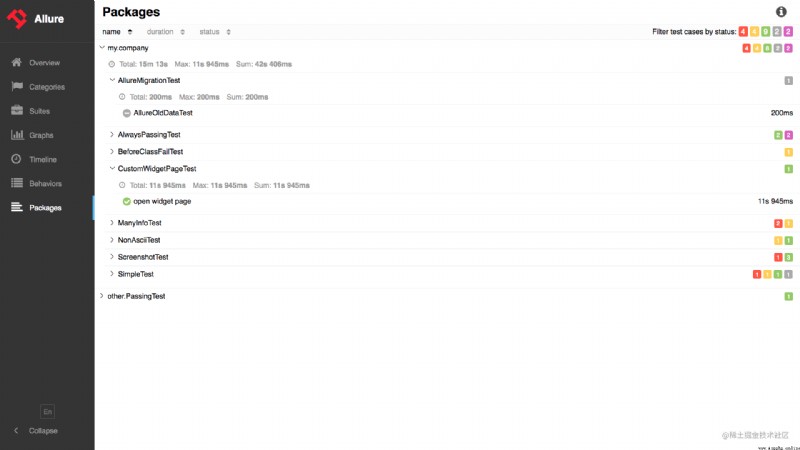
“ package ” The tab represents the tree layout of the test results , Group by different packages .
Mode one : Run in the script run directory
1 、 Execute use cases to generate test data pytest.main(['-s','[ The test file .py]','--alluredir','./allure-result'])
2、 Generate test reports os.system('allure generate ./allure-result -0 ./reports')

Mode two : On the command line or pycharm Run in terminal
1、 Generate json file
pytest Script name --alluredir ./report
perhaps
pytest --alluredir= Specify the path ( Appoint allure Report data generation path )
2、 take json The file is converted to HTML page
allure serve report
perhaps
allure generate [json File address ] -o [ Report address ] --clean
3、 ... and : A way I'm using myself :
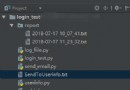
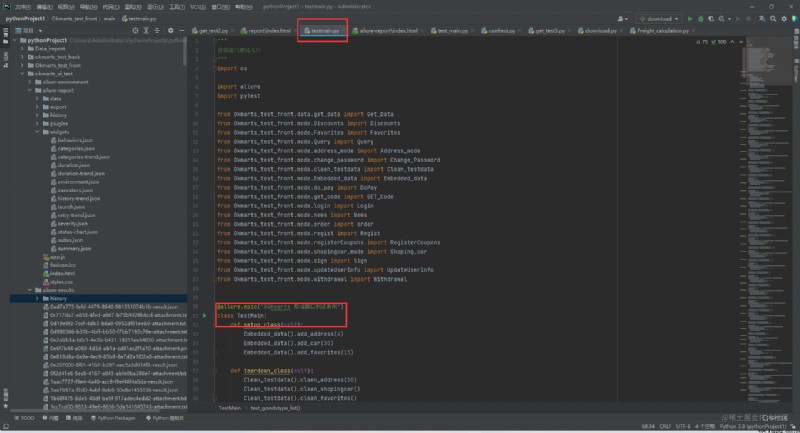
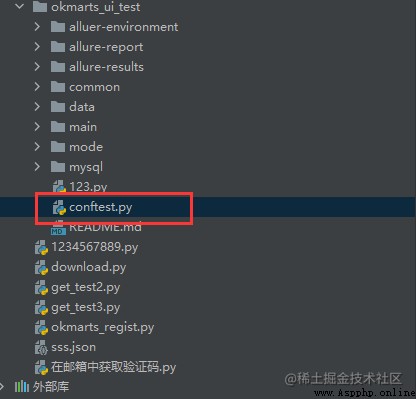
This is a diagram of my architecture ,main Is the script entry ,common It's a public package , I am here common There is a method to use OS Module to start ,
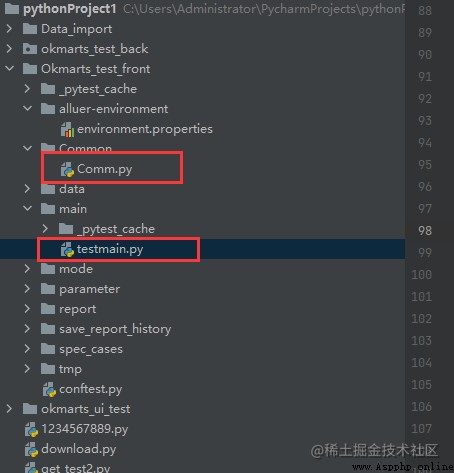
Why should we do this ?
Because I found out in main Run the command of mode 1 in the entry , It's called pytest The test framework , It's not allure-pytest The test framework , So I just started the script , Program that generates report is not executed , It's too troublesome to run through the command line , I set the environment file , Set the configuration of the history file , Every time you generate a script, you need to call , Insert into the test data file , need 4 More than lines of code can be executed , So I created this method , It is equivalent to one click start .
remarks :tmp by Test data generation Directory , report Generate directories for test reports
1、2、3、4 Step needs to be run every time , step 5 It depends , If you want to Others can visit your allure The report You can turn on
The script content :
def get_report(self):
# 1 、 Generate json file
print(" Generating JSON file ".center(76, '-'))
cmd = r"pytest C:\Users\admin\PycharmProjects\pythonProject\Okmarts_test_front\main\testmain.py " \
r"--alluredir=C:\Users\admin\PycharmProjects\pythonProject\Okmarts_test_front\tmp --clean-alluredir "
os.system(cmd)
print(" Copying configuration information file ".center(76, '-'))
# 2、 Copy the configuration file to json In file
cmd1 = r'copy C:\Users\admin\PycharmProjects\pythonProject\Okmarts_test_front\alluer-environment\environment.properties' \
r' C:\Users\admin\PycharmProjects\pythonProject\Okmarts_test_front\tmp\environment.properties '
os.system(cmd1)
print(" Generating report ".center(76, '-'))
# 3、 Generate a report
cmd2 = r"allure generate C:\Users\admin\PycharmProjects\pythonProject\Okmarts_test_front\tmp -o " \
r"C:\Users\admin\PycharmProjects\pythonProject\Okmarts_test_front\report --clean "
os.system(cmd2)
print(" Report generation completed !!!!".center(76, '-'))
# 4、 Replace history file
print(" Generating historical trend file ".center(76, '-'))
Get_History().get_history()
# 5、 Open port for report , Share view
# print(' Opening port , Share Report ')
# cmd3 = r'allure open -h 192.168.81.102 -p 8885 C:\Users\admin\PycharmProjects\pythonProject\Okmarts_test_front\reports'
# os.system(cmd3)
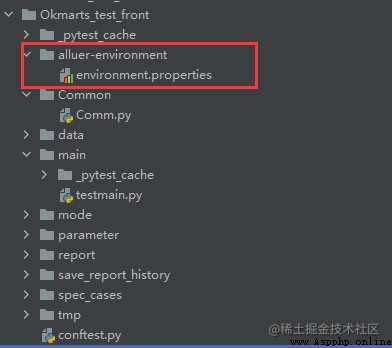
To add information to the environment widget , Just create... Before generating the report ( or ) File to allure-results directory .
1、 Create a separate test environment file environment.properties, Don't put it on allure In the report , Because the report may be brought every time it runs clean Parameters will be deleted , Generally, it is placed in one place alone , for example :
The contents of the document can be written casually Keys and values can be connected by an equal sign
example :
SystemVersion = Windows 11
javaVersion = 1.8.0_131
pythonVersion=3.9.10
pytestversion=6.2.5
allureVersion=2.17.2
pyVersion =1.11.0
pluggyVersion=1.0.0
pycharmVersion = PyCharm 2021.2.1 (Professional Edition)
Browser = Microsoft Edge
rootdir=C:/Users/admin/PycharmProjects/pythonProject/okmarts_test_front
plugins = allure-pytest-2.9.45
2、 Copy the file to... Before generating the report json File generation directory Generally speaking allure-results What I use here is tmp Folder
# Output report
def get_report(self):
# 1 、 Generate json file
print(" Generating JSON file ".center(76, '-'))
cmd = r"pytest C:\Users\admin\PycharmProjects\pythonProject\Okmarts_test_front\main\testmain.py " \
r"--alluredir=C:\Users\admin\PycharmProjects\pythonProject\Okmarts_test_front\tmp --clean-alluredir "
os.system(cmd)
print(" Copying configuration information file ".center(76, '-'))
# 2、 Copy the configuration file to json In file
cmd1 = r'copy C:\Users\admin\PycharmProjects\pythonProject\Okmarts_test_front\alluer-environment\environment.properties' \
r' C:\Users\admin\PycharmProjects\pythonProject\Okmarts_test_front\tmp\environment.properties '
os.system(cmd1)
print(" Generating report ".center(76, '-'))
# 3、 Generate a report
cmd2 = r"allure generate C:\Users\admin\PycharmProjects\pythonProject\Okmarts_test_front\tmp -o " \
r"C:\Users\admin\PycharmProjects\pythonProject\Okmarts_test_front\report --clean "
os.system(cmd2)
print(" Report generation completed !!!!".center(76, '-'))
3、 function allure generate Test data generation Directory (json file ) Generate report Directory give the result as follows
stay JENKINS Run in allure The trend file may be generated automatically , However, if you run locally, the historical trend file may not be automatically generated , Here is a method to manually generate historical trend files or save historical test data :
1、 Create a directory to store historical trend files 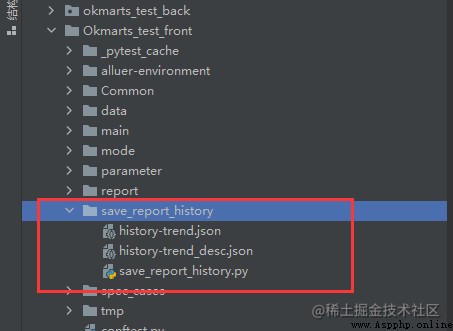
2、 Create a file that saves historical trends py file , The contents of the document :
Be careful : This script needs to run the Completion Script , Run after generating the test report
# -*- coding: UTF-8 -*-
"""
Save the history of each test
Used to generate trend charts
Design thinking : First, judge whether there is a historical test record file in the current folder
If there is --- It is not the first time to test , Then the operation to be done is 1、 Read historical test data Use a variable to save ,
2、 Read the latest test report data , Save with another variable ,
3、 Use for loop Get every data , Add the data obtained each time to the old history ,
4、 Overwrite the old data after adding new data into the history file ,
5、 Copy the file to the report file
If it doesn't exist --- It is the first time to perform the test , The specific operation steps are : Copy the test report file to the history file As the first record
"""
import os
import json
class Get_History:
def get_history(self):
# First determine whether it is the first generation ( If there is no history-trend.json This is the first time )
if os.path.exists(
r"C:\Users\admin\PycharmProjects\pythonProject\Okmarts_test_front\save_report_history\history-trend.json"):
print(' File exists ')
# If there are files , Then read the existing file , Add the newly generated file to the existing file , Then copy the processed files to the report directory
# open json File access data
f = open(r"C:\Users\admin\PycharmProjects\pythonProject\Okmarts_test_front\save_report_history\history-trend.json")
old_history_list = json.load(f)
# print(f' old json File for {old_history_list}')
# Get the newly generated history File data
f1 = open(r"C:\Users\admin\PycharmProjects\pythonProject\Okmarts_test_front\report\history\history-trend.json")
new_history_list = json.load(f1)
# print(f' new json File for {new_history_list}')
# Traverse the new history file , Document processing , Add to the old file in turn
for i in new_history_list:
# print(i)
old_history_list.append(i)
# Overwrite the written data into the saved historical data file
with open(r"C:\Users\admin\PycharmProjects\pythonProject\Okmarts_test_front\save_report_history\history-trend.json","w") as f:
json.dump(old_history_list, f)
s = open(r'C:\Users\admin\PycharmProjects\pythonProject\Okmarts_test_front\save_report_history\history-trend.json')
total_history_data = json.load(s)[::-1] # Get the total historical file in reverse order
filename = r'C:\Users\admin\PycharmProjects\pythonProject\Okmarts_test_front\save_report_history\history-trend_desc.json' # Specify a file name to create an inverted file
with open(filename,'w') as f :
json.dump(total_history_data,f)
# Copy the flashback file written to the report file
cmd = rf'copy {filename} C:\Users\admin\PycharmProjects\pythonProject\Okmarts_test_front\report\widgets\history-trend.json'
os.system(cmd)
else:
print(" Test for the first time ?")
if os.path.exists(r'C:\Users\admin\PycharmProjects\pythonProject\Okmarts_test_front\report\widgets\history-trend.json'):
print(' Get the latest data for the first edition , Copy files from the report directory to the historical file save directory ')
cmd = r'copy C:\Users\admin\PycharmProjects\pythonProject\Okmarts_test_front\report\widgets\history-trend.json C:\Users\admin\PycharmProjects\pythonProject\Okmarts_test_front\save_report_history\history-trend.json'
os.system(cmd)
else :
print(' The relevant test record file was not found , Please perform the test first ')
if __name__ == '__main__':
a = Get_History()
a.get_history()
allure open -h [ip Address ] -p [ Port number ] [ Report address ]
establish conftest.py file , Write the following
The contents of the document :
@pytest.hookimpl(tryfirst=True, hookwrapper=True)
def pytest_runtest_makereport(item, call):
"""
The hook function that gets the state of each use case
:param item:
:param call:
:return:
"""
# Get the call result of hook method
outcome = yield
rep = outcome.get_result()
# Just get the use cases call The result of execution is a failure , It doesn't contain setup/teardown
if rep.when == "call" and rep.failed:
# add to allure Report screenshots
if hasattr(_driver, "get_screenshot_as_png"):
with allure.step(' Add failed screenshot ...'):
allure.attach(_driver.get_screenshot_as_png(), " Screenshot of failure ", allure.attachment_type.PNG)
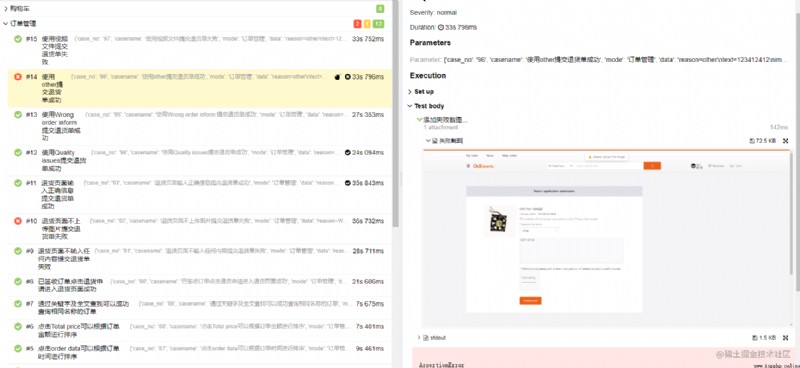
Realization effect :
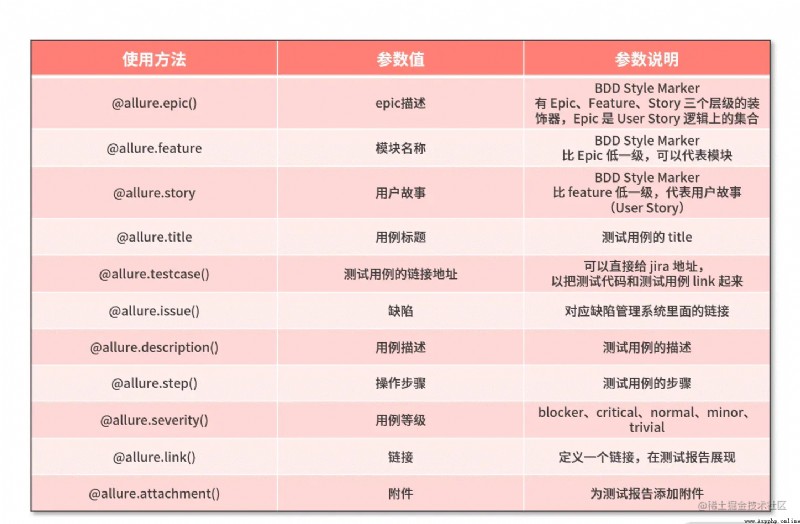
Set some labels for the report : Test object name 、 Test module name 、 User story name 、 Use case step name 、 Set the defect severity corresponding to the test case
@allure.epic(‘ Test object , Test set name ’)
Under the general categories commonly used for testing , It is similar to the headline of an article
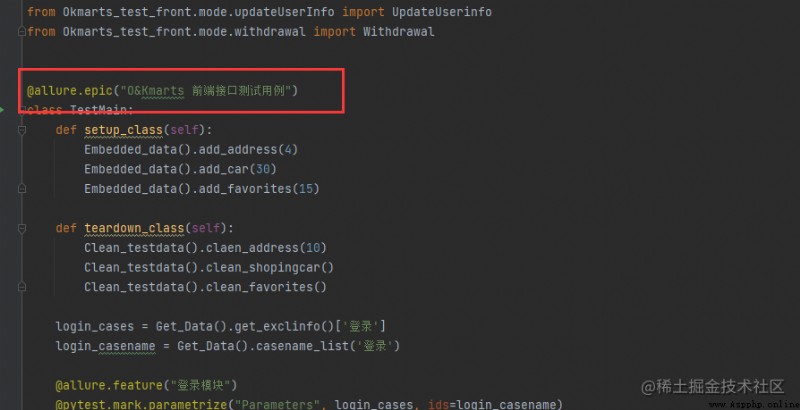
The position shown in the report :
@allure.feature(‘ Test module ’)
Equivalent to secondary classification
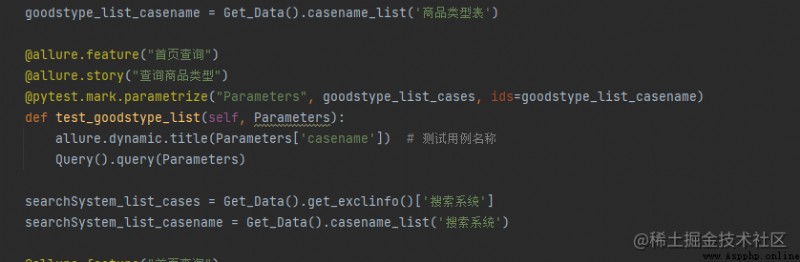
The position shown in the report :
@allure.story(‘ A user story - Use cases ’)
Three levels of classification , It is also the last level ,allure There are only three levels of classification
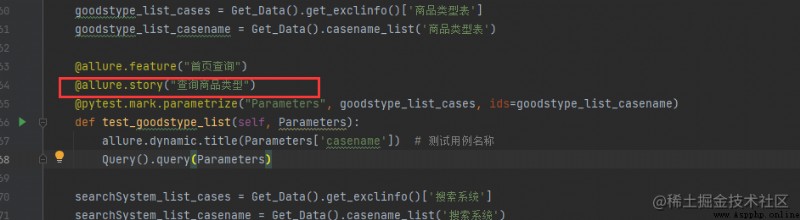
Show location :
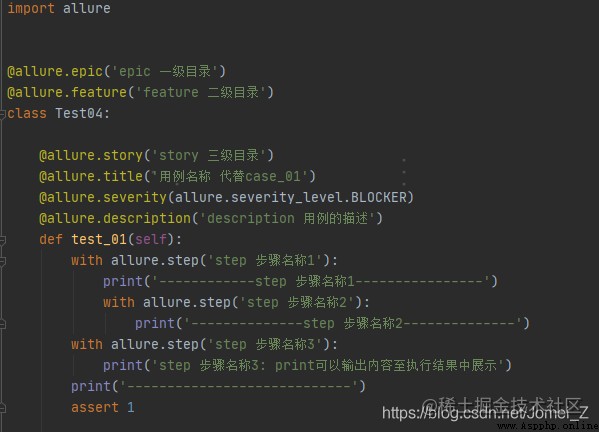
@allure.step(‘ Use case step ’)
@allure.severity(‘ Severity level ’)
@allure.description(‘ describe ’)
@allure.attach(‘ Add attachments - picture , Data sheets, etc , Give address ’)
with allure.step(‘ testing procedure ’):