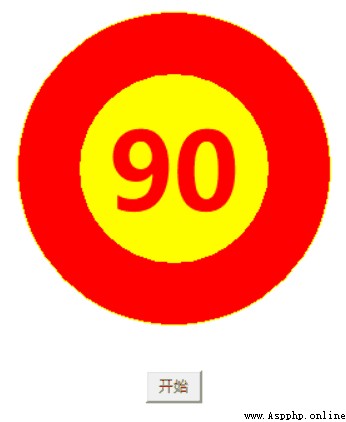
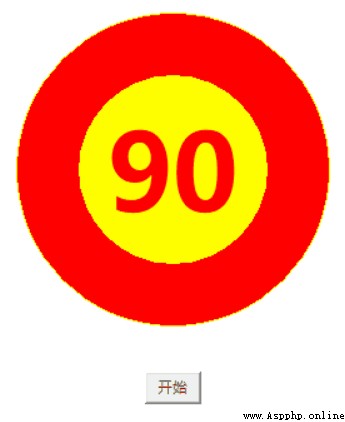
Today, I will explain how to use python Self contained tkinter modular , How to make the countdown effect in the figure below .
We use tkinter In the module Canvas Canvas component to complete the countdown .
Disassemble the final finished drawing , You can see , Except that the button is used as the start countdown , The round progress bar used to indicate the countdown can be disassembled into the following four components :
1. Yellow outer circle ( One is filled with blank , Circle with yellow border )
2. Red fan ( The core of the progress bar , Change the angle of the fan with the countdown )
3. Yellow concentric circles ( Used to cover the inside of the fan , Shows the effect of wrapping around the progress bar )
4. The words in the middle ( Countdown per second , Change with the sector )

therefore , It's not hard , Let's do it separately :
Canvas The function to draw a circle is create_oval. So draw the yellow outer circle , And the little yellow concentric circles inside , You can use this function . The way to do it is :
# Draw a yellow outer circle
cv.create_oval(100,50,350,300,outline='yellow')
# Draw small concentric circles in yellow
cv.create_oval(150,100,300,250,fill='yellow',outline='yellow')
The parameters are also relatively simple , The first four numbers represent the upper left corner of the square occupied by the circle (x1 and y1) And the lower right corner (x2 and y2) Coordinates of . Of course, this square just shows the position , There is no square border or content .
trailing fill Indicates the color of the fill , If you don't write this parameter , It means a hollow circle .outline Represents the color of the outer border , We all use yellow here yellow. There are other parameters , such as width, It can indicate the thickness of the outer border , The default is 1, We didn't specify it here .
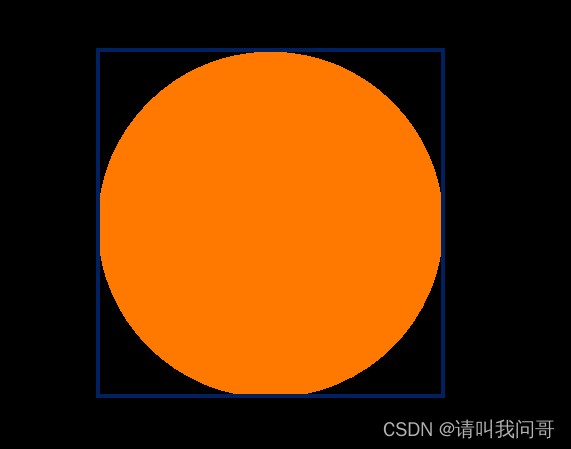
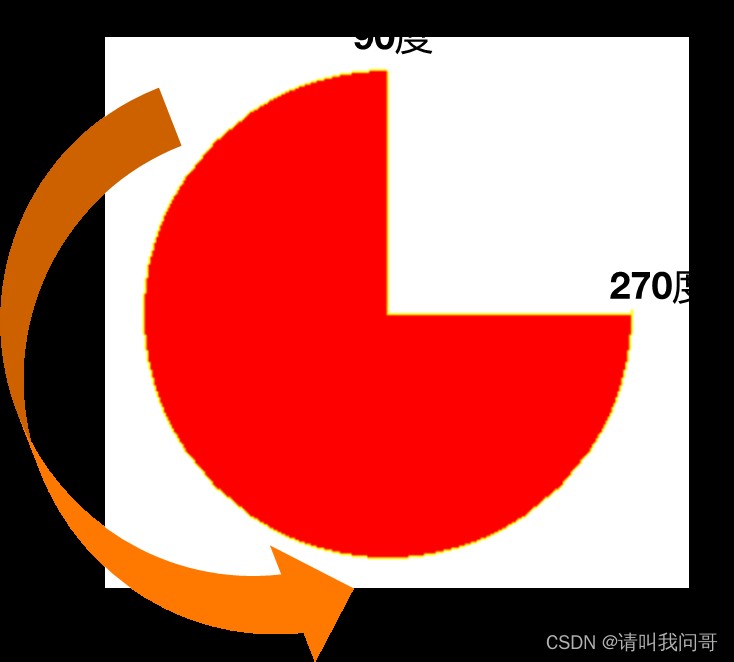
Then draw the fan .Canvas Drawing fan ( arc ) The function of is create_arc. For example, the following code draws a three quarter circular sector in the above example .
cv.create_arc(100,50,350,300,start=90,extent=270,fill="red",outline='yellow')The first four numbers are the same as those for drawing a circle , Represents the coordinates of the upper left and lower right corners of the square occupied by the sector .fill and outline The parameter of is the same as that of a circle , Indicates the color of the fill and the color of the outer border . The more important parameter is start and extent.
start The parameter represents the starting angle of the sector ,extent It means to start counter clockwise , How much angle to draw . therefore , here start=90,extent=270, It means that one side of the arc is vertical (90 Degrees starting angle ), The other side is horizontal to the right ( Counter clockwise rotation 270 degree )
And the last words ( Numbers ) have access to Canvas Of create_text function :
cv.create_text(225,175,text='90',font =(' Microsoft YaHei ',64,'bold'),fill='red')The first two numbers in the code represent the horizontal and vertical coordinates of the text center , This is also convenient for us , No matter how the text changes , Can always be centered . Parameters text Indicates what is displayed ,fill Indicates the color of the text ,font Indicates the font of the text 、 size 、 Thickness and other attributes .
So many components , The principle of implementation is also very simple :
Although it's very simple , But in fact, there are also a few small pits :
from tkinter import *
import tkinter.messagebox as tm
count=90
angle=360
def countdown():
global angle,count,cv_arc
btn['state']=DISABLED
if angle==360:
angle -= 4
else:
cv.delete(cv_arc)
cv_arc=cv.create_arc(100,50,350,300,start=90,extent=angle,fill="red",outline='yellow')
angle -= 4
count-=1
cv.create_oval(150,100,300,250,fill='yellow',outline='yellow')
cv.create_text(225,175,text=count,font =(' Microsoft YaHei ',64,'bold'),fill='red')
if count==0:
tm.showinfo(message=' The countdown is over !')
angle = 360
cv.delete(cv_arc)
cv_arc=cv.create_oval(100,50,350,300,fill='red',outline='yellow')
count=90
cv.create_oval(150,100,300,250,fill='yellow',outline='yellow')
cv.create_text(225,175,text=count,font =(' Microsoft YaHei ',64,'bold'),fill='red')
btn['state']=NORMAL
else:
root.after(1000,countdown)
root = Tk()
root.geometry('450x450')
root.resizable(0,0)
root.title(' count down ')
cv = Canvas(root,width=450,height=450,bg='white')
btn = Button(root,text=' Start ',width=5,command=countdown)
cv_btn = cv.create_window(225,350,window=btn)
cv.create_oval(100,50,350,300,outline='yellow')
cv_arc=cv.create_oval(100,50,350,300,fill='red',outline='yellow')
cv.create_oval(150,100,300,250,fill='yellow',outline='yellow')
cv.create_text(225,175,text=90,font =(' Microsoft YaHei ',64,'bold'),fill='red')
cv.pack()
root.mainloop()Of course , count down 90 Seconds is just an example , Whatever you like , You can count down any time . But here's the thing , The angle change of the sector every second should also be adjusted according to the countdown number . Like the countdown 90 seconds , Every second it decreases 360/90=4 degree , If the countdown 60 second , Then it decreases every second 360/60=6 degree , count down 120 Second is 360/120=3 degree , And so on .
Of course , Color and location 、 Can vary in size ( Brother Wen also thinks that the large plate of scrambled eggs with tomatoes is a little scary , But the main melody , Do you know :D), Just pay attention to the sequence , Just don't be blocked by the newly drawn fan .
Last , You can also think about , If the number you want to count down does not change at the same time as the outside sector , How to implement . This effect is similar to the following , The change of the sector is smoother :
It's not hard , Just make a small change to the existing code , Let's use our brains to think about it .:D