Last blog post Twenty thousand word blog posts teach you python Reptiles requests library 【 Detailed explanation 】 By many reptile lovers / Little friends who want to learn reptiles read , My friends all said that the tuition fee had been paid , But there are many students' private letters that I do some requests to use urllib library Implemented crawler project , Cerebral melon seed pain ~
( wry smile ) Programming ape world :“ It is better to teach fish than to teach fish ,” So the blogger worked overtime all night , Work hard to make this article , Let me give you an in-depth and comprehensive explanation Python Request URL Connect to the official standard library ——urllib Libraries and urllib3 library !”
Digression —— If you want to systematically learn the technology of reptile , So it is suggested that this article is the first crawler library you must master on your way to crawling !( This article is the essential knowledge for a pit crawler —— A ten thousand word blog post takes you into the pit, the reptile is a no return road 【 Ten thousand words and pictures 】)
The key! ! The key! !!
I believe many friends have passed my Last post The tuition fee is completely requests library , And this article explains urllib Library is Python Built in HTTP Request Library , In other words, it can be used without additional installation ( Take it and use it , How cool !), It is also a must for reptiles ~
Jump straight to the end ——> Receive exclusive fan benefits
️
A small talk :
urllib yes Python Request url Connect to the official standard library , stay Python2 It is mainly urllib and urllib2, stay Python3 In the whole synthesis of urllib.
and urllib3 The connection pool and other functions are added , Both have complementary parts .
Let's take a look first urllib library .
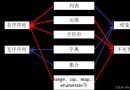
brief introduction :urllib library ( Official documents !), yes Python Built in HTTP Request Library ( It can be used without additional installation ~), It includes the following 4 A module :
1.request: It's fundamental HTTP Request module , Can be used to simulate sending requests . It's like entering the URL in the browser and then entering ,
Just pass... To the library method URL And additional parameters , You can simulate this process .
2.error: Exception handling module , If there is a request error , We can catch these anomalies , Then try again or other operations to ensure that the program
Will not end unexpectedly .
3.parse: A tool module , Provides a variety of URL processing method . such as : Split , analysis , Merger, etc .
4.robotparser: It is mainly used to identify the website robots.txt file , Then determine which websites can climb , Which websites are not allowed to climb ,
In fact, it is rarely used !
request The module is mainly responsible for constructing and initiating network requests , And add Headers,Proxy etc. , We can easily send the request and get the response .
It can simulate the request initiation process of the browser .
Small expansion —— Use a proxy to explain :( There are written explanations in this article , You can see —— I've been learning reptiles for so long , Take a look at these reverse crawls , How many can you break ?【 Take a look at the level you have reached ~】)
urilib.request Module provides the most basic structure HTTP Requested method , It can be used to simulate a request initiation process of the browser , It also comes with processing authorization validation (authentication), Redirect (redirection), browser Cookies And more .
Little knowledge points :
import urllib.request
response = urllib.request.urlopen("http://www.baidu.com")
print(type(response))
print("*"*50)
print(response.read().decode('utf-8'))
It is easy to complete the capture of Baidu home page , Output the source code of the web page . meanwhile , We found that the response is a HTTPResponse Object of type , It mainly includes read(),readinto(),getheader(name),getheaders() Other methods , as well as msg,version,status,reason Equal attribute . for example : call read() Method can get the returned web page content ; call getheaders() Method can get the header information of the response ; call getheader(name) Method to get the... In the response header name value !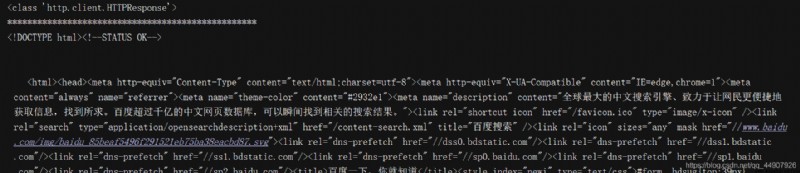
A general demonstration of the actual use of some common methods :
from urllib import request
test_url_get = "http://httpbin.org/get" # Test website
response=request.urlopen(test_url_get,timeout=10,data=None) # Yes data That is to say post request ; nothing data(None) That is to say get request
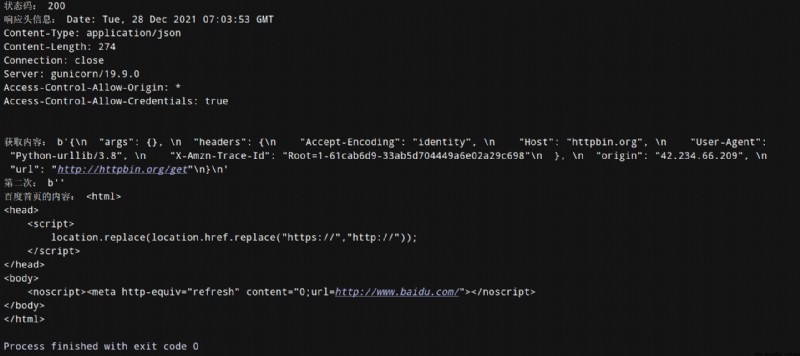
print(" Status code :",response.getcode()) # Get the status code
print(" Response header information :",response.info()) # Display response header information
print(" Get content :",response.read()) # Take out the content
# We need to pay attention to :( If you do this , The server can see at a glance that you are plotting something wrong , Not a serious client !)
# If the browser directly accesses the test website :"User-Agent": "Mozilla/5.0 (Windows NT 10.0; Win64; x64) AppleWebKit/537.36 (KHTML, like Gecko) Chrome/80.0.3987.132 Safari/537.36",
# If it's a reptile acquisition : "User-Agent": "Python-urllib/3.8"
# One small point : read Can only read once , Again read You can't get information
print(" The second time :",response.read()) # Output : The second time : b''
# Get Baidu home page
baidu_url = "http://www.baidu.com"
response_baidu = request.urlopen(baidu_url)
print(" The content of Baidu homepage :",response_baidu.read().decode())
# Source code is as follows :
def urlopen(url, data=None, timeout=socket._GLOBAL_DEFAULT_TIMEOUT,
*, cafile=None, capath=None, cadefault=False, context=None):
To see the function source code, you must look at the three corresponding features of this function :
data Parameters are optional , If you need to add this parameter , To use bytes() Method converts the parameter to the content of byte stream encoding format , namely bytes type . also , At this time, its request mode is no longer GET The way , It is POST The way ( The parameters we pass appear in form Field , Indicates that the form submission method is simulated !).
import urllib.request,urllib.parse
data = bytes(urllib.parse.urlencode({
'word':'hello'}),encoding='utf-8')
response = urllib.request.urlopen('http://httpbin.org/post', data=data)
print(response.read())
Use bytes() Method , Transcode the parameter to bytes( Byte stream ) type . The first parameter of the method needs to be str( character string ) type , Need to use urllib.parse In the module urlencode() Method to convert the parameter dictionary to a string ; The second parameter specifies the encoding format .

timeout Parameter is used to set the timeout , The unit is seconds , It means that if the request exceeds the set time , No response yet , Will throw URLError abnormal , The exception belongs to urllib.error modular , The cause of the error is timeout . If you don't specify , The global default time will be used .
place :
You can set this timeout to control a web page if it does not respond for a long time , Just skip its grab . It can take advantage of try except Statement to implement . as follows :
import socket
import urllib.request
import urllib.error
try:
response = urllib.request.urlopen('http://httpbin.org/get', timeout=0.01)
except urllib.error.URLError as e:
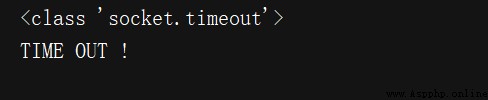
if isinstance(e.reason, socket.timeout): # The judgment exception is socket.timeout type ( Timeout exception ), Thus it is concluded that it is indeed an error due to timeout !
print('TIME OUT') # According to common sense .0.01 It's almost impossible to get a response from the server in seconds , So the output is TIME OUT Tips .
urlopen() Method can realize the initiation of the most basic request , But not enough to build a complete request . If you need to add headers Etc , We need to use more powerful Request Class to build !
The same as usual , Let's look at three features :
 Source code :
def __init__(self, url, data=None, headers={
},
origin_req_host=None, unverifiable=False,
method=None):
import urllib.request
request = urllib.request.Request('https://www.baidu.com')
response = urllib.request.urlopen(request)
print(response.read().decode('utf-8'))
Actually , I'm still using urlopen() Method to send the request , But this time the parameter of this method is no longer URL, It is a Request Object of type . By constructing this data structure , On the one hand, we can separate the request into an object , On the other hand, more flexible configuration parameters can be provided .
adopt urllib The request sent will have a default Headers: “User-Agent”:“Python-urllib/3.6”, Indicate that the request was made by urllib Sent . So I encountered some validation User-Agent The website of , We need to customize Headers Disguise yourself .
from urllib import request
img_url = "https://ss1.bdstatic.com/70cFvXSh_Q1YnxGkpoWK1HF6hhy/it/u=261409204,1345114629&fm=26&gp=0.jpg"
headers = {
"User-Agent": "Mozilla/5.0 (Windows NT 10.0; Win64; x64) AppleWebKit/537.36 (KHTML, like Gecko) Chrome/80.0.3987.132 Safari/537.36"}
req = request.Request(url=img_url,headers=headers) # structure Request object effect : When sending a request to the server ,User-Agent Change becomes what we define , Simple disguise !
# response = request.urlopen(url=img_url) # Common method
response = request.urlopen(req) # Added Hearders A more advanced method of
data = response.read()
with open("cat.jpg","wb") as f:
f.write(data)
# We can check to see if we have really changed the request header information
headers = {
"User-Agent": "Mozilla/5.0 (Windows NT 10.0; Win64; x64) AppleWebKit/537.36 (KHTML, like Gecko) Chrome/80.0.3987.132 Safari/537.36"}
test_url = "http://httpbin.org/get"
req = request.Request(url=test_url,headers=headers)
res_test = request.urlopen(req)
print(res_test.read()) # In direct use urlopen when :"User-Agent": "Python-urllib/3.8"
# But now we use Request camouflage , Now that's what we set up

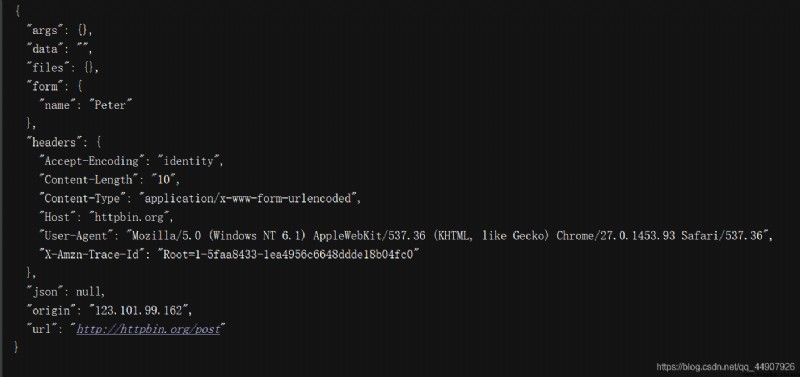
import urllib.request,urllib.parse
from fake_useragent import UserAgent
url = 'http://httpbin.org/post'
headers = {

'User-Agent':UserAgent().random
}
dict = {

'name':'Peter'
}
data = bytes(urllib.parse.urlencode(dict), encoding='utf-8')
request = urllib.request.Request(url, data=data, headers=headers, method='POST')
response = urllib.request.urlopen(request)
print(response.read().decode('utf-8'))
Although we can construct the request above , But for some more advanced operations ( such as Cookies Handle , Agent settings, etc ), What should I do ?
This requires more powerful tools Handler! In short , We can understand it as a variety of processors , There are special for login authentication , There is a deal Cookies Of , There are options for handling agent settings . Use them , We can do almost everything HTTP Everything in the request .
The first part : brief introduction !
urllib.request In the module BaseHandler Class is all the others Handler Parent class of , Provides the most basic method . The following are examples of various inheritors of this BaseHandler Class Handler Subclass :
Another important class is OpenerDirector, We call it Opener. Used before urlopen() This method , It's actually urllib One for us Opener.
We introduce Opener, It is because of the need to implement more advanced functions . Used before Request and urlopen() It is equivalent to that the class library encapsulates the extremely common request methods for you , Using them, you can complete basic requests , But now we need to go through Handler To achieve more advanced functions , You need to go deep into the next layer to configure , Use a lower level instance to complete the operation , And that's where it comes in Opener( in short : Is the use Handler To build Opener).Opener have access to open() Method , The type of return and urlopen() equally .
The second part : actual combat !
from urllib.request import HTTPPasswordMgrWithDefaultRealm,HTTPBasicAuthHandler,build_opener
from urllib.error import URLError
username = 'username'
password = 'password'
url = 'url'
p = HTTPPasswordMgrWithDefaultRealm()
p.add_password(None, url, username, password)
# First , Instantiation HTTPBasicAuthHandler object , Parameter is HTTPPasswordMgrWithDefaultRealm object , It USES add_password() Add user name and password ,
# In this way, a system for processing verification is established handler.
auth_handler = HTTPBasicAuthHandler(p)
# then , Use this Handler And use build_opener() Method to build a Opener, This Opener When the request is sent, it is equivalent to that it has been verified successfully !
opener = build_opener(auth_handler)
try:
# Last , Use Opener Of open() Method to open the link , You can complete the verification !
result = opener.open(url)
html = result.read().decode('utf-8')
except URLError as e:
print(e.reason)
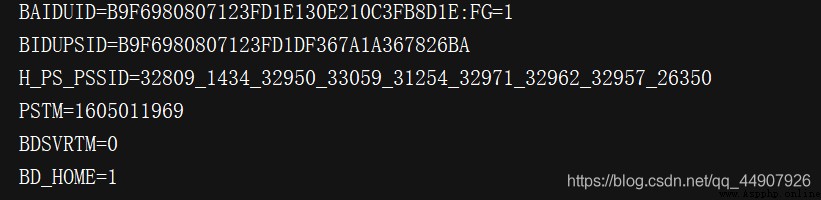
First , Get the website's Cookies.
import http.cookiejar,urllib.request
# First , Make a statement CookieJar object
cookie = http.cookiejar.CookieJar()
# then , utilize HTTPCookieProcessor Construct a Handler
handler = urllib.request.HTTPCookieProcessor(cookie)
# Last , utilize build_opener structure Opener
opener = urllib.request.build_opener(handler)
# perform open() Function !
response = opener.open('http://www.baidu.com')
for item in cookie:
print(item.name+"="+item.value)
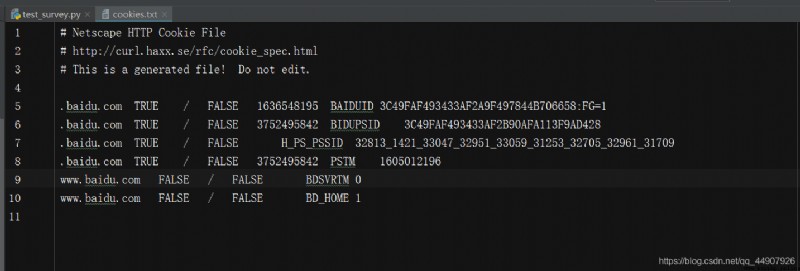
expand : Output to file format , Save as text !
import http.cookiejar,urllib.request
filename = 'cookies.txt'
# here ,CookieJar It needs to be replaced with MozillaCookieJar, It will be used when generating files , yes CookieJar Subclasses of ,
# It can be used to deal with Cookie Document related events , Such as reading and saving Cookie, Can be Cookies Save as
# Mozilla Type browser Cookie Format .
cookie = http.cookiejar.MozillaCookieJar(filename)
handler = urllib.request.HTTPCookieProcessor(cookie)
opener = urllib.request.build_opener(handler)
response = opener.open('http://www.baidu.com')
cookie.save(ignore_discard=True, ignore_expires=True)
“
If instead
cookie = http.cookiejar.LWPCookirJar(filename)
Then it will be saved as libwww-perl(LWP) Format Cookies file !
”
that , Generated Cookies After the document , How to read and use from the file ?( With LWPCookieJar Format as an example )
import http.cookiejar,urllib.request
cookie = http.cookiejar.LWPCookieJar()
# call load() Method to read the local Cookies file , Got it Cookies The content of ( Note that the premise must be generated and saved ), And get Cookies Then build it the same way Handler and Opener that will do !
cookie.load('cookies.txt', ignore_expires=True, ignore_discard=True)
handler = urllib.request.HTTPCookieProcessor(cookie)
opener = urllib.request.build_opener(handler)
response = opener.open('http://www.baidu.com')
print(response.read().decode('utf-8'))
When running the crawler , Often there will be sealed IP The situation of , This is what we need to use ip Agent to handle ,urllib Of IP The proxy settings are as follows :
from urllib import request
url = "http://httpbin.org/ip"
# Agency address
proxy = {
"http":" domain name : Port number "}
# Proxy processor
proxies = request.ProxyHandler(proxy)
# establish openner object
openner = request.build_opener(proxies)
res = openner.open(url)
print(res.read().decode())
error The module is mainly responsible for handling exceptions , If an error occurs in the request , We can use error Module processing .
It mainly includes URLError and HTTPError
URLError Class from urllib Library error modular , It is inherited from OSError class , yes error Exception module base class , from request Any exception generated by a module can be handled by capturing this class .( attribute reason: Return the cause of the error .)
from urllib import request,error
try:
response = request.urlopen('http://www.baidu.com/peter')
except error.URLError as e:
print(e.reason)
We open a page that doesn't exist , Should have reported an error , But we caught this URLError abnormal .
It is URLError Subclasses of , Used exclusively to deal with HTTP Request error , For example, authentication request fails . It has the following three properties :
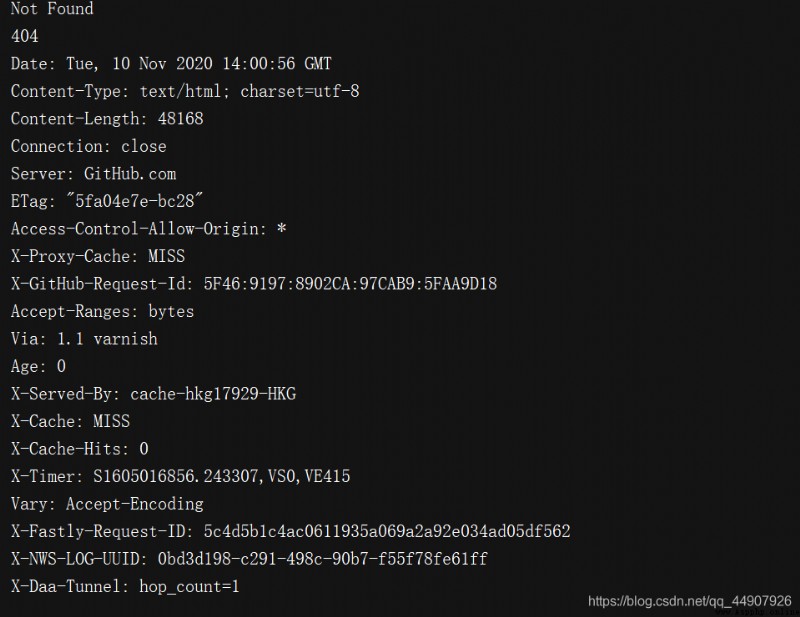
because URLError yes HTTPError Parent class of , So you can choose to catch the errors of the subclass first , If not HTTPError abnormal , Then catch the errors of the parent class :
from urllib import request,error
try:
response = request.urlopen('http://cuiqingcai.com/index.htm')
except error.HTTPError as e:
print(e.reason, e.code, e.headers, sep='\n')
except error.URLError as e:
print(e.reason)
else:
print('Request Successfully')
expand : Be careful ! occasionally reason Property does not necessarily return a string , It could also be an object , The following example :
from urllib import request,error
import socket
try:
response = request.urlopen('http://www.baidu.com', timeout=0.01)
except error.URLError as e:
print(type(e.reason))
if isinstance(e.reason, socket.timeout):
print('TIME OUT !')
urllib Kuri also provided parse modular ( Is a tool module ), It defines processing URL Standard interface for , for example : Realization URL The extraction of each part 、 Merge and link conversion .
This method can realize URL Identification and segmentation of .
from urllib.parse import urlparse
result = urlparse('http://www.baidu.com/index.html;user?id=5#comment')
print(type(result), result)

The result returned is a ParseResult Object of type ,urlparse() Method splits it into 6 Parts of :
/ The one in front is scheme, On behalf of the agreement ; first / Before the symbol is netloc, Domain name ; And then path, Access path ; A semicolon ; The back is params, On behalf of the parameter ; question mark ? After that is the query criteria query, Generally used as GET Type of URL; Well No # Behind it is the anchor , Used to directly locate the drop-down position inside the page .( Please read this article for more details : A ten thousand word blog post takes you into the pit, the reptile is a no return road 【 Ten thousand words and pictures 】)
A standard link format is available :
scheme://netloc/path;params?query#fragment
urlparse() Of API usage :
# Source code :
def urlparse(url, scheme='', allow_fragments=True):
# Explanation of three parameters :
“
1.url: mandatory , That is, to be resolved URL;
2.scheme: Default protocol ( such as http or https etc. ).scheme Parameter only in URL Contains no scheme It's only effective when the message is sent . If URL There is scheme Information , Will return the parsed scheme.
3.allow_fragments: That is, whether to ignore fragment. If it is set to False,fragment Part of it will be ignored , It will be resolved to path,parameters perhaps query Part of , and fragment Part is empty .
”
For example :
from urllib.parse import urlparse
result = urlparse('http://www.baidu.com/index.html;user?id=5#comment', allow_fragments=False)
print(result)

hypothesis URL Contains no params and query, Try again. :
You can find ,fragment It will be resolved to path Part of ;
and , Return results ParseResult It's actually a tuple , Can be obtained by index order or attribute name !
from urllib.parse import urlparse
result = urlparse('http://www.baidu.com/index.html#comment', allow_fragments=False)
print(result)
print(result.scheme, result[0], sep='\n')

urlparse() The opposite approach urlunparse(), The received parameter is an iteratable object , The length must be 6, Otherwise, an error will be reported !
from urllib.parse import urlunparse
data = ['http', 'www.baidu.com', 'index.html', 'user', 'a=6', 'comment']
print(urlunparse(data))
The parameters here data Used list type , Of course, other types can also be used , Like tuples or specific data structures !
and urlparse() The method is very similar , But it will not be resolved separately params, It only returns 5 results , In the above example params Will merge into path in .( Commonly used !) as follows :
from urllib.parse import urlsplit
result = urlsplit('http://www.baidu.com/index.html;user?id=5#comment')
print(result)
# Its return result is SplitResult, It's a tuple type , You can use attributes and indexes to get !
print(' The return is :',type(result))
print(result.scheme, result[0], sep='\n')

And urlunparse() similar , It's also a way to combine the various parts of the link into a complete link , The parameter passed in is also an iteratable object , The only difference is that the length must be 5!
from urllib.parse import urlunsplit
data = ['http', 'www.baidu.com', 'index.html;user', 'a=6', 'comment']
print(urlunsplit(data))

Aforementioned urlunparse() and urlunsplit() Method can complete the merging of links , But the premise is that there must be objects of a certain length , Every part of the link should be clearly separated .
This requires another method of generating links —urljoin() Method . We can provide one base_url( Basic links ) As the first parameter , Take the new link as the second parameter , This method will analyze base_url Of scheme,netloc and path this 3 Add content and add the missing part of the new link , Last result returned .
from urllib.parse import urljoin
print(urljoin('http://www.baidu.com', 'FAQ.html'))
print(urljoin('http://www.baidu.com', 'https://pythonsite.com/FAQ.html'))
print(urljoin('http://www.baidu.com/about.html', 'https://pythonsite.com/FAQ.html'))
print(urljoin('http://www.baidu.com/about.html', 'https://pythonsite.com/FAQ.html?question=2'))
print(urljoin('http://www.baidu.com?wd=abc', 'https://pythonsite.com/index.php'))
print(urljoin('http://www.baidu.com', '?category=2#comment'))
print(urljoin('www.baidu.com', '?category=2#comment'))
print(urljoin('www.baidu.com#comment', '?category=2'))
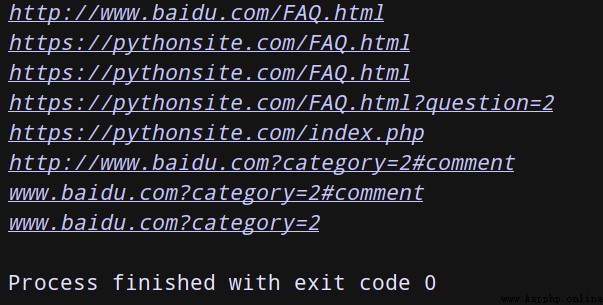
You can find ,base_url Three items are provided scheme,netloc and path. If these three items do not exist in the new link , I'll add ; If there is , Just use the new link !
One sentence summary — From the result of splicing, we can see , When splicing, the priority of the back is higher than that of the front url
When sending a request , It is often necessary to pass many parameters , It is troublesome to use string method to splice ,parse.urlencode() The method is to splice url Parametric .( Convert dictionary format to url Request parameters )
It can also be done through parse.parse_qs() Method to return it to the dictionary
This method constructs GET It is very useful when requesting parameters !
# Single demonstration
params = parse.urlencode({
"name":" beauty ","name2":" handsome guy ","name3":" sister "}) # The dictionary format is converted to url Request parameters
print(params)
print(" Back again :",parse.parse_qs(params)) #url Request parameter conversion to dictionary format
# The actual use
test_url2 = "http://httpbin.org/get?{}".format(params)
res2 = request.urlopen(test_url2)
print(res2.read())

With serialization , There must be deserialization . A string of GET Request parameters , utilize parse_qs() Method to return it to the dictionary !
from urllib.parse import parse_qs
query = 'name=peter&age=22'
print(parse_qs(query))

Used to convert parameters into a list of tuples .
from urllib.parse import parse_qsl
query = 'name=peter&age=22'
print(parse_qsl(query))

function :url Can only contain ascii character , In actual operation ,get Request by url There will be a large number of special characters in the parameters passed , For example, Chinese characters , Then we need to do url code .
utilize parse.unquote() It can be recoded .
from urllib.parse import quote
keyword = " wallpaper "
url = 'http://www.baicu.com/s?wd=' + quote(keyword)
print(url)

Is used to URL decode .
from urllib.parse import unquote
url = 'http://www.baicu.com/s?wd=%E5%A3%81%E7%BA%B8'
print(unquote(url))

robotparse The module is mainly responsible for processing the crawler protocol file ,robots.txt. Parsing .( a gentleman 's agreement )
such as : Baidu robots agreement :
http://www.baidu.com/robots.txt You can view it .
When search crawlers visit a site , First, he will check whether there is... In the root directory of the site robots.txt file , If there is , Search crawler will crawl according to the crawl range defined in it . without , The search crawler will access all directly accessible pages .
robots.txt A file is a text file , Use any common text editor , such as Windows System native Notepad, You can create and edit it .robots.txt It's an agreement , Not an order .robots.txt It's the first file to view when visiting a website in a search engine .robots.txt Files tell the spider what files can be viewed on the server .
give an example : Following Robots The protocol only allows crawling for all search crawlers public The function of directory .
User-agent:*
Disallow: /
Allow: /public/
have access to robotparser Module to parse robots.txt, This module provides a class RobotFileParser, It can be based on the robots.txt File to determine whether a crawler has permission to crawl this web page .
Usage method , Just pass in the constructor robots.txt Link to . Of course , It can also be declared without passing in , The default is empty. , Final use set_url() Method settings can also . The following is its statement :
# Source code :
def __init__(self, url=''):
from urllib.robotparser import RobotFileParser
# First , establish RobotFileParser object
rp = RobotFileParser()
# then , adopt set_url() Method set robots.txt Link to
rp.set_url('http://www.jianshu.com/robots.txt')
rp.read()
# utilize can_fetch() Method to determine whether the web page can be crawled
print(rp.can_fetch('*', 'http://www.jianshu.com/p'))
print(rp.can_fetch('*', 'http://www.jianshu.com/p/b67554025d7dsdfsdf'))
It can also be used parse() Method to perform read and Analysis :
from urllib.robotparser import RobotFileParser
from urllib.request import urlopen
# First , establish RobotFileParser object
rp = RobotFileParser()
rp.parse(urlopen('http://www.jianshu.com/robots.txt').read().decode('utf-8').split('\n'))
# utilize can_fetch() Method to determine whether the web page can be crawled
print(rp.can_fetch('*', 'http://www.jianshu.com/p'))
print(rp.can_fetch('*', 'http://www.jianshu.com/p/b67554025d7dsdfsdf'))
urllib3 It's based on python3 Is powerful , Amicable http client . More and more python The application began to adopt urllib3. It provides a lot of python Important functions not available in the standard library ( Thread safety , Connection pool ).
Source code :
request(self, method, url, fields=None, headers=None,**urlopen_kw)
import urllib3
import json
http=urllib3.PoolManager() # Instantiate a connection pool object keep socket Turn on . This object handles all the details of connection pooling and thread safety , So we don't have to deal with it ourselves !
test_url = "http://httpbin.org/get"
# Add head
headers = {
"User-Agent": "Mozilla/5.0 (Windows NT 10.0; Win64; x64) AppleWebKit/537.36 (KHTML, like Gecko) Chrome/80.0.3987.132 Safari/537.36"}
# Parameters fileds Use : If it is get will fields This dictionary translates to url Parameters ; If it is post will fields This dictionary translates to form The form data .
# about put and post request , You need to provide parameters of dictionary type field To pass on form The form data . How to get JSON Specific information in response format data , Learn from the small expansion part !
data_dict={
"name1":"allen","name2":"rose"}
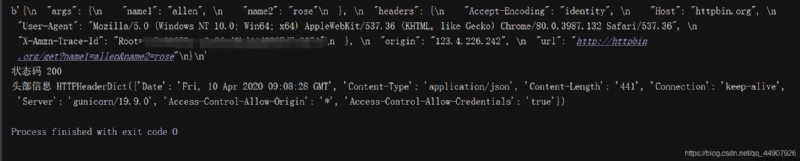
res = http.request("GET",test_url,headers=headers,fields=data_dict) # function : Send a complete network request
print(res.data) # Get content
print(" Status code ",res.status) # Status code
print(" Header information ",res.headers) # Response header information
 If it is POST request , Will fields The corresponding dictionary is converted to form The form data :
Add... To the above code :
data = res.data.decode() # Convert byte data to utf-8 Format
print(json.loads(data)["args"]["name1"]) #json.loads() take json Data conversion to dictionary , In this way, specific information can be obtained
# Output is :allen
When we need to send json Data time , We need to be in request Of the binary data type after encoding is passed in body Parameters , And formulate Content-Type Request header for :
import json
import urllib3
http=urllib3.PoolManager() # Instantiate a connection pool object keep socket Turn on . This object handles all the details of connection pooling and thread safety , So we don't have to deal with it ourselves !
data = {
'attribute': 'value'}
encoded_data = json.dumps(data).encode('utf-8')
r = http.request('post', 'http://httpbin.org/post',body=encoded_data,
headers={
'Content-Type':' application/json'})
print(json.loads(r.data.decode('utf-8'))['json'])
For file upload , We can imitate the way browser forms :
import json
import urllib3
http=urllib3.PoolManager() # Instantiate a connection pool object keep socket Turn on . This object handles all the details of connection pooling and thread safety , So we don't have to deal with it ourselves !
with open('test.txt') as f:
file_data = f.read()
r = http.request('post', 'http://httpbin.org/post',
fields={

'filefield': ('test.txt', file_data)
})
print(json.loads(r.data.decode('utf-8'))['files'])
( Only simulation , So the file is empty )
For binary data upload , We use to specify body The way , And set up Content-Type Request header for :
import json
import urllib3
http=urllib3.PoolManager() # Instantiate a connection pool object keep socket Turn on . This object handles all the details of connection pooling and thread safety , So we don't have to deal with it ourselves !
with open('girl.jpg', 'rb') as f:
binary_data = f.read()
r = http.request('post', 'http://httpbin.org/post',
body=binary_data,
headers={
'Content-Type': 'image/jpeg'})
print(json.loads(r.data.decode('utf-8'))['files'])
( Only simulation , So the picture is empty )
You can use ProxyManager Conduct http Agent operation :
import urllib3
proxy = urllib3.ProxyManager('http://111.11.111.11:1111')
res = proxy.request('get', 'http://httpbin.org/ip')
print(res.data)