一、學習版本 spring-framework-4.0.0
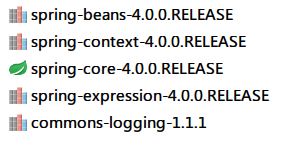
二、導入 jar 包:
三、在類路徑下創建 Spring Config 文件:ApplicationContext.xml
<?xml version="1.0" encoding="UTF-8"?>
<beans xmlns="http://www.springframework.org/schema/beans"
       xmlns:xsi="http://www.w3.org/2001/XMLSchema-instance"
       xsi:schemaLocation="http://www.springframework.org/schema/beans http://www.springframework.org/schema/beans/spring-beans.xsd">
</beans>
四、創建一個非侵入的 Bean
/**
 * @author solverpeng
 * @create 2016-07-15-10:09
 */
public class HelloWorld {
    private String userName;

    public void setUserName(String userName) {
        this.userName = userName;
    }

    public void hello() {
        System.out.println("hello:" + userName);
    }
}
五、在 Spring Config 文件中配置該 Bean
<?xml version="1.0" encoding="UTF-8"?>
<beans xmlns="http://www.springframework.org/schema/beans"
       xmlns:xsi="http://www.w3.org/2001/XMLSchema-instance"
       xsi:schemaLocation="http://www.springframework.org/schema/beans http://www.springframework.org/schema/beans/spring-beans.xsd">
    <bean id="helloWorld" class="com.nucsoft.spring.helloworld.HelloWorld">
        <property name="userName" value="spring"/>
    </bean>
</beans>
六、通過 IOC 容器對象來獲取在 Spring Config 文件中配置的 Bean,並調用其方法
public static void main(String[] args) {
  ApplicationContext ctx = new ClassPathXmlApplicationContext("spring/ApplicationContext.xml");
  HelloWorld helloWorld = (HelloWorld) ctx.getBean("helloWorld");
  helloWorld.hello(); // 輸出 hello:spring
}
七、總結
兩個重點:
1.在 Spring Config 中配置 Bean
2.通過 IOC 容器中獲取 Sring Config 配置的 Bean 對象