Chapter one django Installation and introduction
Chapter two django Based on using
The third chapter The routing layer
Chapter four A virtual environment 、django Version difference 、 View layer
The fifth chapter Formwork layer
Chapter six The model layer ( On )
Chapter vii. The model layer ( Next )
Chapter viii. ajax
Chapter nine sweetalert Front end plug-ins 、 Serialization component 、 Bulk data operations 、 Pager 、Forms Components ( On )
Chapter ten forms Components ( Next )、ModelForm Easy to use 、cookie And session Easy to use
Chapter 11 django operation cookie Add 、django operation session、CBV There are three ways to add decorators 、django Common methods of middleware 、csrf
request.COOKIES['key']
request.get_signed_cookie(key, default=RAISE_ERROR, salt='', max_age=None)
rep = HttpResponse(...)
rep = render(request, ...)
rep.set_cookie(key,value,...) # Set up cookie
rep.set_signed_cookie(key,value,salt=' Encrypting salt ', max_age=None, ...)# Salt setting cookie
rep.delete_cookie("username") # The parameter here corresponds to the key
SESSION_ENGINE = 'django.contrib.sessions.backends.db' # engine ( Default )
SESSION_ENGINE = 'django.contrib.sessions.backends.cache' # engine
SESSION_CACHE_ALIAS = 'default' # Cache alias used ( Default memory cache , It can also be memcache), Alias depends on cached settings here
SESSION_ENGINE = 'django.contrib.sessions.backends.file' # engine
SESSION_FILE_PATH = None # Cache file path , If None, Then use tempfile Module gets a temporary address tempfile.gettempdir()
SESSION_ENGINE = 'django.contrib.sessions.backends.cached_db' # engine
SESSION_ENGINE = 'django.contrib.sessions.backends.signed_cookies' # engine
 Other public settings :
SESSION_COOKIE_NAME = "sessionid" # Session Of cookie When saved on the browser key, namely :sessionid= Random string ( Default )
SESSION_COOKIE_PATH = "/" # Session Of cookie Saved path ( Default )
SESSION_COOKIE_DOMAIN = None # Session Of cookie Saved domain name ( Default )
SESSION_COOKIE_SECURE = False # whether Https transmission cookie( Default )
SESSION_COOKIE_HTTPONLY = True # whether Session Of cookie Only support http transmission ( Default )
SESSION_COOKIE_AGE = 1209600 # Session Of cookie Expiration date (2 Zhou )( Default )
SESSION_EXPIRE_AT_BROWSER_CLOSE = False # Whether to close the browser Session Be overdue ( Default )
SESSION_SAVE_EVERY_REQUEST = False # Save every request Session, Save only after default modification ( Default )
request.session['key'] = value # You can set up multiple groups
request.session.set_expiry(value) # Set timeout
* If value It's an integer. ,session It's going to fail in seconds .
* If value It's a datatime or timedelta,session It will expire after this time .
* If value yes 0, User closes browser session It will fail. .
* If value yes None,session Will depend on the overall situation session Failure strategy .
Set up session
request.session.get('key') # You can get multiple groups
request.session.session_key # Get the generated random string
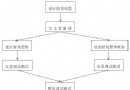
The server saves user related status information Return to the client random string
For save django Use the self-contained django_session surface
obtain session
django default session The expiration time is 14 God
request.session.delete() # Only delete the client
request.session.flush() # Server side Clients are deleted
First, you need to add a special decorator module
from django.utils.decorators import method_decorator
Add... Directly to a method in the class
class MyLoginView(views.View):
@method_decorator(login_auth)
def get(self, request):
return HttpResponse("from CBV get view")
Add and specify directly on the class name
@method_decorator(login_auth, name='get')
class MyLoginView(views.View):
def get(self, request):
return HttpResponse("from CBV get view")
rewrite dispatch Method and add methods that act on all the methods in the class
class MyLoginView(views.View):
@method_decorator(login_auth)
def dispatch(self, request, *args, **kwargs):
return super().dispatch(request,*args,**kwargs)
django The usage scenarios of middleware : As long as the global related functions can be written in the middleware
1. Create a folder with any name
2. Create a folder with any name in this folder py file
3. In the py Write middleware classes in the file
4. Register in profile
# stay settings.py Middle configuration
MIDDLEWARE = [
'django.middleware.security.SecurityMiddleware',
'django.contrib.sessions.middleware.SessionMiddleware',
'django.middleware.common.CommonMiddleware',
# 'django.middleware.csrf.CsrfViewMiddleware',
'django.contrib.auth.middleware.AuthenticationMiddleware',
'django.contrib.messages.middleware.MessageMiddleware',
'django.middleware.clickjacking.XFrameOptionsMiddleware',
'mid.mid1.Mid', # Custom middleware Mid
'mid.mid1.Mid1', # Custom middleware Mid1
]
django There are not only seven middleware, and each has many functions and methods , besides django It also supports custom middleware and provides five methods that can be customized
process_request There is a parameter , Namely request, This request And in view functions request It's the same
1. Middleware process_request Method is executed before the view function is executed .
2. When configuring multiple Middleware , According to MIDDLEWARE Registration order in , That is, the index value of the list , From front to back .
3. Between different Middleware request It's all the same thing
Definition process_response When the method is used , You must pass two formal parameters to the method ,request and response. In multiple Middleware process_response The method is according to MIDDLEWARE The order of registration in is reversed .
The method has four parameters :
1.request yes HttpRequest object .
2.view_func yes Django View functions to be used .
3.view_args Is the list of location parameters that will be passed to the view .
4.view_kwargs Is the dictionary of key parameters that will be passed to the view .
Django It will be called before calling the view function. process_view Method .
It should return None Or a HttpResponse object . If you return None,Django This request will continue to be processed , Execute any other middleware process_view Method , Then execute the corresponding view . If it returns a HttpResponse object , Then there will be no execution Django View function of , It's a direct U-turn in middleware , Flashback one by one process_response Method , Finally back to the browser
Its parameters , One HttpRequest object ,response yes TemplateResponse object
process_template_response It is executed immediately after view function execution , But it has a precondition , That is, the object returned by the view function has a render() Method
Two parameters of the method :
One HttpRequest object
One exception It is caused by view function exception Exception object .
This method can only be executed if there is an exception in the view function , It can return a value of None It can also be a HttpResponse object . If it is HttpResponse object ,Django The process_response Method , And return to browser , Otherwise, the exception will be handled by default . If you return one None, The next Middleware process_exception Method to handle exceptions . Its execution order is also the reverse of middleware registration order .
eg:
from django.utils.deprecation import MiddlewareMixin
class Mid(MiddlewareMixin):
def process_request(self, request):
print('Mid Medium process_request')
def process_response(self, request, response):
print('Mid Medium process_response')
return response
def process_view(self, request, view_func, view_args, view_kwargs):
print('Mid Medium process_view')
def process_exception(self,request, exception):
print('Mid Medium process_exception')
def process_template_response(self, request, response):
print('Mid Medium process_template_response')
class Mid1(MiddlewareMixin):
def process_request(self, request):
print('Mid1 Medium process_request')
def process_response(self, request, response):
print('Mid1 Medium process_response')
return response
def process_view(self, request, view_func, view_args, view_kwargs):
print('Mid1 Medium process_view')
def process_exception(self, request, exception):
print('Mid1 Medium process_exception')
def process_template_response(self, request, response):
print('Mid1 Medium process_template_response')
Cross-site request forgery (CSRF) Contrary to the cross site request script . The problem with cross site request scripts is , The client trusts the data sent by the server . The problem with cross site request forgery is , The server trusts the data from the client .
in the light of csrf There are many ways of related verification django It just provides some
Writing form The form is in form Label with {% csrf_token %} that will do
<form action="" method="post">
{% csrf_token %}
{% for foo in form %}
<div class="row">
<label>{
{ foo.label }}</label>
{
{ foo }}<span >{
{ foo.errors.0 }}</span>
</div>
{% endfor %}
<input type="submit" value=" register " class="btn-success btn btn-default">
</form>
The way 1
Anywhere on the page
{% csrf_token %}
When sending a request, bring csrf_token
<!DOCTYPE html>
<html lang="en">
<head>
<meta charset="UTF-8">
<title> Sign in </title>
<link rel="stylesheet" href="/static/bootstrap-3.4.1-dist/css/bootstrap.css">
</head>
<body>
<div class="container">
<form action="" method="post">
{% csrf_token %}
{% for foo in form %}
<div class="row">
<label>{
{ foo.label }}</label>
{
{ foo }}<span >{
{ foo.errors.0 }}</span>
</div>
{% endfor %}
<input type="button" id='loginbtn' value=" Sign in " class="btn-success btn btn-default">
</form>
</div>
<script> $(function () {
 $('#loginbtn').click(function () {
 $.ajax({
 url:'', type:"POST", headers:{
'X-CSRFToken': $('input[name="csrfmiddlewaretoken"]').val() }, # Here and below data Medium csrfmiddlewaretoken A choice data:{
 'csrfmiddlewaretoken':$('input[name="csrfmiddlewaretoken"]').val() 'username':$('#id_username').val(), 'password':$('#id_password').val() }, success:function (arg) {
 } }) }) }) </script>
</body>
</html>
The way 2
Template syntax directly obtains
<!DOCTYPE html>
<html lang="en">
<head>
<meta charset="UTF-8">
<title> Sign in </title>
<link rel="stylesheet" href="/static/bootstrap-3.4.1-dist/css/bootstrap.css">
</head>
<body>
<div class="container">
<form action="" method="post">
{% csrf_token %}
{% for foo in form %}
<div class="row">
<label>{
{ foo.label }}</label>
{
{ foo }}<span >{
{ foo.errors.0 }}</span>
</div>
{% endfor %}
<input type="button" id='loginbtn' value=" Sign in " class="btn-success btn btn-default">
</form>
</div>
<script> $(function () {
 $('#loginbtn').click(function () {
 $.ajax({
 url:'', type:"POST", headers:{
'X-CSRFToken': {
{
 csrf_token }} }, # Here and below data Medium csrfmiddlewaretoken A choice data:{
 'csrfmiddlewaretoken':{
{
 csrf_token }} 'username':$('#id_username').val(), 'password':$('#id_password').val() }, success:function (arg) {
 } }) }) }) </script>
</body>
</html>