Chapter one django Installation and introduction
Chapter two django Based on using
The third chapter The routing layer
Chapter four A virtual environment 、django Version difference 、 View layer
The fifth chapter Formwork layer
Chapter six The model layer ( On )
Chapter vii. The model layer ( Next )
Chapter viii. ajax
Chapter nine sweetalert Front end plug-ins 、 Serialization component 、 Bulk data operations 、 Pager 、Forms Components ( On )
Chapter ten forms Components ( Next )、ModelForm Easy to use 、cookie And session Easy to use
Chapter 11 django operation cookie Add 、django operation session、CBV There are three ways to add decorators 、django Common methods of middleware 、csrf
csrf Middleware is django For website anti-counterfeiting , After configuration in the configuration file , As long as there is an operation to submit data, it must go through csrf Anti counterfeiting verification of components
When we do not need anti-counterfeiting verification in some places in the project, we need to use csrf The decorator of is closed for the corresponding function csrf verification
from django.views.decorators.csrf import csrf_exempt,csrf_protect
csrf_exempt # Ignore csrf check
csrf_protect # Turn on csrf check
@csrf_protect\@csrf_exempt
def login(request):
return render(request,'login.html')
csrf_protect Three CBV You can add decorators in any way
 class Index(views.View):
@method_decorator(csrf_protect)
def get(self, request):
# username = request.get_signed_cookie('username', salt=' Add salt ')
username = request.session.get('username')
return render(request, 'index.html', locals())
@method_decorator(csrf_protect, name='get')
class Index(views.View):
def get(self, request):
# username = request.get_signed_cookie('username', salt=' Add salt ')
username = request.session.get('username')
return render(request, 'index.html', locals())
class Index(views.View):
@method_decorator(csrf_protect)
def dispatch(self, request, *args, **kwargs):
return super().dispatch(request, *args, **kwargs)
def get(self, request):
# username = request.get_signed_cookie('username', salt=' Add salt ')
username = request.session.get('username')
return render(request, 'index.html', locals())
csrf_exempt There is only one way to work ( For rewritten dispatch How to install )
class Index(views.View):
@method_decorator(csrf_exempt)
def dispatch(self, request, *args, **kwargs):
return super().dispatch(request, *args, **kwargs)
def get(self, request):
# username = request.get_signed_cookie('username', salt=' Add salt ')
username = request.session.get('username')
return render(request, 'index.html', locals())
After the project is developed, it will be started on the server and will not stop until there is no accident , This is the time when we need to modify the project function ( newly added 、 modify 、 Delete 、 Do not use, etc ), At this time, you need to modify the core business logic layer code . But modifying the business logic layer at will often brings many problems ( The code that needs to be modified is in use 、 The modified part is the core code, and you must stop the server first ), To address these issues , It often needs to pay a high price to modify it once , At this time, the functions are modularized in the form of middleware and configuration files , It can be modified and deleted at will, which will save a lot of costs
Through the study django7 Middleware , We know that MIDDLEWARE The configuration in is not just a string, but is equivalent to the operation of the import module
importlib modular
This module can convert the string into the corresponding py File path , And get py file ( notes : Cannot import py Class in file )
python Reflection
Use reflection to get classes in objects 、 Method 、 Variable
Through the above two codes, you can complete the corresponding... Of the string path py Class in 、 Method 、 The variable changes to
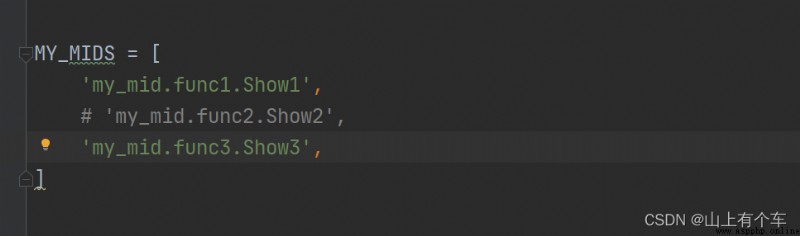
1. Create a my_mid package
establish func1.py、func2.py、func3.py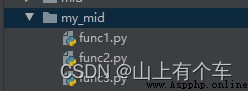
2. There are three py File setting function
func1.py
class Show1(object):
def __init__(self, msg):
self.msg =msg
def show_p(self):
print(f' You enabled func1 Component's show_p function , You passed in a parameter :%s'% self.msg)
def show_p1(self):
print(f' You enabled func1 Component's show_p1 function , You passed in a parameter :{
self.msg}')
func2.py
class Show2(object):
def __init__(self, msg):
self.msg = msg
def show_p(self):
print(f' You enabled func2 Component's show_p function , You passed in a parameter :%s'%self.msg)
def show_p1(self):
print(f' You enabled func2 Component's show_p1 function , You passed in a parameter :{
self.msg}')
func3.py
class Show3(object):
def __init__(self, msg):
self.msg = msg
def show_p(self):
print(f' You enabled func3 Component's show_p function , You passed in a parameter :%s'%self.msg)
def show_p1(self):
print(f' You enabled func3 Component's show_p1 function , You passed in a parameter :{
self.msg}')
3. Write to get the configuration file and convert it into object call function
def run_way():
# 1. Get the path in the configuration file
from djangoceshi1 import settings
# 2. Process the obtained path
total_mid = []
# 3. Separate the paths in the configuration file
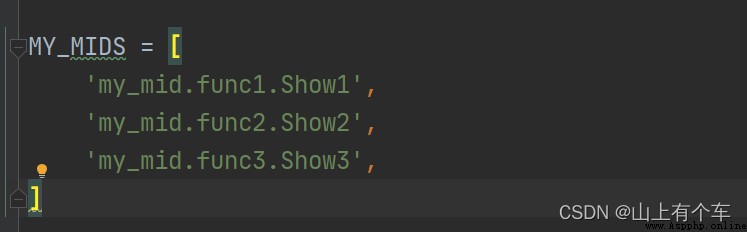
for MY_MID in settings.MY_MIDS:
py_name, class_name = MY_MID.rsplit('.', maxsplit=1)
# 4. obtain py Get after file class object
import importlib
py_obj = importlib.import_module(py_name)
class_obj = getattr(py_obj, class_name)
total_mid.append(class_obj)
# 5. Use packaged total_mid It can be directly in for Call in
for mid in total_mid:
obj = mid(' Parameters ')
obj.show_p()
obj.show_p1()
You only need to trigger to complete the above steps
eg:
# Call anywhere at will
run_way()
Running results :
Running results :
auth yes django The module provided to users to quickly complete relevant functions :
User related functions : establish 、 authentication 、 edit …
auth modular django A user table is also provided
Generated by default after executing the database migration command auth_user
django Self contained admin The background management user login reference is auth_user surface
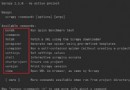
establish admin Background administrator users :
python manage.py createsuperuser
auth_user Table structure 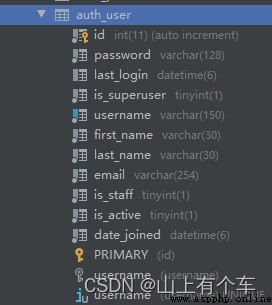
Use auth Modules need to be imported first
from django.contrib import auth
It provides user authentication function , That is, verify that the user name and password are correct , Generally need username 、password Two key parameters .
If the authentication is successful ( The user name and password are correct and valid ), Will return to a User object .
authenticate() It's time to User Object to identify that the backend has authenticated the user , And this information is needed in the subsequent login process .
user = auth.authenticate(username='username',password='password')
This function accepts a HttpRequest object , And a certified User object .
This function implements a user login function . It essentially generates correlation for that user at the back end session data ( Generally, it is stored in django_session in ).
def login(request):
user = auth.authenticate(username='username',password='password')
login(request, user)
Yes request Use .user You can get user object
def login(request):
user = request.user
Used to determine whether the current request has passed the authentication ( Does it already exist session).( In essence, it is to check session)
request.user.is_authenticated()
auth A decorator tool provided to us , Used to quickly add login verification to a view .
from django.contrib.auth.decorators import login_required
@login_required(login_url='/lg/') # Local configuration
@login_required # Global configuration
LOGIN_URL = '/lg/' # You need to add configuration in the configuration file
If the user is not logged in , It will jump to django default Sign in URL '/accounts/login/ ’ And deliver the current visit url The absolute path of ( Upon successful landing , Will redirect to the path ).
If you need a custom login URL, You need to in settings.py Through the file LOGIN_URL Make changes .
from django.contrib.auth.decorators import login_required
# 1. Local configuration
@login_required(login_url='/lg/') # Local configuration Only valid here
# 2. Global configuration
@login_required # Global configuration , After using this decorator, it will take effect
LOGIN_URL = '/lg/' # You need to add configuration in the configuration file
auth Provides a way to check whether the password is correct , You need to provide the password of the current requesting user .
Password returned correctly True, Otherwise return to False.
request.user.check_password(' password ')
auth Provides a way to change the password , receive New password to set As a parameter .
Be careful : Make sure to call the user object after setting save Method
 request.user.set_password(' New password ')
request.user.save()
This function accepts a HttpRequest object , No return value .
When this function is called , Currently requested session The information will be cleared . Even if the user is not logged in , No error will be reported using this function .
auth.logout(request)
auth It provides us with two kinds of user creation
create_superuser For super users , This method requires a user name 、 password 、 Mailbox, etc
create_suser For ordinary users , This method requires a user name 、 Password etc.
from django.contrib.auth.models import User
User.objects.create_superuser(username=' user name 1', password=' password 1', email='[email protected]')
User.objects.create_suser(username=' user name 2', password=' password 2')
Directly use one-to-one relationship to associate other tables auth_user surface
This can increase in disguise auth_user Table fields
When we design the user table, we want to have more fields and can use django Login provided 、 Registration and other functions . Inherit at this time auth_user surface , This can expand the field and continue to be used django Provides convenient features .
from django.contrib.auth.models import AbstractUser
class Users(AbstractUser):
# To write AbstractUser Fields not in class It can't be AbstractUser Owned fields
phone = models.BigIntegerField()
addr = models.CharField(max_length=32)
After writing, you need to set in the configuration file
AUTH_USER_MODEL = 'app01.Users'
At this point, the migration table can be owned auth_user New user table of functions and fields
Be careful :
1. Whether the migration operation has been recorded , Delete it if necessary
2. Whether the migration operation has generated a table , It is best to delete all tables ( You can delete only auth Prefix table )
Hand training program :
bbs Forum