http://mp.weixin.qq.com/debug/cgi-bin/sandboxinfo?action=showinfo&t=sandbox/index
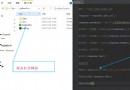
Scan wechat , You can get a test number .
next step , Slide slide to
Test number QR code, Scan and add your own micro signal .
Next step , Experience interface permission table , Slide directly to Web Services - Web account , Click Modify .
Domain name of authorization callback page .Because we test locally , We modify it directly hosts Just the documents .
weixintest.comHere is the wechat development document
https://developers.weixin.qq.com/doc/offiaccount/OA_Web_Apps/Wechat_webpage_authorization.html#0
Paste part of the document directly
1 First step : User consent authorization , obtain code
2 The second step : adopt code Website authorization access_token
3 The third step : Refresh access_token( if necessary )
4 Step four : Pull the user information ( Need to be scope by snsapi_userinfo)
5 attach : Inspection authorization certificate (access_token) Whether it works
The official account web page debugged We directly Django Just write a view .
appid = 'xxx'
secret = 'xxxx'
code = request.GET.get('code')
weixin_url = requests.get(
f"https://api.weixin.qq.com/sns/oauth2/access_token?appid={appid}&secret={secret}&code={code}&grant_type=authorization_code")
info = weixin_url.json()
open_id = info.get('openid')
access_token = info.get('access_token')
user_info_req = requests.get(
f'https://api.weixin.qq.com/sns/userinfo?access_token={access_token}&openid={open_id}&lang=zh_CN')
user_info_req.encoding = 'utf-8'
user_info = user_info_req.json()
context = {'code': request.GET.get('code'), 'info': info, 'user_info': user_info}
return render(request, 'test.html', context)
This is a simple view , The data we obtained is rendered to test.html On , Facilitate our intuitive observation .
Last in urls.py On , Define it url, such as /test/ And so on. .
Don't forget to start python manage.py 127.0.0.1:80, Yes, what you need to open is 80 port , Not other ports .
Finally, our redirected domain name is weixintest.com/test/ , In fact, that is 127.0.0.1:80/test/.
<html lang="en">
<head>
<meta charset="UTF-8">
<title> test </title>
</head>
<body>
<h3>{
{ code }}</h3>
{% for k,v in info.items%}
<p>{
{k}}:{
{ v }}</p>
{% endfor %}
{% for k,v in user_info.items %}
<p>{
{k}}:{
{v}}</p>
{% endfor %}
</body>
</html>
Finally, you just need to input the above words in the wechat developer tool url, Will redirect us weixintest.com/test/ On the route , Render some of our simple data .
The same is true for subsequent tests .