Keep creating , Accelerate growth ! This is my participation 「 Nuggets day new plan · 6 Yuegengwen challenge 」 Of the 6 God , Click to see the event details
Reference petrel Socket Programming :www.cnblogs.com/haiyan123/p… Sometimes , Like downloading pictures , Because downloading pictures is a time-consuming operation . If you download in the same way as before . The efficiency will be very slow . At this point, we can consider using multithreading to download images .
Multithreading is to accomplish multiple tasks synchronously , Improve the efficiency of the system by improving the efficiency of resource utilization . Threads are implemented when multiple tasks need to be completed at the same time . The simplest analogy is that multithreading is like every carriage of a train , And the process is the train . The carriage can't run without the train , In the same way, a train can have more than one carriage . The emergence of multithreading is to improve efficiency . At the same time, its emergence has also brought some problems . For more information, please refer to : zh.wikipedia.org/wiki/%E5%A4…
threading The module is python Secondary school provides modules for multithreading programming .threading The most commonly used classes in modules are Thread. Here is a simple multithreaded program :
import threading
import time
def coding():
for x in range(3):
print(' Writing code %s'%threading.current_thread())
time.sleep(1)
def drawing():
for x in range(3):
print(' Is drawing %s' % threading.current_thread())
time.sleep(1)
def main():
t1 = threading.Thread(target=coding,args=[]) # Add arguments to the function ,args If a list or tuple
t2 = threading.Thread(target=drawing)
t1.start()
t2.start()
# All current threads
print(threading.enumerate())
#[<_MainThread(MainThread, started 6876)>, <Thread(Thread-1, started 3112)>, <Thread(Thread-2, started 14792)>]
if __name__ == '__main__':
main()
Copy code threading Some methods provided by the module :
# threading.currentThread(): Returns the current thread information .
# threading.enumerate(): Returns a containing all running threads list.
# threading.activeCount(): Returns the number of running threads , And len(threading.enumerate()) It has the same result .
Copy code Threading.Thread() Instance object method :Thread Method of instance object
# is_alive(): Returns whether the thread is active .True/False
# getName(): Return thread name .
# setName(): Set the thread name .
Copy code Examples are as follows :
from threading import Thread
from multiprocessing import Process
import time,os,threading
def work():
time.sleep(2)
print('%s is running' % threading.currentThread().getName())
print(threading.current_thread()) # Current thread
print(threading.currentThread().getName()) # Get the names of other threads
if __name__ == '__main__':
t = Thread(target=work)
t.start()
print(threading.current_thread().getName()) # The name of the main thread
print(threading.current_thread()) # The main thread
print(threading.enumerate()) # There are two running threads along with the main thread
time.sleep(2)
print(t.is_alive()) # Determine if the thread is alive
print(threading.activeCount())
print(' Lord ')
Copy code 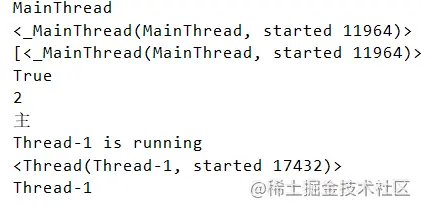
The sample code is slightly modified :
from threading import Thread
from multiprocessing import Process
import time, os, threading
def work():
# time.sleep(2)
print('%s is running' % threading.currentThread().getName())
if __name__ == '__main__':
t = Thread(target=work)
t.start()
print(threading.current_thread().getName()) # The name of the main thread
print(threading.current_thread()) # The main thread
print(threading.enumerate()) # There are two running threads along with the main thread
time.sleep(2)
print(t.is_alive()) # Determine if the thread is alive
print(threading.activeCount())
print(' The main thread ')
Copy code 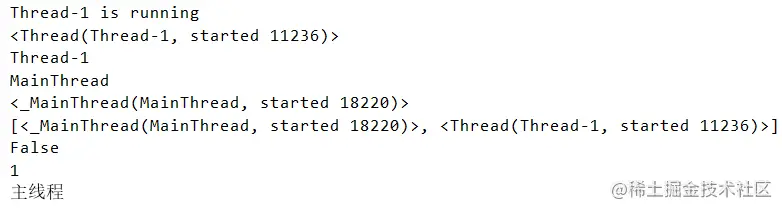
In order to better encapsulate the thread code . have access to threading Under the module of Thread class , Inherited from this class , Then implement run Method , The thread will run automatically run The code in the method . The sample code is as follows :
import threading
import time
class CodingThread(threading.Thread):
def run(self):
for x in range(3):
print('%s Writing code ' % threading.current_thread())
time.sleep(1)
class DrawingThread(threading.Thread):
def run(self):
for x in range(3):
print('%s Is drawing ' % threading.current_thread())
time.sleep(1)
def multi_thread():
t1 = CodingThread()
t2 = DrawingThread()
t1.start()
t2.start()
if __name__ == '__main__':
multi_thread()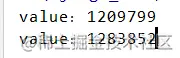
Copy code Multithreading runs in the same process . Therefore, the global variables in the process can be shared by all threads . This creates a problem , Because the order of thread execution is out of order . It may cause data error . For example, the following code :
import threading
VALUE = 0
def add_value():
global VALUE
for x in range(1000000):
VALUE += 1 # When modifying a global variable in a child scope, you must first declare global VALUE
print('value:%d'%VALUE)
def main():
for x in range(2):
t = threading.Thread(target=add_value)
t.start()
if __name__ == '__main__':
main()
 Copy code
The above results should normally be 1000000 2000000, But because of the uncertainty of multithreading . So the final result may be random .
To solve the above problem, use shared global variables ( Modify global variables ) The problem of .threading Provides a Lock class , This class can lock a variable when a thread accesses it , Other threads cannot come in at this time , Until the current thread finishes processing , Release the lock , Only other threads can come in to process . The sample code is as follows :
import threading
VALUE = 0
gLock = threading.Lock()
def add_value():
global VALUE
gLock.acquire()
for x in range(1000000):
VALUE += 1
gLock.release()
print('value:%d'%VALUE)
def main():
for x in range(2):
t = threading.Thread(target=add_value)
t.start()
if __name__ == '__main__':
main()
 Copy code
Be careful : Don't use the lock casually , Locking is required only when multiple threads modify global variables , If it's just access, you don't need to lock it .
Producer and consumer patterns are a common pattern in multithreaded development . The producer's thread is dedicated to producing some data , Then it is stored in an intermediate variable . The consumer then takes the data from this intermediate variable to consume . But because you want to use intermediate variables , Intermediate variables are often global variables , Therefore, it is necessary to use locks to ensure data integrity . Here are the USES threading.Lock Lock implementation “ Producer and consumer patterns ” An example of :
import threading
import random
import time
gMoney = 1000
gLock = threading.Lock()
# Record the number of times the producer produces , achieve 10 Once, it will no longer be produced
gTimes = 0
class Producer(threading.Thread):
def run(self):
global gMoney
global gLock
global gTimes
while True:
money = random.randint(100, 1000)
gLock.acquire()
# If it has reached 10 Time , No longer produce
if gTimes >= 10:
gLock.release()
break
gMoney += money
print('%s Currently deposited %s Yuan , The remaining %s Yuan ' % (threading.current_thread(), money, gMoney))
gTimes += 1
time.sleep(0.5)
gLock.release()
class Consumer(threading.Thread):
def run(self):
global gMoney
global gLock
global gTimes
while True:
money = random.randint(100, 500)
gLock.acquire()
if gMoney > money:
gMoney -= money
print('%s Currently remove %s Yuan , The remaining %s Yuan ' % (threading.current_thread(), money, gMoney))
time.sleep(0.5)
else:
# If there is not enough money , It may have exceeded the number of times , At this time, judge
if gTimes >= 10:
gLock.release()
break
print("%s I want to get %s Yuan , The remaining %s Yuan , Insufficient !" % (threading.current_thread(),money,gMoney))
gLock.release()
def main():
for x in range(5):
Consumer(name=' Consumer thread %d'%x).start()
for x in range(5):
Producer(name=' Producer thread %d'%x).start()
if __name__ == '__main__':
main()
Copy code Lock Version of the producer and consumer model works properly . But there is one drawback , Among consumers , Always through while True A closed loop and locked way to judge whether the money is enough . Locking is a very expensive CPU The behavior of resources . So this is not the best way . A better way is to use threading.Condition To achieve .threading.Condition It can be in a blocking waiting state when there is no data . Once you have the right data , You can also use notify Related functions to notify other waiting threads . In this way, some useless locking and unlocking operations can be avoided . Can improve the performance of the program . First of all, threading.Condition Related functions are introduced ,threading.Condition similar threading.Lock, You can lock when modifying global data , You can also unlock after the modification . The following is a brief introduction to some commonly used functions :
acquire: locked .release: Unlock .wait: Put the current thread in a waiting state , And the lock will be released . Can be used by other threads notify and notify_all Function wake up . After being awakened, it will continue to wait for locking , After locking, continue to execute the following code .notify: Notify a waiting thread , The default is No 1 Waiting threads .notify_all: Notify all waiting threads .notify and notify_all It won't release the lock . And need to be in release Previous call .Condition The producer and consumer model code of version is as follows :
import threading,time,random
gMONEY = 1000 # The vault initially has 1000 element
gTotalTimes = 10 # Define producer generation 10 Time
gTimes = 0 # Every production , Times plus one
gCondition = threading.Condition()
class Producer(threading.Thread):
def run(self):
global gMONEY
global gTimes
while True:
money = random.randint(100,1000)
gCondition.acquire()
if gTimes<gTotalTimes:
gTimes+=1
gMONEY+=money
gCondition.notify_all() # Notify all waiting threads
print(" producer %s Produced %s The remaining total amount is %s"%(threading.currentThread().getName(),money,gMONEY))
else:
gCondition.release()
break
gCondition.release()
time.sleep(0.5)
class Customer(threading.Thread):
def run(self):
global gMONEY
while True:
money = random.randint(100,1000)
gCondition.acquire()
while gMONEY<money:
## Maybe the money produced at one time is not enough for consumption , Or the money produced is consumed by other consumers, resulting in insufficient balance
## Use while loop , Until the Treasury has enough money to spend
if gTimes>=gTotalTimes:
gCondition.release()
return # Use here return Just jump out of the function , Out of commission break break You can only jump one level while loop
print("%s Prepare for consumption %s Yuan , The remaining %s Yuan , Lack of balance !"%(threading.currentThread(),money,gMONEY))
gCondition.wait()
gMONEY-=money
print("%s consumption %s Yuan , The remaining %s Yuan " % (threading.currentThread(), money, gMONEY))
gCondition.release()
time.sleep(0.5)
def main():
for x in range(3):
t = Customer(name=' Consumer thread %s'%x)
t.start()
for x in range(5):
t = Producer(name=' Producer thread %s'%x)
t.start()
if __name__ == '__main__':
main()
 Copy code
Print the results :
<Customer( Consumer thread 0, started 17316)> consumption 836 Yuan , The remaining 164 Yuan
<Customer( Consumer thread 1, started 17876)> Prepare for consumption 656 Yuan , The remaining 164 Yuan , Lack of balance !
<Customer( Consumer thread 2, started 3992)> Prepare for consumption 768 Yuan , The remaining 164 Yuan , Lack of balance !
Producer producer thread 0 Produced 575 The remaining total amount is 739
<Customer( Consumer thread 2, started 3992)> Prepare for consumption 768 Yuan , The remaining 739 Yuan , Lack of balance !
<Customer( Consumer thread 1, started 17876)> consumption 656 Yuan , The remaining 83 Yuan
Producer producer thread 1 Produced 470 The remaining total amount is 553
<Customer( Consumer thread 2, started 3992)> Prepare for consumption 768 Yuan , The remaining 553 Yuan , Lack of balance !
Producer producer thread 2 Produced 552 The remaining total amount is 1105
<Customer( Consumer thread 2, started 3992)> consumption 768 Yuan , The remaining 337 Yuan
Producer producer thread 3 Produced 631 The remaining total amount is 968
Producer producer thread 4 Produced 512 The remaining total amount is 1480
<Customer( Consumer thread 0, started 17316)> consumption 411 Yuan , The remaining 1069 Yuan
Producer producer thread 0 Produced 730 The remaining total amount is 1799
<Customer( Consumer thread 1, started 17876)> consumption 934 Yuan , The remaining 865 Yuan
Producer producer thread 1 Produced 802 The remaining total amount is 1667
<Customer( Consumer thread 2, started 3992)> consumption 559 Yuan , The remaining 1108 Yuan
Producer producer thread 2 Produced 827 The remaining total amount is 1935
Producer producer thread 3 Produced 319 The remaining total amount is 2254
Producer producer thread 4 Produced 633 The remaining total amount is 2887
<Customer( Consumer thread 0, started 17316)> consumption 132 Yuan , The remaining 2755 Yuan
<Customer( Consumer thread 1, started 17876)> consumption 676 Yuan , The remaining 2079 Yuan
<Customer( Consumer thread 2, started 3992)> consumption 240 Yuan , The remaining 1839 Yuan
<Customer( Consumer thread 0, started 17316)> consumption 284 Yuan , The remaining 1555 Yuan
<Customer( Consumer thread 1, started 17876)> consumption 150 Yuan , The remaining 1405 Yuan
<Customer( Consumer thread 2, started 3992)> consumption 717 Yuan , The remaining 688 Yuan
<Customer( Consumer thread 0, started 17316)> consumption 441 Yuan , The remaining 247 Yuan
<Customer( Consumer thread 2, started 3992)> consumption 215 Yuan , The remaining 32 Yuan
Copy code Reference resources :docs.python.org/zh-cn/3.6/l… In the thread , Access some global variables , Locking is a regular process . If you want to store some data in a queue , that Python Built in a thread safe module called queue modular .Python Medium queue Synchronous... Is provided in the module 、 Thread safe queue class , Include FIFO( fifo ) queue Queue,LIFO( After the first out ) queue LifoQueue The stack . These queues all implement lock primitives ( It can be understood as atomic operation , That is to say, do not do , Or it's all done ), Can be used directly in multithreading . You can use queues to synchronize threads . Queue object ([Queue](https://docs.python.org/zh-cn/3.6/library/queue.html#queue.Queue), [LifoQueue](https://docs.python.org/zh-cn/3.6/library/queue.html#queue.LifoQueue), perhaps [PriorityQueue](https://docs.python.org/zh-cn/3.6/library/queue.html#queue.PriorityQueue)) Provides the public methods described below :
queue.Queue(maxsize): Create a first in, first out queue .queue.Queue.qsize(): Returns the size of the queue .queue.Queue.empty(): Determines if the queue is empty .queue.Queue.full(): Determine if the queue is full .queue.Queue.get(): Get the last data from the queue ( That is, the value that first enters the queue )queue.Queue.put(): Put a data in the queue .queue.Queue.task_done(): Indicates that the task in front of the queue has been completed . Used by queued consumer threads . Every get() Used to get a task , Subsequent calls task_done() Tell the line , The processing of this task has been completed .If join() Currently blocking , After all the entries have been processed , Will unblock ( It means every put() Entry in queue task_done() All received ). If the number of calls is more than the number of items put in the queue , Will lead to ValueError abnormal .
queue.Queue.join(): All elements blocked into the queue are received and processed .When entries are added to the queue , The count of outstanding tasks increases . Every time a consumer thread calls task_done() Indicates that the item has been recycled , All work on this item has been completed , Incomplete count will decrease . When the unfinished count drops to zero , join() The block was lifted .
q.put(block=True): If the queue is full, it will be blocked all the time when the value is set , Until the queue size is less than maxsize( Default block by True) q.get(block=True): If the queue has no value, it will be blocked all the time ( Default block by True) Example :
import queue,threading,time
def set_value(q):
index = 0
while True:
q.put(index)
print(' Added a value to the queue :%s' % index)
index += 1
time.sleep(3)
def get_value(q):
while True:
print(q.get())
if __name__ == '__main__':
q = queue.Queue(4)
t1 = threading.Thread(target=set_value, args=[q])
t2 = threading.Thread(target=get_value, args=[q])
t1.start()
t2.start()
Copy code The producer is responsible for crawling the pictures url And pictures filename The consumer is responsible for downloading the pictures locally When the page queue page_queue When it's not worth it , Producers stop producing When the page queue page_queue No value and Picture queue img_queue When there is no value , Consumers stop spending summary : Get it from the Internet url Storing content and pictures locally is time-consuming I/O operation , Therefore, starting multiple threads will speed up a lot .
import threading
import requests
from lxml import etree
from urllib import request
import os
import re
from queue import Queue
class Producer(threading.Thread):
headers = {
'User-Agent': 'Mozilla/5.0 (Windows NT 10.0; Win64; x64) AppleWebKit/537.36 (KHTML, like Gecko) Chrome/62.0.3202.94 Safari/537.36'
}
def __init__(self,page_queue,img_queue,*args,**kwargs):
super(Producer, self).__init__(*args,**kwargs)
self.page_queue = page_queue
self.img_queue = img_queue
def run(self):
while True:
if self.page_queue.empty():
break
url = self.page_queue.get()
self.parse_page(url)
def parse_page(self,url):
response = requests.get(url,headers=self.headers)
text = response.text
html = etree.HTML(text)
imgs = html.xpath("//div[@class='page-content text-center']//a//img")
for img in imgs:
if img.get('class') == 'gif':
continue
img_url = img.xpath(".//@data-original")[0]
suffix = os.path.splitext(img_url)[1]
alt = img.xpath(".//@alt")[0]
alt = re.sub(r'[,.??,/\\·]','',alt)
img_name = alt + suffix
self.img_queue.put((img_url,img_name))
class Consumer(threading.Thread):
def __init__(self,page_queue,img_queue,*args,**kwargs):
super(Consumer, self).__init__(*args,**kwargs)
self.page_queue = page_queue
self.img_queue = img_queue
def run(self):
while True:
if self.img_queue.empty():
if self.page_queue.empty():
return
img = self.img_queue.get(block=True)
url,filename = img
request.urlretrieve(url,'images/'+filename)
print(filename+' Download complete !')
def main():
page_queue = Queue(100)
img_queue = Queue(500)
for x in range(1,101):
url = "http://www.doutula.com/photo/list/?page=%d" % x
page_queue.put(url)
for x in range(5):
t = Producer(page_queue,img_queue)
t.start()
for x in range(5):
t = Consumer(page_queue,img_queue)
t.start()
if __name__ == '__main__':
main()
Copy code Python The built-in interpreter is CPython.CPython The multithreading of the interpreter is actually a fake multithreading ( In multicore CPU in , Only one core can be used , Can't use multi-core ). Only one thread is executing at the same time , To ensure that only one thread is executing at the same time , stay CPython There is something in the interpreter called GIL(Global Intepreter Lock), It is called global interpreter lock . This interpreter lock is necessary . because CPython Interpreter memory management is not thread safe . Except, of course, CPython Interpreter , There are other interpreters , Some interpreters do not GIL The lock , See below :
Jython: use Java Realized Python Interpreter . non-existent GIL lock . For more details, see :zh.wikipedia.org/wiki/JythonIronPython: use .net Realized Python Interpreter . non-existent GIL lock . For more details, see :zh.wikipedia.org/wiki/IronPy…PyPy: use Python Realized Python Interpreter . There is GIL lock . For more details, see :zh.wikipedia.org/wiki/PyPyGIL Although it is a fake multithread . But we are dealing with some IO operation ( Such as file read / write and network request ) It can improve efficiency to a great extent . stay IO It is recommended to use multithreading to improve efficiency . In some CPU Multithreading is not recommended for computing operations , Multi process is recommended .
import requests
from lxml import etree
import threading
from queue import Queue
import csv
class BSSpider(threading.Thread):
headers = {
'User-Agent': 'Mozilla/5.0 (Windows NT 10.0; Win64; x64) AppleWebKit/537.36 (KHTML, like Gecko) Chrome/62.0.3202.94 Safari/537.36'
}
def __init__(self,page_queue,joke_queue,*args,**kwargs):
super(BSSpider, self).__init__(*args,**kwargs)
self.base_domain = 'http://www.budejie.com'
self.page_queue = page_queue
self.joke_queue = joke_queue
def run(self):
while True:
if self.page_queue.empty():
break
url = self.page_queue.get()
response = requests.get(url, headers=self.headers)
text = response.text
html = etree.HTML(text)
descs = html.xpath("//div[@class='j-r-list-c-desc']")
for desc in descs:
jokes = desc.xpath(".//text()")
joke = "\n".join(jokes).strip()
link = self.base_domain+desc.xpath(".//a/@href")[0]
self.joke_queue.put((joke,link))
print('='*30+" The first %s Page download complete !"%url.split('/')[-1]+"="*30)
class BSWriter(threading.Thread):
headers = {
'User-Agent': 'Mozilla/5.0 (Windows NT 10.0; Win64; x64) AppleWebKit/537.36 (KHTML, like Gecko) Chrome/62.0.3202.94 Safari/537.36'
}
def __init__(self, joke_queue, writer,gLock, *args, **kwargs):
super(BSWriter, self).__init__(*args, **kwargs)
self.joke_queue = joke_queue
self.writer = writer
self.lock = gLock
def run(self):
while True:
try:
joke_info = self.joke_queue.get(timeout=40)
joke,link = joke_info
self.lock.acquire()
self.writer.writerow((joke,link))
self.lock.release()
print(' Save one ')
except:
break
def main():
page_queue = Queue(10)
joke_queue = Queue(500)
gLock = threading.Lock()
fp = open('bsbdj.csv', 'a',newline='', encoding='utf-8')
writer = csv.writer(fp)
writer.writerow(('content', 'link'))
for x in range(1,11):
url = 'http://www.budejie.com/text/%d' % x
page_queue.put(url)
for x in range(5):
t = BSSpider(page_queue,joke_queue)
t.start()
for x in range(5):
t = BSWriter(joke_queue,writer,gLock)
t.start()
if __name__ == '__main__':
main()
Copy code What is? AJAX: AJAX(Asynchronouse JavaScript And XML) asynchronous JavaScript and XML. Through a small amount of data exchange with the server in the background ,Ajax Asynchronous update of web pages . This means that you can load the entire page without reloading it , Update a part of the web page . Traditional web pages ( Don't use Ajax) If you need to update the content , You have to reload the entire page . Because the traditional transmission data format , It uses XML grammar . So it's called AJAX, In fact, data interaction now basically uses JSON. Use AJAX Loaded data , Even if JS, Render the data into the browser , stay Right click -> View page source code Still can't see through ajax Loaded data , You can only see using this url Loaded html Code .
Selenium+chromedriver Get dynamic data :Selenium It's like a robot . It can simulate some human behaviors on the browser , Automatically handle some behavior on the browser , For example, click on , Fill in the data , Delete cookie etc. .chromedriver It's a driver Chrome Browser driver , Use it to drive the browser . Of course, there are different for different browsers driver. The following lists the different browsers and their corresponding driver:
install Selenium and chromedriver:
Selenium There are many language versions , Yes java、ruby、python etc. . We download python Version will do .
pip install selenium
Copy code chromedriver: download chromedriver.exe after , Just put it in the pure English directory without permission . Now take a simple example of getting Baidu home page Selenium and chromedriver How to get started quickly :
from selenium import webdriver
# chromedriver The absolute path of
driver_path = r'D:\ProgramApp\chromedriver\chromedriver.exe'
# Initialize a driver, And specify chromedriver The path of
driver = webdriver.Chrome(executable_path=driver_path)
# Request web page
driver.get("https://www.baidu.com/")
# adopt page_source Get web source code
print(driver.page_source)
Copy code For more tutorials, please refer to :selenium-python.readthedocs.io/installatio…www.cnblogs.com/XJT2018/p/1…
driver.close(): Close current page .driver.quit(): Exit the entire browser . Import By:from selenium.webdriver.common.by import By
find_element_by_id: according to id To find an element . Equivalent to :submitTag = driver.find_element_by_id('su')
submitTag1 = driver.find_element(By.ID,'su')
Copy code find_element_by_class_name: Find elements by class name . Equivalent to :submitTag = driver.find_element_by_class_name('su')
submitTag1 = driver.find_element(By.CLASS_NAME,'su')
Copy code find_element_by_name: according to name Property to find the element ( some input The label has name attribute ). Equivalent to :submitTag = driver.find_element_by_name('email')
submitTag1 = driver.find_element(By.NAME,'email')
Copy code find_element_by_tag_name: Find elements by tag name . Equivalent to :submitTag = driver.find_element_by_tag_name('div')
submitTag1 = driver.find_element(By.TAG_NAME,'div')
Copy code find_element_by_xpath: according to xpath Syntax to get elements . Equivalent to :submitTag = driver.find_element_by_xpath('//div')
submitTag1 = driver.find_element(By.XPATH,'//div')
Copy code find_element_by_css_selector: according to css Selectors select elements . Equivalent to :submitTag = driver.find_element_by_css_selector('//div')
submitTag1 = driver.find_element(By.CSS_SELECTOR,'//div')
Copy code Be careful ,find_element Is to get the first element that meets the condition .find_elements Is to get all the elements that meet the conditions . find_element_by_id These methods use Python Written , lookup HTML The performance of elements is not as good as xpath, If you don't need to interact with browser content ( If you click Or enter the contents into the input box ), You can throw the web page source code to lxml Parsing etree.HTML(driver.page_source)
send_keys(value), Fill in the data . The sample code is as follows :inputTag = driver.find_element_by_id('kw')
inputTag.send_keys('python')
Copy code clear Method can clear the contents of the input box . The sample code is as follows :inputTag.clear()
Copy code checkbox label , In the web page, it is through mouse click . So I want to select checkbox label , Then select this tab first , And then execute click event . The sample code is as follows :rememberTag = driver.find_element_by_name("rememberMe")
rememberTag.click()
Copy code selenium.webdriver.support.ui.Select. Pass the obtained element as a parameter to this class , Create this object . You can use this object for selection later . The sample code is as follows :from selenium.webdriver.support.ui import Select
# Check this tab , And then use Select Create objects
selectTag = Select(driver.find_element_by_name("jumpMenu"))
# Choose... According to the index
selectTag.select_by_index(1)
# Select... According to the value
selectTag.select_by_value("http://www.95yueba.com")
# Select... Based on visual text
selectTag.select_by_visible_text("95 Show client ")
# Deselect all options
selectTag.deselect_all()
Copy code click Function is OK . The sample code is as follows :inputTag = driver.find_element_by_id('su')
inputTag.click()
Copy code Sometimes the operation in the page may have many steps , Then you can use the mouse behavior chain class ActionChains To complete . For example, now you want to move the mouse over an element and execute a click event . So the sample code is as follows :
inputTag = driver.find_element_by_id('kw')
submitTag = driver.find_element_by_id('su')
actions = ActionChains(driver)
actions.move_to_element(inputTag)
actions.send_keys_to_element(inputTag,'python')
actions.move_to_element(submitTag)
actions.click(submitTag)
actions.perform()
 Copy code
There are more mouse related operations .
It is often used in automated testing , But reptiles don't use much , Understanding can For more methods, please refer to :selenium-python.readthedocs.io/api.html
cookie:for cookie in driver.get_cookies():
print(cookie)
Copy code value = driver.get_cookie(key)
Copy code driver.delete_all_cookies()
Copy code cookie:driver.delete_cookie(key)
Copy code cookie2 = {"name":"BDUSS","value":"UJJTH5rcE9qd1VsWDZ5SzFsQkJVZUVPZTMwRi05bzg4UDE5YXJYZDAzNklkRzViQVFBQUFBJCQAAAAAAAAAAAEAAADzdT9HTGlseTAyNTE4AAAAAAAAAAAAAAAAAAAAAAAAAAAAAAAAAAAAAAAAAAAAAAAAAAAAAAAAAAAAAAAAAAAAAAAAAIjnRluI50Zbe"}
driver.add_cookie(cookie2)
Copy code Now more and more web pages adopt Ajax technology , In this way, the program can't determine when an element is fully loaded . If the actual page waiting time is too long, resulting in some dom The elements haven't come out yet , But your code uses this directly WebElement, Then it will throw NullPointer It's abnormal . To solve this problem . therefore Selenium There are two ways to wait : One is implicit waiting 、 One is explicit waiting .
driver.implicitly_wait. So before getting the unavailable elements , Will wait first. 10 Time in seconds . The sample code is as follows :driver = webdriver.Chrome(executable_path=driver_path)
driver.implicitly_wait(10)
# Request web page
driver.get("https://www.douban.com/")
Copy code selenium.webdriver.support.excepted_conditions Expected conditions and selenium.webdriver.support.ui.WebDriverWait To complete . The sample code is as follows :from selenium import webdriver
from selenium.webdriver.common.by import By
from selenium.webdriver.support.ui import WebDriverWait
from selenium.webdriver.support import expected_conditions as EC
driver = webdriver.Firefox()
driver.get("http://somedomain/url_that_delays_loading")
try:
element = WebDriverWait(driver, 10).until(
EC.presence_of_element_located((By.ID, "myDynamicElement"))
)
finally:
driver.quit()
Copy code Example : 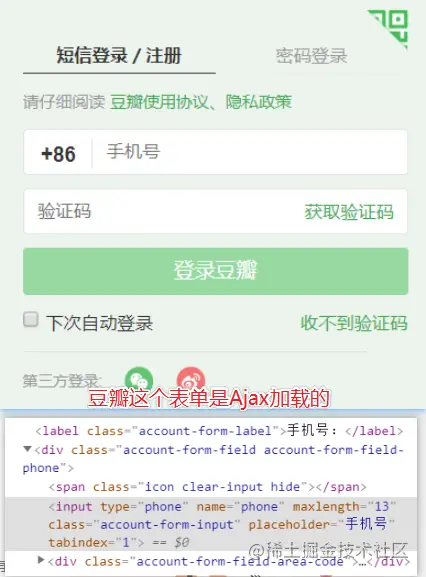
Sometimes there are many children in the window tab page . It must be necessary to switch at this time .selenium There's a name switch_to_window To switch , Which page to switch to , It can be downloaded from driver.window_handles Find . The sample code is as follows :
# Open a new page
self.driver.execute_script("window.open('"+url+"')")
# Switch to this new page
self.driver.switch_to_window(self.driver.window_handles[1])
 Copy code
switch_to_window and switch_to.window It's the same thing ,selenium The latest version is recommended switch_to.window()
Example :
driver.get('https://www.baidu.com/')
# driver.get("https://www.douban.com/") # Open Douban directly on the current Baidu page
driver.execute_script("window.open('https://www.douban.com/')")
print(driver.window_handles)
driver.switch_to_window(driver.window_handles[1])
print(driver.current_url)
print(driver.page_source)
# Although I switched to a new page in the window . however driver There is no switch in .
# If you want to switch to a new page in your code , And do some crawling .
# So you should use driver.switch_to_window To switch to the specified window
# from driver.window_handlers Take out the specific windows in
# driver.window_handlers It's a list , Inside are all window handles .
# It stores handles to windows in the order they are opened .
Copy code demo10.py Sometimes I often crawl some web pages . The server will block you when it finds you are a crawler ip Address . At this time, we can change the agent ip. Change agent ip, Different browsers have different implementations . Here we use Chrome Take browser as an example to explain :
from selenium import webdriver
options = webdriver.ChromeOptions()
options.add_argument("--proxy-server=http://110.73.2.248:8123")
driver_path = r"D:\ProgramApp\chromedriver\chromedriver.exe"
driver = webdriver.Chrome(executable_path=driver_path,chrome_options=options)
driver.get('http://httpbin.org/ip')
 Copy code
WebElement Elements :demo8.py from selenium.webdriver.remote.webelement import WebElement Class is the class of each obtained element . Source code analysis
"""Represents a DOM element. Generally, all interesting operations that interact with a document will be performed through this interface. All method calls will do a freshness check to ensure that the element reference is still valid. This essentially determines whether or not the element is still attached to the DOM. If this test fails, then an ``StaleElementReferenceException`` is thrown, and all future calls to this instance will fail."""
Representing one DOM Elements . Generally speaking , All the interesting operations interacting with the document will be performed through this interface .
All method calls will be checked for freshness , To ensure that the element is still valid . This essentially determines that the element is still connected to DOM. If this test fails , Then throw it out "StaleElementReferenceException", All future attempts at this example will fail .
Copy code driver Upper use .driver.save_screenshot('baidu.png')divTag.find_element_by_id() ...
driver Object class of , It's also inherited from WebElement. Read more about the source code . Example :
submitBtn = driver.find_element_by_id('su')
print(type(submitBtn)) #<class 'selenium.webdriver.remote.webelement.WebElement'>
print(submitBtn.get_attribute("value")) # use Baidu Search
driver.save_screenshot('baidu.png') # Save the screenshot
Copy code from selenium import webdriver
from selenium.webdriver.remote.webelement import WebElement
driver_path = r"C:\programApps\chromedriver\chromedriver.exe"
driver = webdriver.Chrome(executable_path=driver_path)
Copy code We use Python Built in functions dir() Print out driver All properties and methods of : print(dir(driver))
[‘NATIVE_EVENTS_ALLOWED’, ‘class’, ‘delattr’, ‘dict’, ‘doc’, ‘format’, ‘getattribute’, ‘hash’, ‘init’, ‘module’, ‘new’, ‘reduce’, ‘reduce_ex’, ‘repr’, ‘setattr’, ‘sizeof’, ‘str’, ‘subclasshook’, ‘weakref’, ‘_file_detector’, ‘_is_remote’, ‘_mobile’, ‘_switch_to’, ‘_unwrap_value’, ‘_wrap_value’, ‘add_cookie’, ‘application_cache’, ‘back’, ‘binary’, ‘capabilities’, ‘close’, ‘command_executor’, ‘create_web_element’, ‘current_url’, ‘current_window_handle’, ‘delete_all_cookies’, ‘delete_cookie’, ‘desired_capabilities’, ‘error_handler’, ‘execute’, ‘execute_async_script’, ‘execute_script’, ‘file_detector’, ‘find_element’, ‘find_element_by_class_name’, ‘find_element_by_css_selector’, ‘find_element_by_id’, ‘find_element_by_link_text’, ‘find_element_by_name’, ‘find_element_by_partial_link_text’, ‘find_element_by_tag_name’, ‘find_element_by_xpath’, ‘find_elements’, ‘find_elements_by_class_name’, ‘find_elements_by_css_selector’, ‘find_elements_by_id’, ‘find_elements_by_link_text’, ‘find_elements_by_name’, ‘find_elements_by_partial_link_text’, ‘find_elements_by_tag_name’, ‘find_elements_by_xpath’, ‘firefox_profile’, ‘forward’, ‘get’, ‘get_cookie’, ‘get_cookies’, ‘get_log’, ‘get_screenshot_as_base64’, ‘get_screenshot_as_file’, ‘get_screenshot_as_png’, ‘get_window_position’, ‘get_window_size’, ‘implicitly_wait’, ‘log_types’, ‘maximize_window’, ‘mobile’, ‘name’, ‘orientation’, ‘page_source’, ‘profile’, ‘quit’, ‘refresh’, ‘save_screenshot’, ‘session_id’, ‘set_page_load_timeout’, ‘set_script_timeout’, ‘set_window_position’, ‘set_window_size’, ‘start_client’, ‘start_session’, ‘stop_client’, ‘switch_to’, ‘switch_to_active_element’, ‘switch_to_alert’, ‘switch_to_default_content’, ‘switch_to_frame’, ‘switch_to_window’, ‘title’, ‘w3c’, ‘window_handles’]
 Copy code
The common attributes and methods are summarized as follows :
- driver.find_element_by_class_name(): adopt class The name of the style gets what you want
- dirver.find_element_by_id(): adopt id Get what you want with the name of
- driver.find_element_by_link_text(): Get the corresponding link through the input text content
- driver.find_element_by_css_selector(): adopt css The name of the style gets what you want
- driver.find_element_by_tag_name(): Get what you want by the name of the tag
- driver.find_element_by_xpath(): Used a certain label xpath Path to get what you want
Be careful :find_elements_by_xxx Is to get multiple objects
Reference resources : Simulate manual dragging ( First fast then slow ) Trajectory algorithm www.51testing.com/html/41/n-3…www.jianshu.com/p/f1fef22a1… There are some problems identified as being machine driven The following technologies are involved : Positioning elements 、 Manipulate form elements 、 Behavioral chain ( Drag slider to verify )
www.jianshu.com/p/c34eaecd6…www.wenjuan.com/report/stat… Filling out website :www.wenjuan.com/s/7fA7RjT/
Boss Direct employment data is not passed Ajax Sent , Directly view the web page source code to find the data
www.zhipin.com/job_detail/…

What hinders our reptiles . Sometimes it is the graphic verification code when logging in or requesting some data . So here we talk about a technology that can translate pictures into words . Translating pictures into characters is generally called optical character recognition (Optical Character Recognition), Shorthand for OCR. Realization OCR Not many libraries , Especially open source . Because there are certain technical barriers in this area ( It takes a lot of data 、 Algorithm 、 machine learning 、 Deep learning knowledge, etc ), And if done well, it has high commercial value . Therefore, there are few open source . Here is an excellent image recognition open source library :Tesseract.
Tesseract It's a OCR library , Currently sponsored by Google .Tesseract Is currently recognized as the best 、 The most accurate open source OCR library .Tesseract With high recognition , It also has high flexibility , He can recognize any font through training . install :Windows System : Download the executable at the link below , Then click next to install ( Put it under the pure English path without permission ): github.com/tesseract-o…Linux System : You can download the source code and compile it yourself at the following link . github.com/tesseract-o… Or in ubuntu Under, install through the following command :
sudo apt install tesseract-ocr
 Copy code
Mac System : use Homebrew Easy installation :
brew install tesseract
 Copy code
Set the environment variable : After installation , If you want to use... On the command line Tesseract, Then you should set the environment variable .Mac and Linux It has been set by default during installation . stay Windows with hands tesseract.exe The path where is added to PATH In the environment variables . Another environment variable that needs to be set is , Put the training data file path into the environment variable . In the environment variable , Add one TESSDATA_PREFIX=C:\path_to_tesseractdata\teseractdata.
If you want to cmd Can be used under tesseract command , So you need to take tesseract.exe Put the directory where you are in PATH In the environment variables . Then use the command :tesseract Picture path File path . Example :
tesseract a.png a
 Copy code
Then you will recognize a.png Picture in , And write the text into a.txt in . If you don't want to write a file, you want to display it on the terminal , Then just don't add the file name .
stay Python Code operation tesseract. You need to install a library , be called pytesseract. adopt pip You can install :
pip install pytesseract
 Copy code
also , Need to read the picture , You need to use a third-party library called PIL. adopt pip list See if it is installed . If not installed , adopt pip Mode of installation :
pip install PIL
 Copy code
Use pytesseract The example code of converting the text on the picture into text text is as follows :
# Import pytesseract library
import pytesseract
# Import Image library
from PIL import Image
# Appoint tesseract.exe Path
pytesseract.pytesseract.tesseract_cmd = r'D:\ProgramApp\TesseractOCR\tesseract.exe'
# Open the picture
image = Image.open("a.png")
# call image_to_string Convert picture to text
text = pytesseract.image_to_string(image)
print(text)
Copy code pytesseract Handle the drawing grid graphic verification code :import pytesseract
from urllib import request
from PIL import Image
import time
pytesseract.pytesseract.tesseract_cmd = r"D:\ProgramApp\TesseractOCR\tesseract.exe"
while True:
captchaUrl = "https://passport.lagou.com/vcode/create?from=register&refresh=1513081451891"
request.urlretrieve(captchaUrl,'captcha.png')
image = Image.open('captcha.png')
text = pytesseract.image_to_string(image,lang='eng')
print(text)
time.sleep(2)
Copy code recommend : The super eagles www.chaojiying.com/
Sometimes a web page requested by a crawler needs to carry the information obtained from the first page of the request or after logging in cookie, There are two ways to deal with cookie
Put... In the bag capturing tool cookie Paste to request headers in disadvantages :cookie Limitation period , After the expiration of the limitation period, it needs to be handled manually again
be based on Session Object to implement automatic processing How to get a Session object :requests.Session() Return to one session object session The role of objects :
- This object can look like requests Same call get/post Initiate request , It's just that if you're using session In the process of sending a request, if cookie, be cookie Will be automatically stored in the session In the object ,name It means you can use it next time session When the object makes a request , The request will carry cookie
- Use in reptiles session,session Object is used at least a few times ?
- 2 Time , For the first time session To capture cookie Store in session In the object , Use... For the second time session.get() or session.post() Bring with you when you make a request cookie
Example : The data requested by snowball needs to carry the data obtained when visiting the home page cookie home page :xueqiu.com/ Get data initiated ajax request :xueqiu.com/statuses/ho…
headers = {
"User-Agent": "Mozilla/5.0 (Windows NT 10.0; WOW64) AppleWebKit/537.36 (KHTML, like Gecko) Chrome/69.0.3472.3 Safari/537.36"
}
def xueqiu():
session = requests.Session()
main_url = "https://xueqiu.com/"
session.get(url=main_url,headers=headers) #1. obtain cookie Store in session In the object
url = "https://xueqiu.com/statuses/hot/listV2.json?since_id=-1&max_id=218185&size=15"
#2. Use session When an object initiates a request, it will carry the original stored cookie
page_text = session.get(url=url,headers=headers)
print(page_text.json())
Copy code 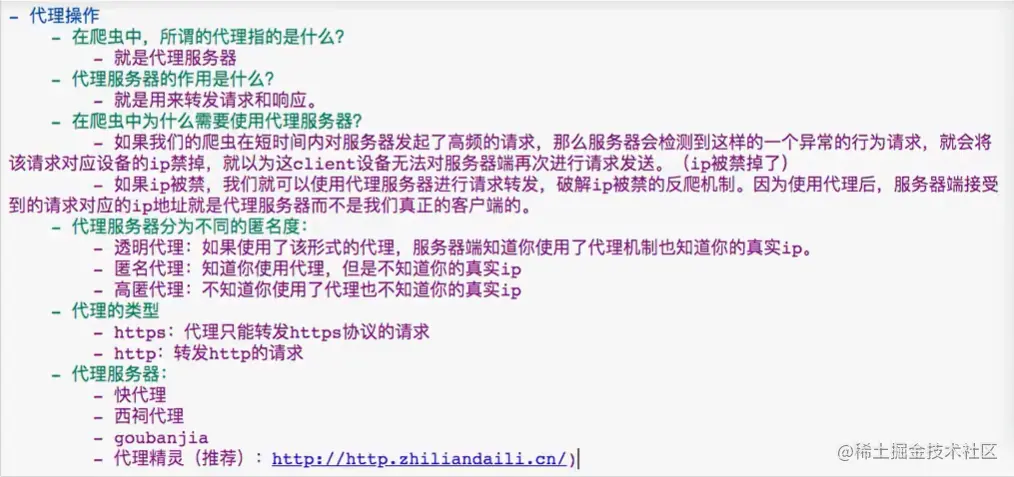
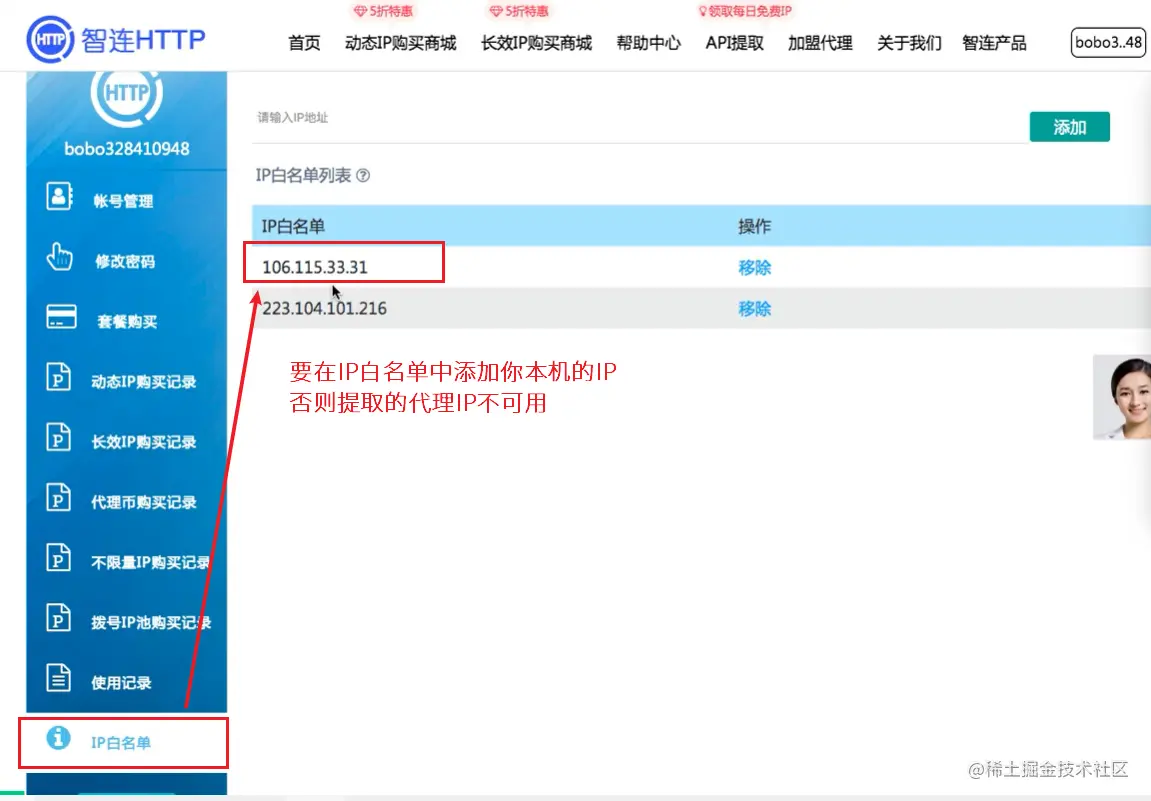 Recommended purchasing agent : www.qg.net/ Green fruit agency www.jinglingdaili.com/Shop-index.… Zhaopin LTD HTTP agent

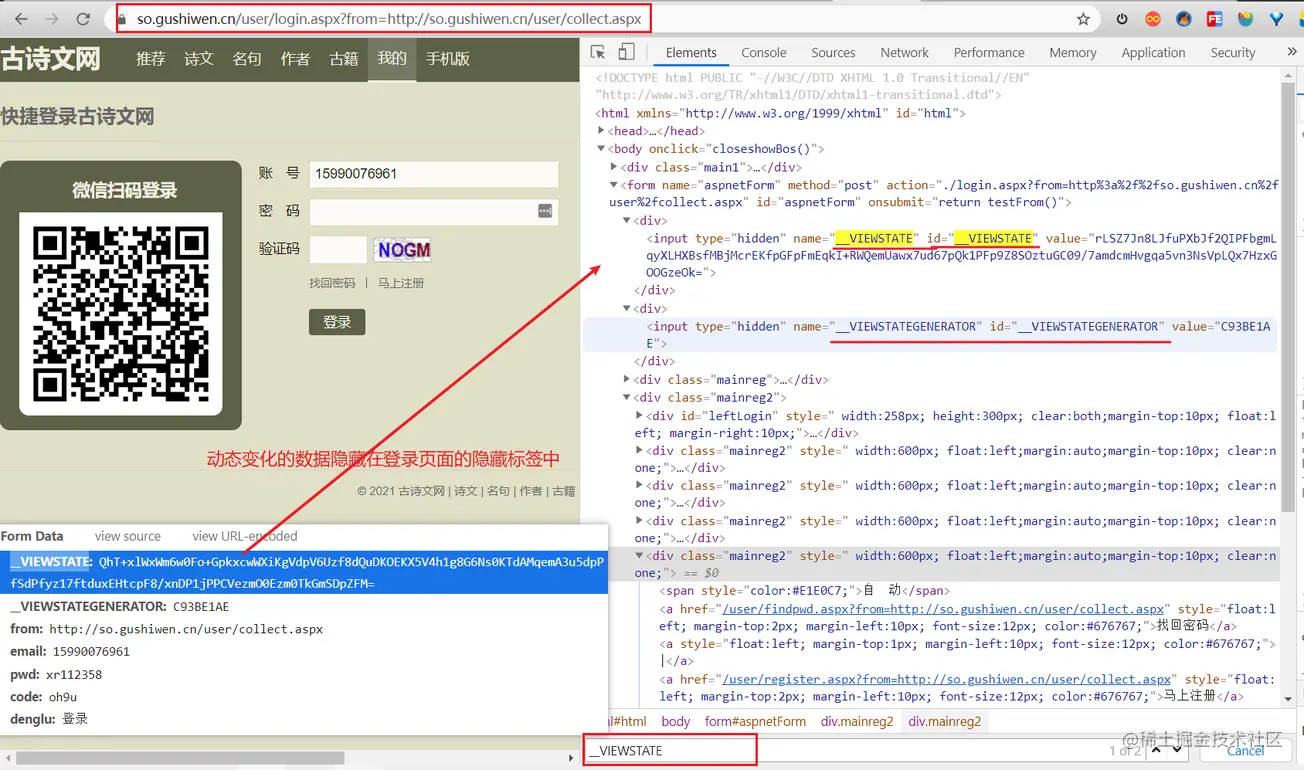
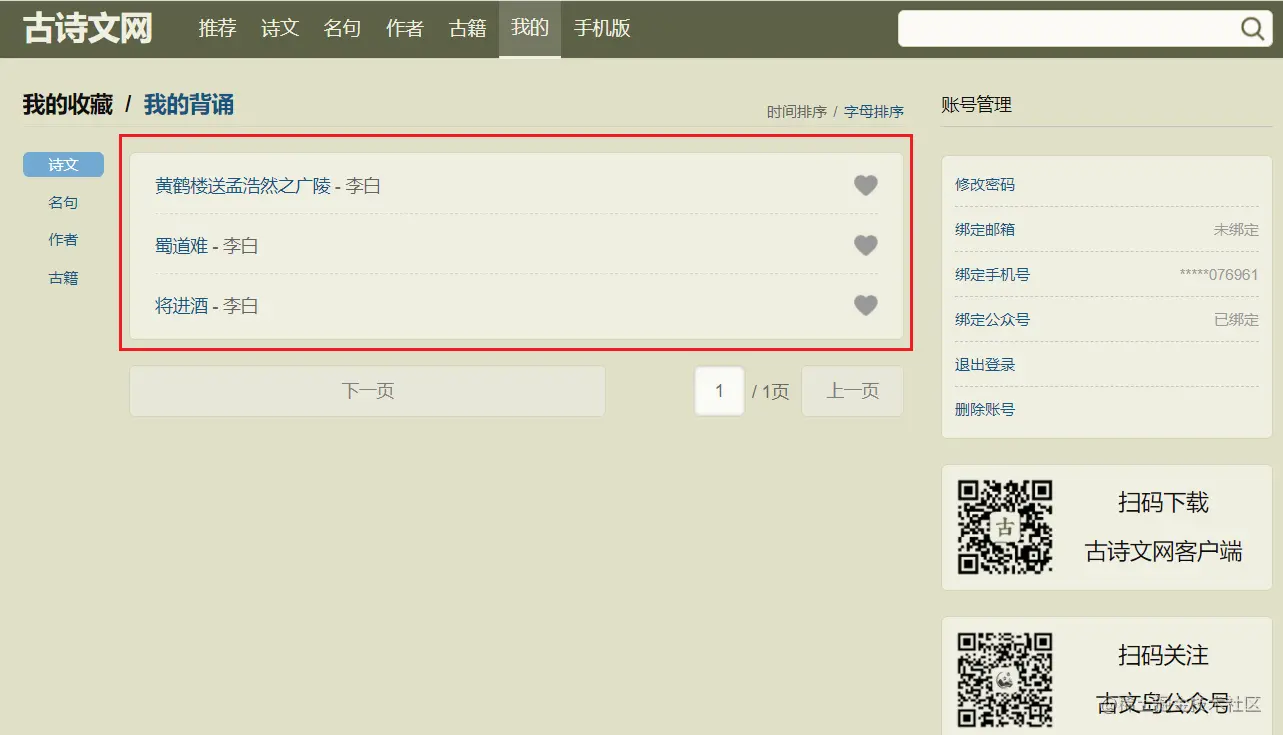
Case study : Simulated landing Ancient poetry network Display the collection interface after successful login
import requests
from lxml import etree
from hashlib import md5
import os
headers = {
"user-agent": "Mozilla/5.0 (Windows NT 10.0; Win64; x64) AppleWebKit/537.36 (KHTML, like Gecko) Chrome/90.0.4430.212 Safari/537.36"
}
class Chaojiying_Client(object):
def __init__(self, username, password, soft_id):
self.username = username
password = password.encode('utf8')
self.password = md5(password).hexdigest()
self.soft_id = soft_id
self.base_params = {
'user': self.username,
'pass2': self.password,
'softid': self.soft_id,
}
self.headers = {
'Connection': 'Keep-Alive',
'User-Agent': 'Mozilla/4.0 (compatible; MSIE 8.0; Windows NT 5.1; Trident/4.0)',
}
def PostPic(self, im, codetype):
""" im: Picture byte codetype: Topic type Reference resources http://www.chaojiying.com/price.html """
params = {
'codetype': codetype,
}
params.update(self.base_params)
files = {'userfile': ('ccc.jpg', im)}
r = requests.post('http://upload.chaojiying.net/Upload/Processing.php', data=params, files=files, headers=self.headers)
return r.json()
def ReportError(self, im_id):
""" im_id: Picture of the wrong title ID """
params = {
'id': im_id,
}
params.update(self.base_params)
r = requests.post('http://upload.chaojiying.net/Upload/ReportError.php', data=params, headers=self.headers)
return r.json()
def autoLoginGusiwen():
#1. obtain cookie
base_url = "https://www.gushiwen.cn/"
session = requests.session()
session.get(base_url, headers=headers)
#2. Gets the captcha image , In any possible way cookie We all use session request
get_captcha = "https://so.gushiwen.cn/RandCode.ashx"
captcha_data = session.get(get_captcha, headers=headers).content
with open("captcha.jpg","wb") as fb:
fb.write(captcha_data)
# Delete verification code picture
# if os.path.exists("./captcha.jpg"):
# os.remove("./captcha.jpg")
#3. Verification code recognition
chaojiying = Chaojiying_Client('xiongjt', 'xr112358', '918609')
im = open('captcha.jpg', 'rb').read()
captcha_code = chaojiying.PostPic(im, 1902)['pic_str']
print(captcha_data)
data = {
"__VIEWSTATE": "QYT6bITNDKjYdvVxdot7+vPqPoibPocr1Uma873iIyDBkxwn4ytNTF6GrEzvWhW6qUoWrDqq8h60wKlA/2v+RWbdkxODYjFlKvuTfQ8fb1wo4tpvv1ln5RLpR7k=",
"__VIEWSTATEGENERATOR": "C93BE1AE",
"from": "http://so.gushiwen.cn/user/collect.aspx?sort=t",
"email": "15990076961",
"pwd": "xr112358",
"code": captcha_code,
"denglu": " Sign in "
}
#4. Sign in
login_url = "https://so.gushiwen.cn/user/login.aspx?from=http%3a%2f%2fso.gushiwen.cn%2fuser%2fcollect.aspx%3fsort%3dt"
response = session.post(login_url,headers=headers,data=data)
response.encoding = response.apparent_encoding
with open("gusiwen.html","w",encoding="utf-8") as fw:
fw.write(response.text)
if __name__ == '__main__':
autoLoginGusiwen()
 Copy code
a key : The first 4 Step land post There are two sets of request parameters out of order in the submitted data , It's best to refresh the page many times to manually test whether the login is dynamic data , __VIEWSTATE __VIEWSTATEGENERATOR
Processing mode :
- Generally speaking, dynamically changing request parameters will be hidden in the foreground page , Then we have to resort to Chrome The packet capture tool searches the source code of the front page
- If there is no , We need to use the packet capture tool for global search