The first 9 Chapter Multi selection button control (Checkbutton)
Multi selection button control , Also called check button control , It is used to realize ON-OFF Selected standard controls . The prompt message of the multi selection button can be text , It can also be an image . Each multi select button can set an independent callback function , To achieve specific processing . You can also use a callback function with multiple multiple buttons .
Prompt text can only use one font , But it can be displayed across lines . Unlike radio buttons , Each multi selection button needs to be associated with a variable . The multi select button control is used to select between two different values ( It usually turns the function on or off ).
9.1 Properties of the multi select button control
9.1.1 activebackground and activeforeground
activebackground When the left mouse button is pressed , The background color of the multi selection button , After the mouse button is released , Restore the original color .activeforeground When the left mouse button is pressed , The text color of the multi selection button , After the mouse button is released , Restore the original color
import tkinter as tk
root=tk.Tk()
root.geometry('300x240')
b1 = tk.Checkbutton(root,
text=' choice 1',
activebackground='red',
activeforeground='yellow')
b1.pack()
root.mainloop()
result :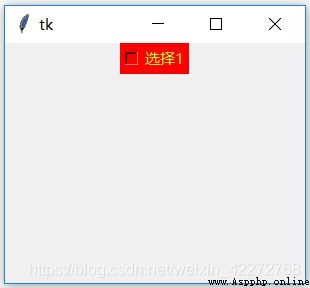
9.1.2 anchor
The usage is the same as that of radio buttons in Chapter 8 . For details, please refer to 8.1.2 Section . Only the code and results are attached here .
#pack Layout
import tkinter as tk
root=tk.Tk()
root.geometry('300x240')
b1 = tk.Checkbutton(root,
text=' choice 1',anchor=tk.S+tk.W)
b1.pack(fill=tk.BOTH,expand=True)
root.mainloop()
#grid Layout :
import tkinter as tk
root=tk.Tk()
root.geometry('300x240')
root.rowconfigure(0, weight=1)
root.columnconfigure(0, weight=1)
b1 = tk.Checkbutton(root,
text=' choice 1',anchor=tk.S+tk.W)
b1.grid(row=0,column=0,sticky='nsew')
root.mainloop()
result :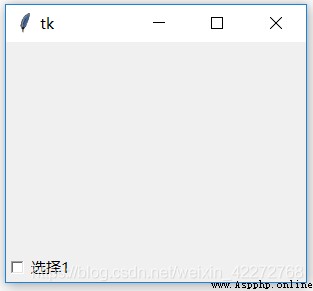

9.1.3 background(bg)
Set the background color of the multi selection button .bg Is an abbreviation .
import tkinter as tk
root=tk.Tk()
root.geometry('300x240')
b1 = tk.Checkbutton(root,text=' Red ',bg='red')
b1.pack()
b2 = tk.Checkbutton(root,text=' Blue ',bg='blue')
b2.pack()
b3 = tk.Checkbutton(root,text=' green ',bg='green')
b3.pack()
root.mainloop()
result :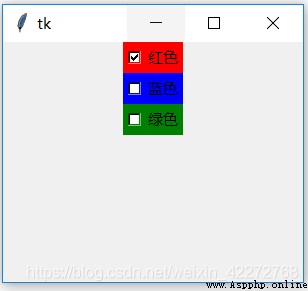
9.1.4 foreground(fg)
Set the prompt text color of the multi selection button .fg Is an abbreviation .
import tkinter as tk
root=tk.Tk()
root.geometry('300x240')
b1 = tk.Checkbutton(root,
text=' Red ',bg='red',fg='yellow')
b1.pack()
b2 = tk.Checkbutton(root,
text=' Blue ',bg='blue',fg='yellow')
b2.pack()
b3 = tk.Checkbutton(root,
text=' green ',bg='green',fg='yellow')
b3.pack()
root.mainloop()
result :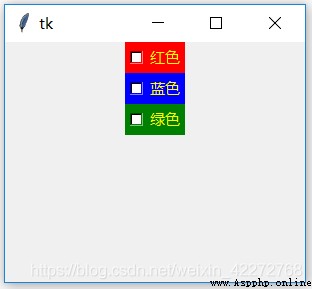
9.1.5 font
Set the font of the prompt text of the multi selection button . Only one font can be set for a multi selection button . For detailed font description, see 3.3.3 section .
import tkinter as tk
root=tk.Tk()
root.geometry('300x240')
b1 = tk.Checkbutton(root,
text=' Red ',fg='red',
font=('times',20,'bold'))
b1.pack()
root.mainloop()
result :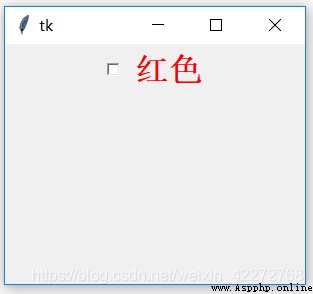
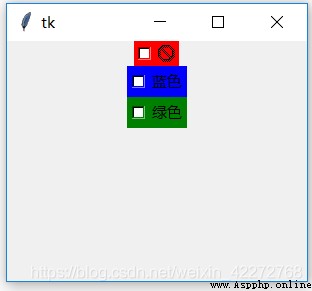
9.1.6 image and bitmap
image and bitmap There are two ways to display picture prompt information .image It's mainly used .bitmap Methods are rarely used . Priority of prompt message :image>bitmap>text
#image
import tkinter as tk
root=tk.Tk()
root.geometry('300x240')
aimage=tk.PhotoImage(file='a.gif')
b1 = tk.Checkbutton(root,image=aimage,bg='red')
b1.pack()
b2 = tk.Checkbutton(root,text=' Blue ',bg='blue')
b2.pack()
b3 = tk.Checkbutton(root,text=' green ',bg='green')
b3.pack()
root.mainloop()
#bitmap
import tkinter as tk
root=tk.Tk()
root.geometry('300x240')
b1 = tk.Checkbutton(root,bitmap='error',bg='red')
b1.pack()
b2 = tk.Checkbutton(root,text=' Blue ',bg='blue')
b2.pack()
b3 = tk.Checkbutton(root,text=' green ',bg='green')
b3.pack()
root.mainloop()
result :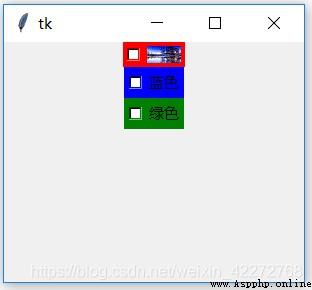
9.1.7 borderwidth(bd)
Set the border width of the multi selection button , The default unit is pixels . For other values, see 3.3.1 section
import tkinter as tk
root=tk.Tk()
root.geometry('300x240')
b1 = tk.Checkbutton(root,text=' Frame ',bd=20)
b1.pack()
root.mainloop()
result :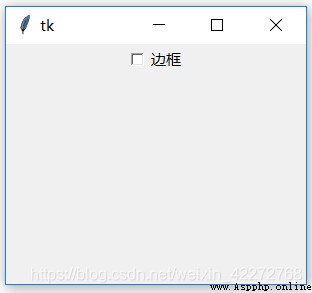

explain : The default values used in Figure 1 , Figure 2 uses 20 A pixel border . You can see the obvious difference .
9.1.8 state and disabledforeground
state Is to set the status of multiple selection buttons . There are three :NORMAL、ACTIVE and DISABLED.NORMAL and ACTIVE State, , Multiple selection buttons can be used normally .DISABLED State, , The multi selection button cannot be used or selected . and disabledforeground Yes set in DISABLED The prompt text color of the multi selection button in the state , in other words , When the multi-choice button is disabled , You can use this attribute to prompt the user that the current state is DISABLED.
import tkinter as tk
root=tk.Tk()
root.geometry('300x240')
b1 = tk.Checkbutton(root,
text=' Disable background color ',
state='disabled',
disabledforeground='red')
b1.pack()
root.mainloop()
result :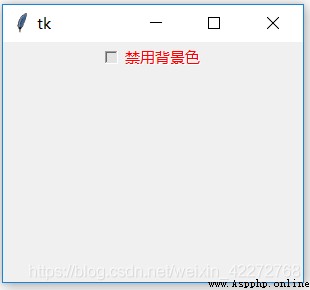
explain : When the multi selection button is disabled , The color of the prompt text is red .
9.1.9 highlightcolor、highlightbackground and highlightthickness
These three attributes are the background color of the border when the multi selection button gets or loses input focus 、 Highlight color and border width . however highlightcolor and highlightbackground It doesn't work in the multi selection button .highlightthickness It works , You can increase the width of the border .
9.1.10 selectcolor
The indicator background color of the multi selection button . The default is white . You can set the color of the indicator by setting this option
import tkinter as tk
root=tk.Tk()
root.geometry('300x240')
color=tk.IntVar()
b1 = tk.Checkbutton(root,text=' Red ',
bg='red',selectcolor='yellow')
b1.pack()
b2 = tk.Checkbutton(root,text=' Blue ',bg='blue')
b2.pack()
b3 = tk.Checkbutton(root,text=' green ',bg='green')
b3.pack()
root.mainloop()
result :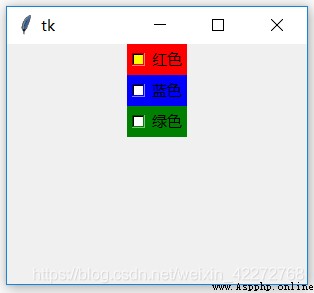
9.1.11 selectimage
After the set multiple selection button is selected , Pictures to show .
import tkinter as tk
root=tk.Tk()
root.geometry('300x240')
aimage=tk.PhotoImage(file='a.gif')
bimage=tk.PhotoImage(file='b.gif')
b1 = tk.Checkbutton(root,bg='red',
image=aimage,selectimage=bimage)
b1.pack()
b2 = tk.Checkbutton(root,text=' Blue ',bg='blue')
b2.pack()
b3 = tk.Checkbutton(root,text=' green ',bg='green')
b3.pack()
root.mainloop()
result :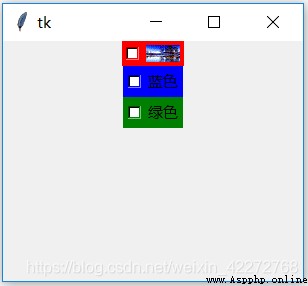
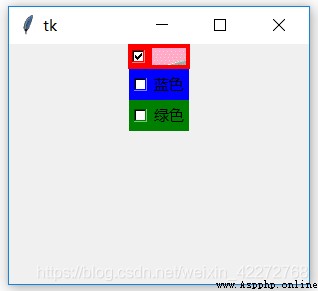
explain : Be sure to use image As a reminder . If using text Property to display a text prompt ,selectimage Attributes don't work .
9.1.12 cursor
Shape when mouse passes over multiple buttons . The details of the cursor For information, see 3.3.6 section
import tkinter as tk
root=tk.Tk()
root.geometry('300x240')
b1 = tk.Checkbutton(root,bg='red',text=' Red ',cursor='spider')
b1.pack()
b2 = tk.Checkbutton(root,text=' Blue ',bg='blue')
b2.pack()
b3 = tk.Checkbutton(root,text=' green ',bg='green')
b3.pack()
root.mainloop()
result :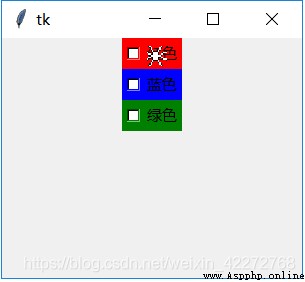
9.1.13 overrelief and relief
relief Is to set the display effect of the border .overrelief Is the display effect of the border when the mouse passes .relief For the relevant description of, see 3.3.5 section
import tkinter as tk
root=tk.Tk()
root.geometry('300x240')
b1 = tk.Checkbutton(root,bg='red',
text=' Red ',relief='flat',bd=5)
b1.pack()
b2 = tk.Checkbutton(root,
text=' Blue ',bg='blue',relief='flat',
overrelief='groove',bd=5)
b2.pack()
b3 = tk.Checkbutton(root,text=' green ',bg='green',
relief='flat',bd=5)
b3.pack()
root.mainloop()
result :
explain :
import tkinter as tk
root=tk.Tk()
root.geometry('300x240')
b1 = tk.Checkbutton(root,text=' Red ',
bg='red',bd=5,indicatoron=False,
offrelief='groove',relief='flat')
b1.pack()
b2 = tk.Checkbutton(root,text=' Blue ',bg='blue',
bd=5,indicatoron=False,
offrelief='groove',relief='flat')
b2.pack()
b3 = tk.Checkbutton(root,text=' green ',bg='green',
bd=5,indicatoron=False,
offrelief='groove',relief='flat')
b3.pack()
root.mainloop()
result :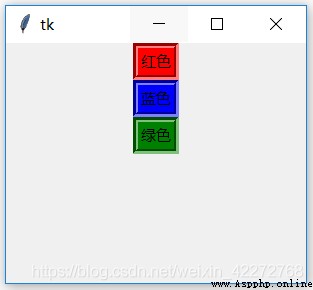
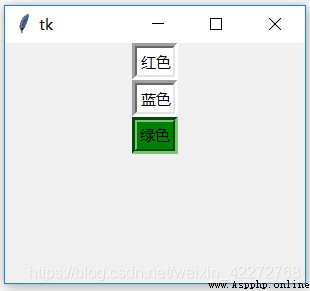
explain :1. indicatoron=False when , There is no usual indicator for the multi select button .
offrelief The setting of works , and relief There is no effect .offrelief=’groove’ and relief=’flat’, You can see that the final effect is GROOVE.
9.1.15 padx and pady
padx and pady Is to define how much inner margin is left in the horizontal and vertical directions .
import tkinter as tk
root=tk.Tk()
root.geometry('300x240')
b1 = tk.Checkbutton(root,text=' Red ',
bg='red',bd=5,padx=10,pady=10)
b1.pack()
b2 = tk.Checkbutton(root,text=' Blue ',bg='blue',bd=5)
b2.pack()
b3 = tk.Checkbutton(root,text=' green ',bg='green',bd=5)
b3.pack()
root.mainloop()
result :
9.1.16 compound
compound Set how to overlay text when using pictures as prompt messages . Yes 5 An option :
LEFT,RIGHT,TOP,BOTTOM,CENTER
If not set compound It is impossible to display text and pictures at the same time . The priority displayed is image > bitmap >text
import tkinter as tk
root=tk.Tk()
root.geometry('300x240')
aimage=tk.PhotoImage(file='a.gif')
b1 = tk.Checkbutton(root,image=aimage,
compound=tk.TOP,bg='red',text=' Red ')
b1.pack()
b2 = tk.Checkbutton(root,text=' Blue ',bg='blue',bd=5)
b2.pack()
b3 = tk.Checkbutton(root,text=' green ',bg='green',bd=5)
b3.pack()
root.mainloop()
result :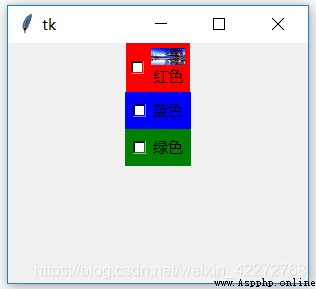
9.1.17 height and width
Set the length and width of the multi selection button .width The unit of is character ,height The unit of is row .
import tkinter as tk
root=tk.Tk()
root.geometry('300x240')
b1 = tk.Checkbutton(root,height=2,width=3,bg='red',text=' Red ')
b1.pack()
b2 = tk.Checkbutton(root,text=' Blue ',bg='blue',bd=5,)
b2.pack()
b3 = tk.Checkbutton(root,text=' green ',bg='green',bd=5)
b3.pack()
root.mainloop()
result :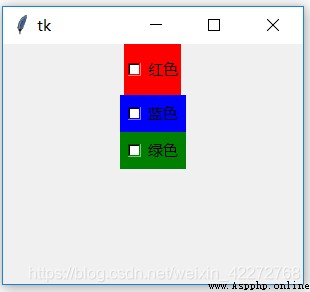
9.1.18 takefocus
takefocus Is used to define whether multiple buttons can be used Tab Key to get input focus . By default, you can .
import tkinter as tk
root=tk.Tk()
root.geometry('300x240')
b1 = tk.Checkbutton(root,takefocus=0,bg='red',text=' Red ',bd=5)
b1.pack()
b2 = tk.Checkbutton(root,takefocus=1,text=' Blue ',bg='blue',bd=5,)
b2.pack()
b3 = tk.Checkbutton(root,text=' green ',bg='green',bd=5)
b3.pack()
root.mainloop()
‘ Red ’ The multi select button is not available Tab Get input focus
‘ Blue ’ You can get the input focus by using the multi select button of , because takefocus=1
‘ green ’ The input focus can also be obtained by using the multiple selection button of the , Because the default is 1.
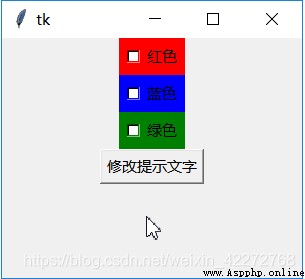
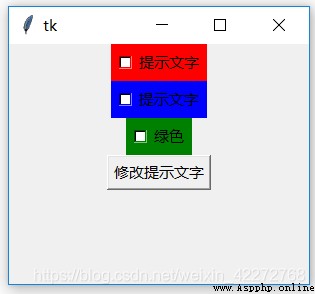
9.1.19 text and textvariable
There are two ways to set the prompt text of the multi selection button . One is to use text, The other is to use textvariable. This attribute is not the value of the multi selection button , Just set the prompt text of the multi selection button .
text The attribute is directly assigned .textvariable It needs to be modified and textvariable The associated StringVar Object to assign prompt text .
How to dynamically modify prompt text ? There are also two ways :
(1)checkbutton[‘text’]=’ Prompt text ’
(2)strvar.set(‘ Prompt text ’).strvar It's a StringVar object , And textvariable Related to .
# Code 1:
import tkinter as tk
root=tk.Tk()
root.geometry('300x240')
strvar=tk.StringVar()
strvar.set(' Blue ')
b1 = tk.Checkbutton(root,bg='red',text=' Red ',bd=5)
b1.pack()
b2 = tk.Checkbutton(root,textvariable=strvar,
bg='blue',bd=5,)
b2.pack()
b3 = tk.Checkbutton(root,text=' green ',bg='green',bd=5)
b3.pack()
root.mainloop()
# Code 2:
import tkinter as tk
root=tk.Tk()
root.geometry('300x240')
strvar=tk.StringVar()
strvar.set(' Blue ')
b1 = tk.Checkbutton(root,takefocus=0,
bg='red',text=' Red ',bd=5)
b1.pack()
b2 = tk.Checkbutton(root,textvariable=strvar,
bg='blue',bd=5,)
b2.pack()
b3 = tk.Checkbutton(root,text=' green ',bg='green',bd=5)
b3.pack()
def change_text():
b1['text']=' Prompt text '
strvar.set(' Prompt text ')
b4=tk.Button(root,text=' Modify the prompt text ',
command=change_text)
b4.pack()
root.mainloop()
result :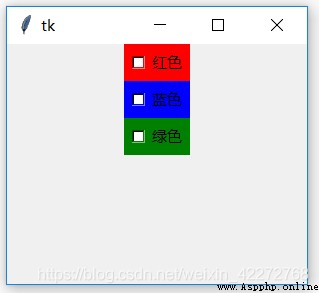
9.1.20 underline
underline The function of is to mark the underline under the first few prompt words .0 Represents the first character ,1, Represents the second character , And so on .
import tkinter as tk
root=tk.Tk()
root.geometry('300x240')
b1 = tk.Checkbutton(root,bg='red',
underline=3,text=' Red characters ',bd=5)
b1.pack()
b2 = tk.Checkbutton(root,text=' Blue ',bg='blue',bd=5,)
b2.pack()
b3 = tk.Checkbutton(root,text=' green ',bg='green',bd=5)
b3.pack()
root.mainloop()
result :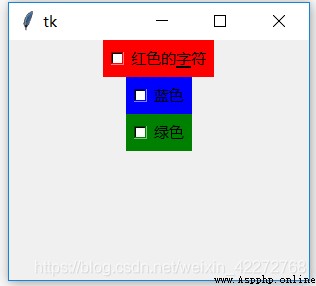
9.1.21 wraplength
When the prompt text is too long , Whether to break the line . In the absence of regulations width and height Under the circumstances , Control automatically calculates the size of the prompt text and displays . But it is stipulated that width Under the circumstances , If the prompt text is too long , There will be some text that cannot be displayed . This is the time , Can be set by wraplength To break line display . But if height The row number setting of is not enough , There will still be cases where characters cannot be displayed . Be careful wraplength Is in pixels , Not characters .
# Code 1:
import tkinter as tk
root=tk.Tk()
root.geometry('300x240')
b1 = tk.Checkbutton(root,bg='red',height=5,width=3,
text=' Red text long text ',bd=5)
b1.pack()
b2 = tk.Checkbutton(root,text=' Blue ',bg='blue',bd=5,)
b2.pack()
b3 = tk.Checkbutton(root,text=' green ',bg='green',bd=5)
b3.pack()
root.mainloop()
# Code 2:
import tkinter as tk
root=tk.Tk()
root.geometry('300x240')
b1 = tk.Checkbutton(root,bg='red',height=5,width=3,
wraplength=90,
text=' Red text long text ',bd=5)
b1.pack()
b2 = tk.Checkbutton(root,text=' Blue ',bg='blue',bd=5,)
b2.pack()
b3 = tk.Checkbutton(root,text=' green ',bg='green',bd=5)
b3.pack()
root.mainloop()
# Code 3:
import tkinter as tk
root=tk.Tk()
root.geometry('300x240')
b1 = tk.Checkbutton(root,bg='red',height=5,width=3,
wraplength=40,
text=' Red text long text ',bd=5)
b1.pack()
b2 = tk.Checkbutton(root,text=' Blue ',bg='blue',bd=5,)
b2.pack()
b3 = tk.Checkbutton(root,text=' green ',bg='green',bd=5)
b3.pack()
root.mainloop()
result :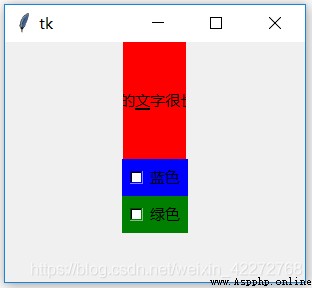
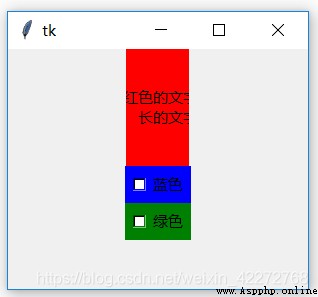
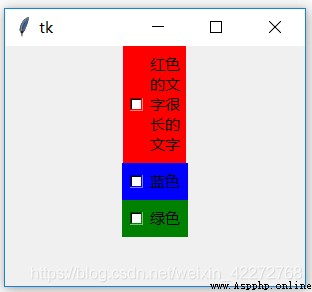
explain :
Code 1 In this case, multiple buttons are selected width Not wide enough , Therefore, it is not possible to display all prompt text .
Code 2 In the case of... Is set wraplength after , Show line breaks . But because of width Not wide enough , Still can't display all the contents .
Code 3 The case is that all the text is displayed .
9.1.22 justify
justify Is to define how to align in the case of line wrapping , There are three ways :CENTER,LEFT and RIGHT. See Chapter IV for detailed description
9.1.23 variable,onvalue and offvalue
Multiple buttons can be set on and off The numerical , That is, whether the multi selection button is selected can have different values . such as , Selected as 1, Not selected as 0 wait . Because it is a multi-choice button , So each multi-choice button has a variable , This variable is the same as that of the multi selection button variable Related to . You can obtain the current value of multiple buttons through the associated variables ,on perhaps off Value . For example, in the following code check_red etc. .
import tkinter as tk
root=tk.Tk()
root.geometry('300x240')
entry=tk.StringVar()
check_red=tk.StringVar()
check_red.set(' Red On')
check_blue=tk.StringVar()
check_blue.set(' Blue Off')
check_green=tk.StringVar()
check_green.set(' green Off')
b1 = tk.Checkbutton(root,bg='red',text=' Red ',bd=5,
onvalue=' Red On',offvalue=' Red Off',
variable=check_red)
b1.pack()
b2 = tk.Checkbutton(root,text=' Blue ',bg='blue',bd=5,
onvalue=' Blue On',offvalue=' Blue Off',
variable=check_blue)
b2.pack()
b3 = tk.Checkbutton(root,text=' green ',bg='green',bd=5,
onvalue=' green On',offvalue=' green Off',
variable=check_green)
b3.pack()
b5=tk.Entry(root,textvariable=entry)
b5.pack()
def check_value():
entry.set(check_red.get()+' '+check_blue.get()
+" "+check_green.get())
b4=tk.Button(root,text='Check',command=check_value)
b4.pack()
root.mainloop()
result :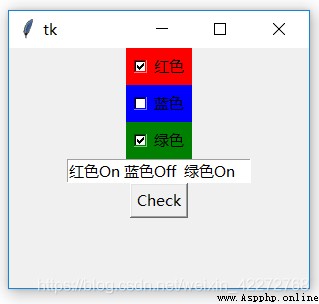
explain :
variable Associated with a variable , You can use it directly get() Method to get the value of the multi selection button ,on perhaps off Value .
onvalue: The value when the multiple selection button is selected
offvalue: The value when the multiple selection button is not selected .
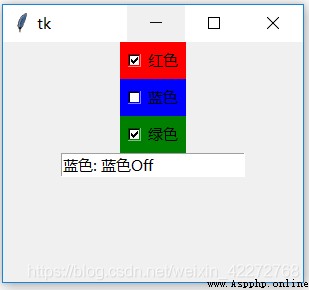
9.1.24 command
Define the callback function for multiple buttons , When the state of the multi selection button changes , I'll call this callback function .
import tkinter as tk
root=tk.Tk()
root.geometry('300x240')
entry=tk.StringVar()
check_red=tk.StringVar()
check_red.set(' Red On')
check_blue=tk.StringVar()
check_blue.set(' Blue Off')
check_green=tk.StringVar()
check_green.set(' green Off')
b5=tk.Entry(root,textvariable=entry)
def red():
entry.set(' Red : '+check_red.get())
def blue():
entry.set(' Blue : '+check_blue.get())
def green():
entry.set(' green : '+check_green.get())
b1 = tk.Checkbutton(root,bg='red',text=' Red ',bd=5,
onvalue=' Red On',offvalue=' Red Off',
variable=check_red,command=red)
b1.pack()
b2 = tk.Checkbutton(root,text=' Blue ',bg='blue',bd=5,
onvalue=' Blue On',offvalue=' Blue Off',
variable=check_blue,command=blue)
b2.pack()
b3 = tk.Checkbutton(root,text=' green ',bg='green',bd=5,
onvalue=' green On',offvalue=' green Off',
variable=check_green,command=green)
b3.pack()
b5.pack()
root.mainloop()
result :