brief introduction
Celery It's using python Write a distributed task scheduling framework .

It has several main concepts :
celery application
User written code scripts , Used to define the tasks to be performed , And then through broker Send the task to the message queue
broker
agent , Through message queuing on the client and worker To coordinate between .
celery Itself does not contain message queues , It supports message queuing RabbitMQRdisAmazon SQSZookeeper
More about Broker See official documents
backend
database , Used to store the results returned by the task .
worker
Worker , Used to perform broker Assigned tasks .
Mission
Mission , Defined tasks to be performed
Version for
Celery5.1 requirement :
python(3.6,3.7,3.8)
Celery It's a least funded project , So we don't support Microsoft Windows.
For more detailed version requirements, see the official documents 
install
Use pip install :
pip install -U Celery
Bundles
Celery It also defines a set of packages , For installation Celery And given dependencies .
Can be in pip Implement braces in the command to specify these dependencies .
pip install "celery[librabbitmq]"
pip install "celery[librabbitmq,redis,auth,msgpack]"
See the official document for the specific supported dependency packages .
Easy to use
1. Select a broker
Use celery First, you need to select a message queue . Install any of the previously mentioned... That you are familiar with celery Supported message queues .
2. Write a celery application
First we need to write a celery application , It is used to create tasks and manage wokers, It should be able to be imported by other modules .
Create a tasks.py file :
from celery import Celery
app = Celery('tasks', broker='redis://localhost:6379/0')
@app.task
def add(x, y):
return x + y
The first parameter tasks Is the name of the current module , It can omit , It is recommended to use the current module name .
The second keyword parameter broker='redis://localhost:6379/0’ Specify that we use Redis As message queue , And specify the connection address .
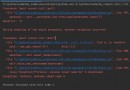
3. function celery Of worker service
cd To tasks.py In the directory , Then run the following command to start worker service
celery -A tasks worker --loglevel=INFO
4. Call task
 from tasks import add
add.delay(4,4)
By calling the delay To perform the corresponding task .celery Will send the execution command to broker,broker Then send the message to worker Services to execute , If all goes well, you will be in worker In the service log, you can see the logs of receiving and executing tasks .
5. Save results
If you want to track the status of the task and save the returned results of the task ,celery Need to send it somewhere .celery Provides a variety of results .
We are here to reids For example , modify tasks.py The code in , Add one Redis Back end .
app = Celery('tasks', broker='redis://localhost:6379/0', backend='redis://localhost:6379/1')
See the official documentation for more results .
Restart worker service , Reopen python Interpreter
 from tasks import add
result = add.delay(4,4)
ready() Method returns whether the task is completed :
result.ready()
False
You can also wait for the results to complete , But this method is rarely used , Because it converts asynchronous calls into synchronous calls
 result.get(timeout=1)
8
Use... In your application celery
Create project
Project structure :
proj/__init__.py
/celery.py
/tasks.py
proj/celery.py
from celery import Celery
app = Celery('proj',
broker='redis://localhost:6379/0',
backend='redis://localhost:6379/1',
include=['proj.tasks']
)# To configure
app.conf.update(
result_expires=3600, # Result expiration time
)
In this module, we created a Celery modular . Use... In your project celery Just import this instance .
proj/tasks.py
from .celery import app
@app.task
def add(x, y):
return x + y
@app.task
def mul(x, y):
return x * y
@app.tas
kdef xsum(numbers)
return sum(numbers)
start-up worker
celery -A proj worker -l INFO
Call task
 from proj.tasks import add
add.delay(2, 2)
stay django Use in celery
In your django Project use celery, First you need to define a Celery Example .
If you django The project is as follows :
- proj/
- manage.py
- proj/
- __init__.py
- settings.py
- urls.py
So the recommended way is to create a new proj/proj/celery.py Module to define celery instances :file:proj/proj/celery.py
import os
from celery import Celery
# by `celery` Set default django Set up modules
os.environ.setdefault('DJANGO_SETTINGS_MODULE','proj.settings')
app = Celery('proj')
# Set configuration source
app.config_from_object('django.conf:settings',namespace='CELERY')
# Load all registered django Tasks in the application
app.autodiscover_tasks()
@app.task(bind=True) def debug_task(self): print(f'Request: {
self.request!r}')
Then you need to be in your proj/proj/init.py Import this application into the module . So that's a guarantee Django Load application at startup , For convenience @shared_task The use of decorators .
proj/proj/init.py:
from .celery import app as celery_app
__all__ = ('celery_app',)
Please note that , This sample project layout is suitable for larger projects , For simple projects , You can use a single module that contains definitions of applications and tasks .
Next, let's explain celery.py The code in , First , We set up celery Command line program environment variables DJANGO_SETTINGS_MODULE The default value of :
os.environ.setdefault('DJANGO_SETTINGS_MODULE', 'proj.settings')
This line is used to load the current django Project environment settings , Especially when it needs to be used in asynchronous tasks ORM. It must be before creating an application instance .
app = Celery('proj')
We also added Django Set the module as Celery Configuration source of . This means that we don't have to use multiple configuration files , It's directly in the Django Configuration in the configuration file of Celery.
app.config_from_object('django.conf:settings', namespace='CELERY')
Uppercase namespaces mean all Celery Configuration items must be specified in uppercase , And CELERY_ start , So for example broker_url Set to CELERY_BROKER_URL.
for example ,Django The project's configuration file may include :
settings.py
CELERY_TIMEZONE = "Asia/Shanghai"
CELERY_TASK_TRACK_STARTED = True
CELERY_TASK_TIME_LIMIT = 30*60
Next , A common practice for reusable applications is in a separate tasks.py All tasks defined in the module Celery There is a way to automatically discover these modules :
app.autodiscover_tasks()
Use the lines above ,Celery Will be in accordance with the tasks.py Contract to automatically discover tasks from all installed applications :
- app1/
- tasks.py
- models.py
- app2/
- tasks.py
- models.py
This eliminates the need to manually add modules to CELERY_IMPORTS Setting up .
Use @shared_task Decorator
The tasks we write may exist in reusable applications , Reusable applications cannot rely on the project itself , Therefore, you cannot import directly celery Application example .
@shared_task The decorator can let us not need any specific celery Instance creation task :demoapp/tasks.py
# Create your tasks here
from demoapp.models import Widget
from celery import shared_task
@shared_task
def add(x, y):
return x + y
@shared_task
def mul(x, y):
return x * y
@shared_task
def xsum(numbers):
return sum(numbers)
@shared_task
def count_widgets():
return Widget.objects.count()
@shared_task
def rename_widget(widget_id, name):
w = Widget.objects.get(id=widget_id)
w.name = name
w.save()
Finally, thank everyone who reads my article carefully , The following online link is also a very comprehensive one that I spent a few days sorting out , I hope it can also help you in need !
These materials , For those who want to change careers 【 software test 】 For our friends, it should be the most comprehensive and complete war preparation warehouse , This warehouse also accompanied me through the most difficult journey , I hope it can help you ! Everything should be done as soon as possible , Especially in the technology industry , We must improve our technical skills . I hope that's helpful ……
If you don't want to grow up alone , Unable to find the information of the system , The problem is not helped , If you insist on giving up after a few days , You can click the small card below to join our group , We can discuss and exchange , There will be various software testing materials and technical exchanges .
Click the small card at the end of the document to receive itTyping is not easy , If this article is helpful to you , Click a like, collect a hide and pay attention , Give the author an encouragement . It's also convenient for you to find it quickly next time .
Zero basis transition software testing :25 Days from zero basis to software testing post , I finished today , Employment tomorrow .【 Include features / Interface / automation /python automated testing / performance / Test Development 】
Advanced automation testing :2022B The first station is super detailed python Practical course of automated software testing , Prepare for the golden, silver and four job hopping season , After advanced learning, it soared 20K