# Course link
new django3 Introduction to project practice ( Zero basis to learn django、 Project development practice 、 College graduation design is available )_ Bili, Bili _bilibili
# Course coverage
Task order module _(5-1 ~ 5-4 Curriculum )
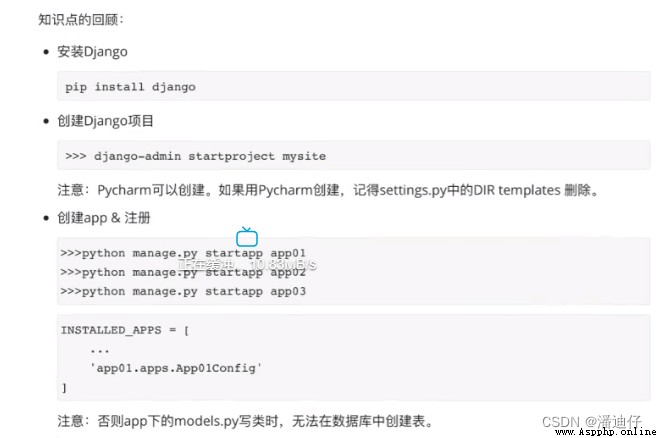
# (1)Django Review of the content of .
1) Knowledge review , Just go to the picture above .
2) Knowledge review of configuration database .
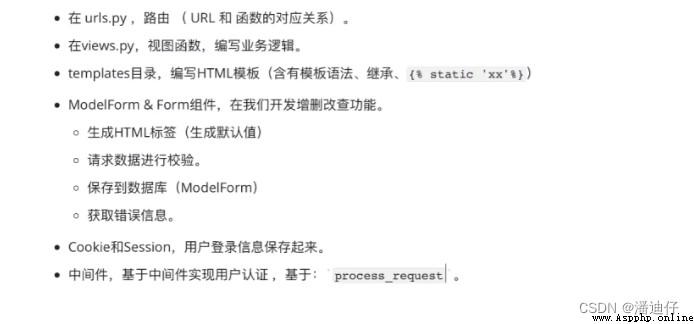
3) Routing and view functions , And middleware .
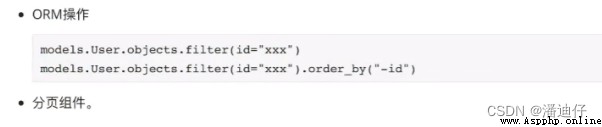
4)orm operation
5) Task list 、 The first implementation of submitting data , Just like before . I won't repeat it here .
#
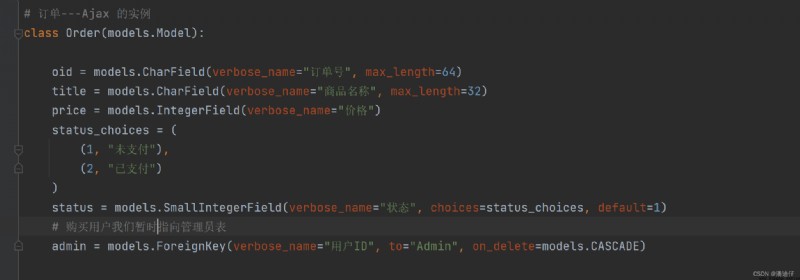
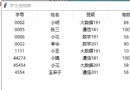
# (1) Table structure design
This part goes directly to the code .
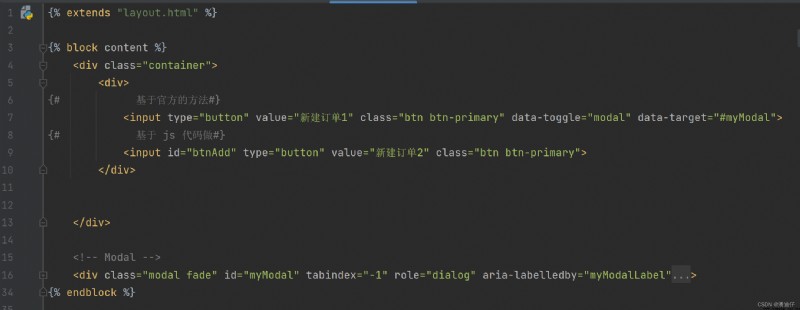
# (2) The code of the front page
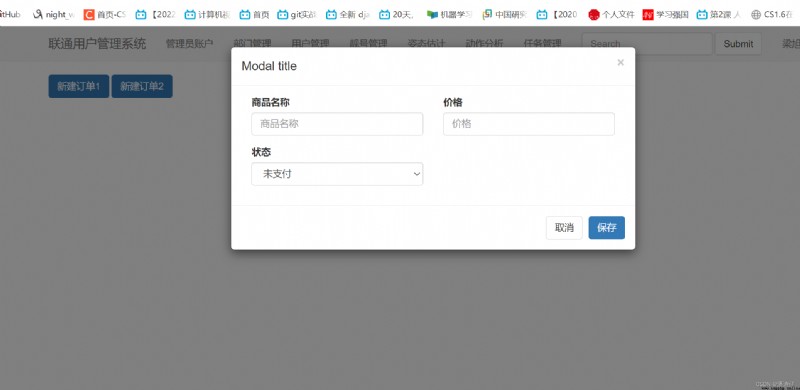
1) Modal response box . We turn on bootstrap Its official website , The modal response box can be found at the plug-in , We choose dynamic . We copied directly to our html The code can be . The specific code is as follows . link :JavaScript plug-in unit · Bootstrap v3 Chinese document | Bootstrap Chinese net
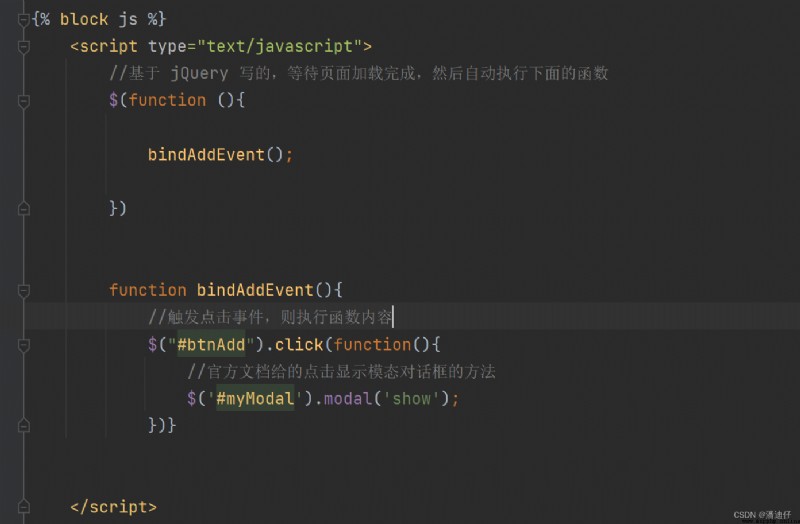
2) Front-end js Code .
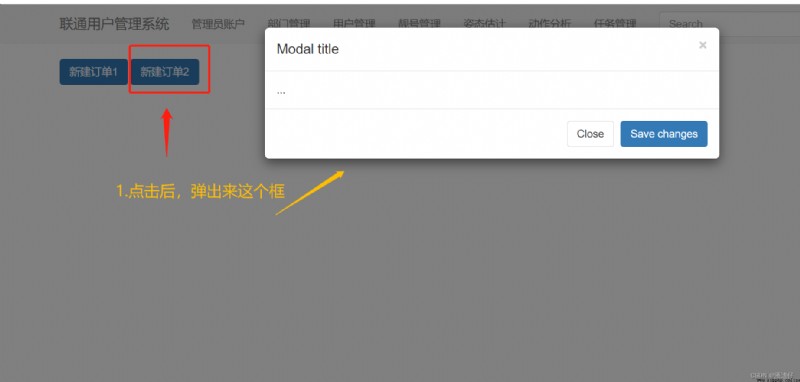
3) Test the modal response box of the front end .
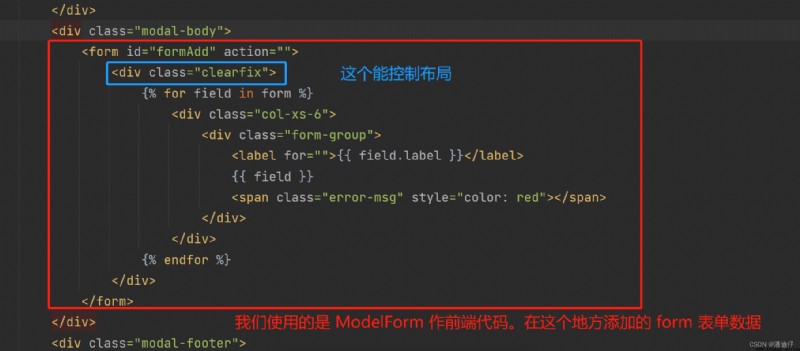
# (1) Compilation of dialog box contents
1) Front-end html Code writing .
2) We are still based on JQuery Bind events to write . The detailed code is as follows :
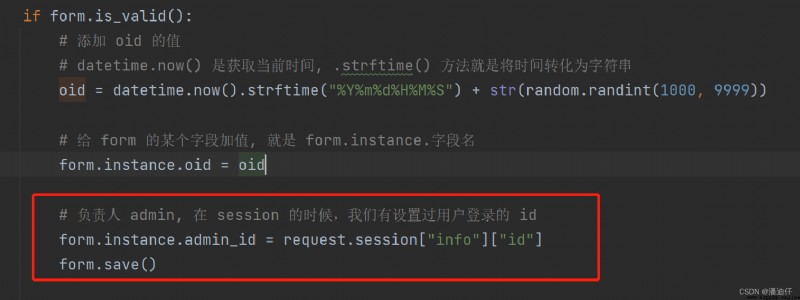
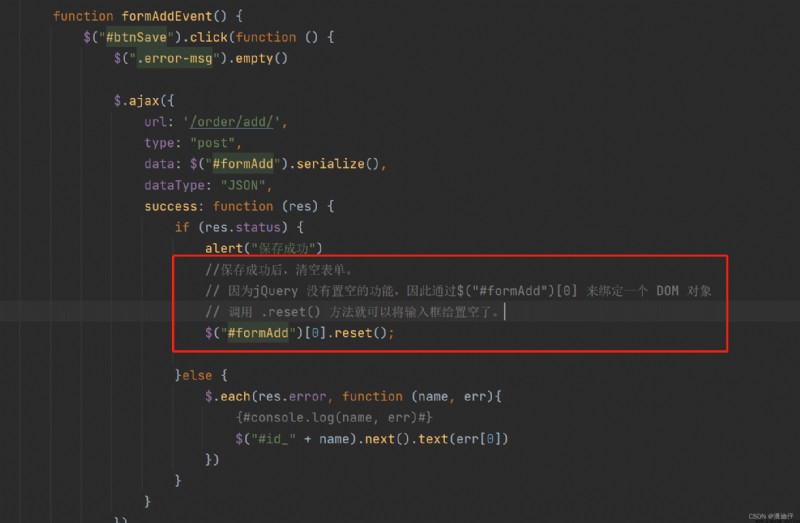
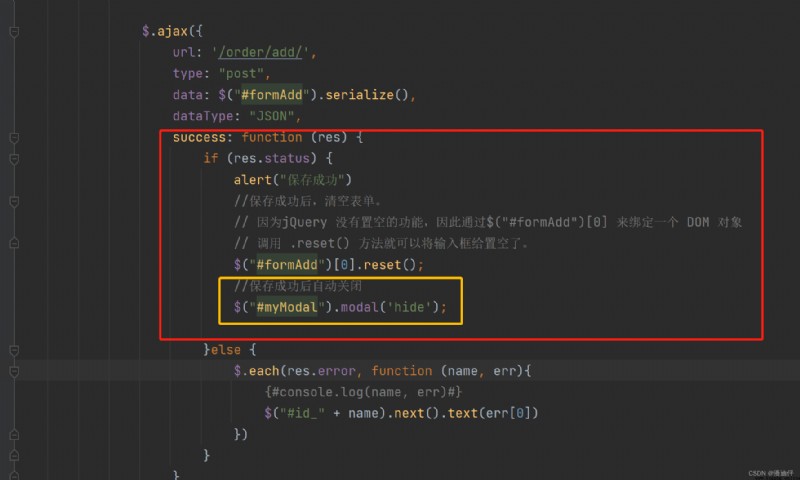
{% block js %}
<script type="text/javascript">
// be based on jQuery Written , Wait for the page to load , Then automatically execute the following functions
$(function () {
bindAddEvent();
formAddEvent(); // send out ajax Data to the background
errorShowEven(); // Display error message
})
function bindAddEvent() {
// Click event , Then execute the function contents
$("#btnAdd").click(function () {
// The method of clicking to display the modal dialog box given by the official document
$('#myModal').modal('show');
})
}
function formAddEvent() {
$("#btnSave").click(function () {
$(".error-msg").empty()
$.ajax({
url: '/order/add/',
type: "post",
data: $("#formAdd").serialize(),
dataType: "JSON",
success: function (res) {
if (res.status) {
alert(" Saved successfully ")
}else {
$.each(res.error, function (name, err){
{#console.log(name, err)#}
$("#id_" + name).next().text(err[0])
})
}
}
})
})
}
</script>
{% endblock %}
3) The compilation of view function . Here's the main thing datetime modular ,datetime.now() Is to get the current time , If you want to convert to string and standard format, you need to call datetime.now().shrftime("%Y%m%d%H%M%S"), In this way, the time format can become 202206140101430, Corresponding to month, day, hour, minute and second respectively . And a little bit more , That is, if we want to add one that users are not allowed to fill in , Data that cannot be empty , You can give form.instance. Field name , Assign a value . It looks like form Just one more data field .
# -*- coding=utf-8 -*-
# github: night_walkiner
# csdn: Pandizi
import json
from app01 import models
from django.shortcuts import render
from django.http import JsonResponse
from django.views.decorators.csrf import csrf_exempt
from app01.utils.bootstrap import BootStrapModelForm
class OrderModelForm(BootStrapModelForm):
class Meta:
model = models.Order
fields = "__all__"
exclude = ["oid"] # If you want to exclude a field , You can use this variable , We exclude oid, Because we want to generate randomly
# Display order list
def order_list(request):
form = OrderModelForm()
context = {
"form": form
}
return render(request, "order_list.html", context)
import random
from datetime import datetime
# Request add
@csrf_exempt
def order_add(request):
ret = {
"code": 1000,
"status": True
}
form = OrderModelForm(data=request.POST)
if form.is_valid():
# add to oid Value
# datetime.now() Is to get the current time , .strftime() The method is to convert the time into a string
oid = datetime.now().strftime("%Y%m%d%H%M%S") + str(random.randint(1000, 9999))
# to form Add value to a field of , Namely form.instance. Field name
form.instance.oid = oid
form.save()
return JsonResponse(ret)
ret["code"] = 1002
ret["status"] = False
ret["error"] = form.errors
return JsonResponse(ret)
# (1) Exclude Administrators
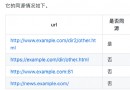
1) When creating an order , In fact, most of the time , We can directly point the person in charge to the currently logged in user , Therefore, it is not necessary for users to fill in . So we are using ModelForm To generate front-end tags , Can be admin Fields are excluded . The code is simple , And above exclude oid equally , Under metaclass exclude=["oid","admin"] , There is no code here . Switch directly to the front end , See the interface effect , As shown in the figure below .
2) In the view function , How do we bind the currently logged in user as the principal , Here we have to use our previous login , Stored in the data table is request.session["info"] Inside id 了 ( Because when we store ,request.session["info"] = {"id": admin_info.id, "name": admin_info.username}, I forgot here. I can look at the previous login Module notes ). set up admin_id = request.session["info"]["id"], So we just set it up form.instance.admin_id = admin_id that will do . Here's a special explanation , When designing tables , Obviously admin , Why is it changed to admin_id, We should pay special attention to , Because we designed admin There are foreign keys , So the system will automatically add _id That is to say admin_id Field . If you don't understand, you can check the data table design of the employee table . As shown in the figure below :
# (2) After successful submission , Clear the data in the table
1) You can use js To clear the form , It's about
2) After saving successfully , Automatically close the modal dialog . Here you need to use the properties of the official website . As shown in the following figure , in other words , We just need to follow the official hidden method after the empty form function .
Then the specific code is as follows :
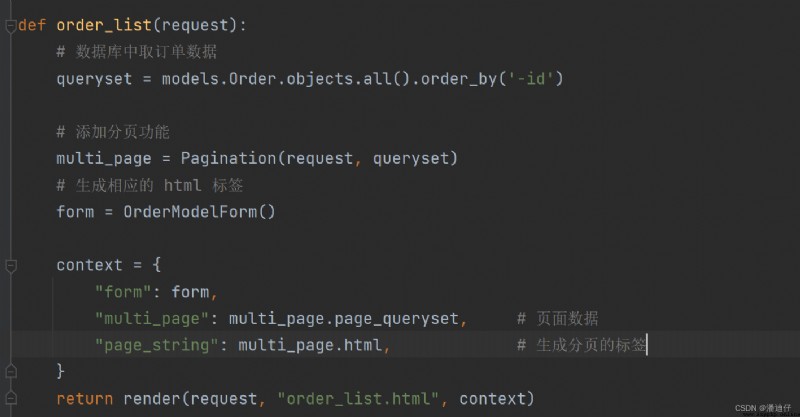
# (3) The order list shows
1) Is to get data from the database . So it's still the old rule to get directly from the database , Then add the corresponding paging function . First, from the original template copy To place an order list html Code . Then the view function is written as follows :
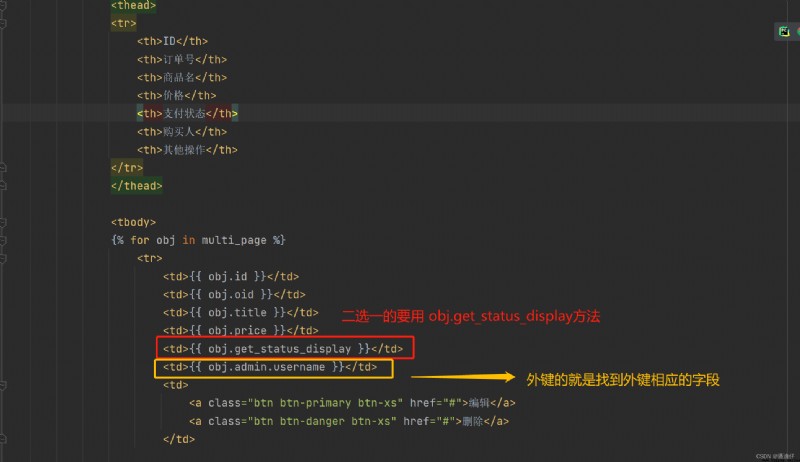
2) Then we put it in the front page , Set the corresponding value , It should be noted here that if you choose one of the two states , Need to use obj.get_status_display Method , Just remember here .
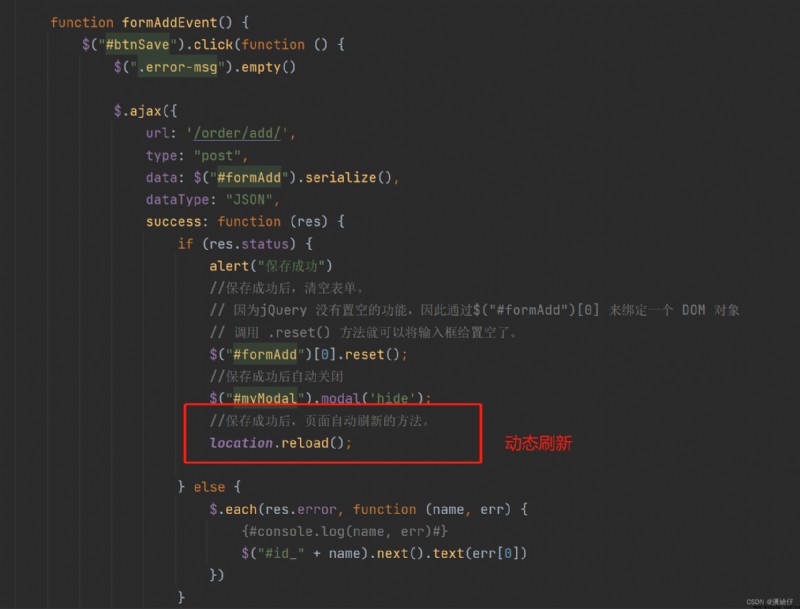
3) Yes, of course , After each successful creation and saving , We want to dynamically refresh data , You can call js Of location.reload() Method to refresh the page .
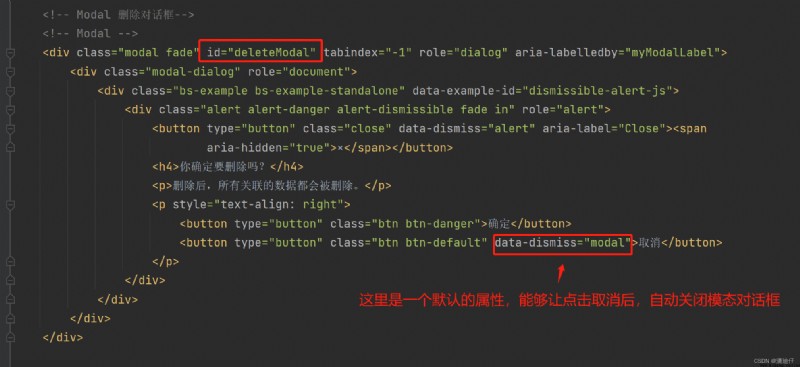
# (4) The deletion operation is preliminary
1) We can create a special dialog box for the delete operation , Then you can go to bootstrap Take it inside . But pay attention to the original id The value has changed . The code is as follows :
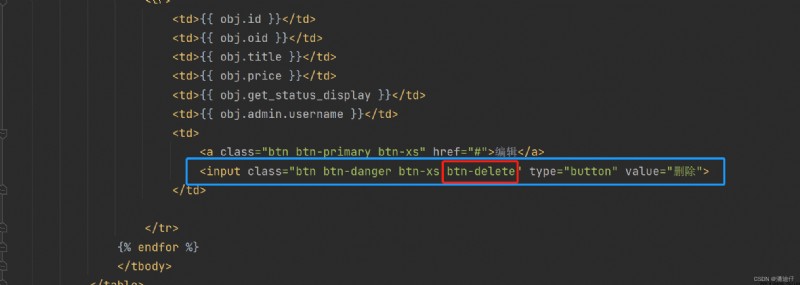
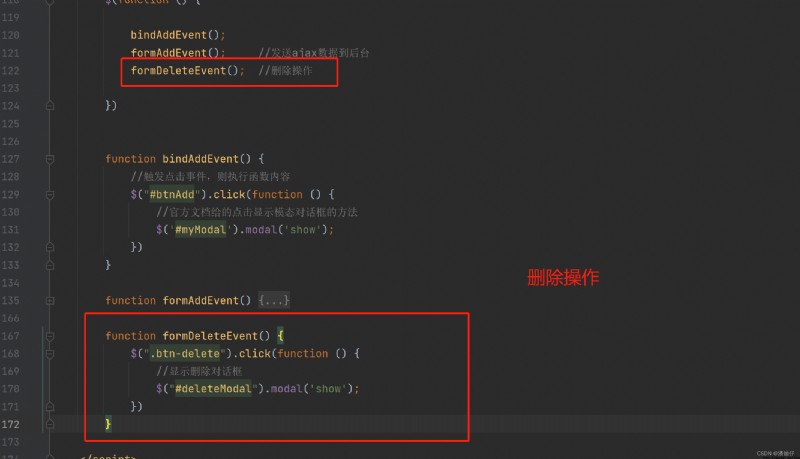
2) We uniformly change the delete button , Don't write it alone . To prevent the page from jumping , We switch to input Label to do . Then add btn-delete attribute .
3) So the corresponding js The code is as follows , I won't go into details here .
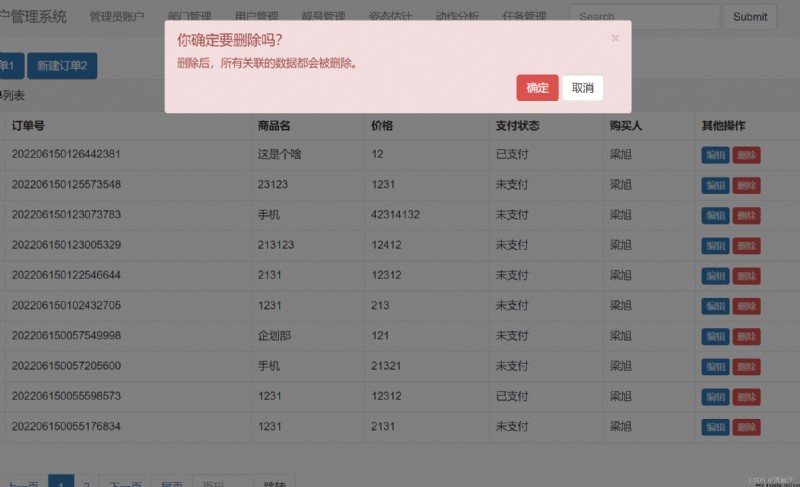
4) The effect after clicking delete is shown in the following figure :
#