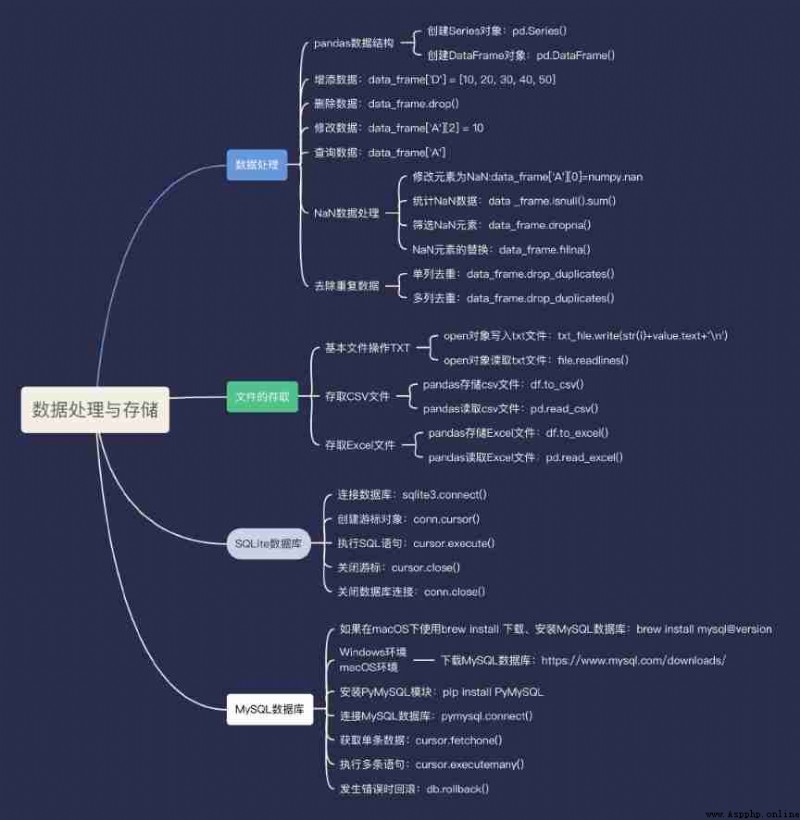
have access to pandas Module to realize data processing ,pandas Is an open source and through BSD Licensed Library . It is mainly Python Language provides high performance 、 Easy to use data structures and data analysis tools , In addition, it also provides a variety of data operation and data processing methods . because pandas It is a third-party module, so you need to install and import this module before using it .
pandas There are two cores in the data structure of , Namely Series And DataFrame. among Series It's a one-dimensional array , It is associated with Python Basic data structure List Close .Series You can save data of multiple data types , Such as Boolean value 、 character string 、 Number type, etc .DataFrame Is a tabular data structure , Be similar to Excel form , It is a two-dimensional tabular data structure .
§ establish Series object
Creating Series Object time , Just pass the data in the form of array into Series() Constructor . The sample code is as follows :
#_*_coding:utf-8_*_
# author :liuxiaowei
# Creation time :2/13/22 7:30 PM
# file :Series object .py
# IDE :PyCharm
# Import pandas modular
import pandas as pd
# Create data array
data = ['A', 'B', 'C']
# establish Series object
series = pd.Series(data)
# Output Series Object content
print(series)
The program runs as follows :
0 A
1 B
2 C
dtype: object
Process finished with exit code 0
say bright
In the running results of the above program , The number column on the left is the index column , The right letter column is the element corresponding to the index .Series Object when no index is specified , Generate the default build from 0 Start incrementing the index values in turn .
§ Creating Series Object time , You can specify the index name , For example, specify that the index entry is a、b、c. The sample code is as follows :
#_*_coding:utf-8_*_
# author :liuxiaowei
# Creation time :2/13/22 7:48 PM
# file : Specify the Series object .py
# IDE :PyCharm
# Import pandas modular
import pandas as pd
# Create data array
data = ['A', 'B', 'C']
# Create an array of Index Names
index = ['a', 'b', 'c']
# Creates the specified index Series object
series = pd.Series(data, index=index )
# Output the... Of the specified index Series Object content
print(series)
The program runs as follows :
a A
b B
c C
dtype: object
Process finished with exit code 0
§ Access data
During a visit to Series Object , You can access the index array or the element array separately . The sample code is as follows :
#_*_coding:utf-8_*_
# author :liuxiaowei
# Creation time :2/13/22 7:52 PM
# file : Access data .py
# IDE :PyCharm
# Import pandas modular
import pandas as pd
# Create data array
data = ['A', 'B', 'C']
# Create an array of Index Names
index = ['a', 'b', 'c']
# Creates the specified index Series object
series = pd.Series(data, index=index )
# Output index array
print(' The index array is :', series.index)
# Print element array
print(' The element array is :', series.values)
The result of program running is :
 The index array is : Index(['a', 'b', 'c'], dtype='object')
The element array is : ['A' 'B' 'C']
Process finished with exit code 0
When you need to get the array element of the specified subscript , You can go directly through “Series object [ Subscript ]“ To get array elements , Array index from 0 Start . The sample code is as follows :
#_*_coding:utf-8_*_
# author :liuxiaowei
# Creation time :2/13/22 7:57 PM
# file : Gets the array element of the specified subscript .py
# IDE :PyCharm
import pandas as pd
# Create data array
data = ['A', 'B', 'C']
# Create an array of Index Names
index = ['a', 'b', 'c']
# Creates the specified index Series object
series = pd.Series(data, index=index )
# Output the array element with the specified index
print(' Specifies that the array element of the subscript is :', series[1])
# Output the array elements of the specified index
print(' The array element of the specified index is :', series['a'])
The program runs as follows :
 Specifies that the array element of the subscript is : B
The array element of the specified index is : A
Process finished with exit code 0
When it is necessary to obtain the corresponding Series Object time , The subscript range can be specified , The sample code is as follows :
#_*_coding:utf-8_*_
# author :liuxiaowei
# Creation time :2/13/22 8:03 PM
# file : Specify the subscript range to get data .py
# IDE :PyCharm
import pandas as pd
# Create data array
data = ['A', 'B', 'C']
# Create an array of Index Names
index = ['a', 'b', 'c']
# Creates the specified index Series object
series = pd.Series(data, index=index)
# The output subscript is 0,1,2 Corresponding Series object
print(' Get the corresponding of multiple subscripts Series object :')
print(series[0:3])
The program runs as follows :
 Get the corresponding of multiple subscripts Series object :
a A
b B
c C
dtype: object
Process finished with exit code
Except by specifying the subscript range Series Beyond the object , It can also be obtained by specifying multiple indexes Series object . The sample code is as follows :
#_*_coding:utf-8_*_
# author :liuxiaowei
# Creation time :2/13/22 8:13 PM
# file : Specify multiple index methods to obtain Series object .py
# IDE :PyCharm
import pandas as pd
# Create data array
data = ['A', 'B', 'C']
# Create an array of Index Names
index = ['a', 'b', 'c']
# Creates the specified index Series object
series = pd.Series(data, index=index)
# Output index a、b Corresponding Series object
print(' Get the corresponding of multiple indexes Series object :')
print(series[['a', 'b']])
The program runs as follows :
 Get the corresponding of multiple indexes Series object :
a A
b B
dtype: object
Process finished with exit code 0
§ Modify element values
modify Series Object , It can also be achieved by specifying a subscript or an index . The sample code is as follows :
#_*_coding:utf-8_*_
# author :liuxiaowei
# Creation time :2/13/22 8:19 PM
# file : modify Series The element value of the object .py
# IDE :PyCharm
# Import pandas modular
import pandas as pd
# Create data array
data = ['A', 'B', 'C']
# Create an array of Index Names
index = ['a', 'b', 'c']
# Creates the specified index Series object
series = pd.Series(data, index=index )
# Change the subscript to 0 The element value of
series[0] = 'D'
print(' Change the subscript to 0 The element value of :\n')
print(series)
# Change the index to b Element value of
series['b'] = 'A'
print(' Change the index to b The element value of :')
# Print after modifying the element value Series object
print(series)
The running result of the program is :
 Change the subscript to 0 The element value of :
a D
b B
c C
dtype: object
Change the index to b The element value of :
a D
b A
c C
dtype: object
Process finished with exit code 0
Creating DataFrame Object time , It needs to be implemented through a dictionary . The name of each column is the key , Each key corresponds to an array , This array as a value . The sample code is as follows :
#_*_coding:utf-8_*_
# author :liuxiaowei
# Creation time :2/13/22 10:09 PM
# file :DataFrame object .py
# IDE :PyCharm
# Import pandas modular
import pandas as pd
data = {
'A':[1, 2, 3, 4, 5],
'B':[6, 7, 8, 9, 10],
'C':[11, 12, 13, 14, 15]}
# establish DataFrame object
data_frame = pd.DataFrame(data)
# Output DataFrame Object content
print(data_frame)
The program runs as follows :
 A B C
0 1 6 11
1 2 7 12
2 3 8 13
3 4 9 14
4 5 10 15
Process finished with exit code 0
say bright
We can see from the above running results , A separate number on the left (0-4) Index column , When no specific index is specified ,DataFrame The default index of the object will be from 0 Began to increase . On the right side A、B、C The column name is key , The value corresponding to the column name is array .
DataFrame Object can also specify the index name separately , Specify in the same way as Series Objects are similar , The sample code is as follows :
#_*_coding:utf-8_*_
# author :liuxiaowei
# Creation time :2/13/22 10:29 PM
# file : Specify index name separately .py
# IDE :PyCharm
import pandas as pd
data = {
'A':[1, 2, 3, 4, 5],
'B':[6, 7, 8, 9, 10],
'C':[11, 12, 13, 14, 15]}
# Custom index
index = ['a', 'b', 'c', 'd', 'e']
# Create a custom index DataFrame object
data_frame = pd.DataFrame(data, index = index)
# Output DataFrame Object content
print(data_frame)
The program runs as follows :
A B C
a 1 6 11
b 2 7 12
c 3 8 13
d 4 9 14
e 5 10 15
Process finished with exit code 0
If the data contains unnecessary data columns , You can create DataFrame Object to specify the required data column name . The sample code is as follows :
#_*_coding:utf-8_*_
# author :liuxiaowei
# Creation time :2/13/22 10:33 PM
# file : Specify the required data column name .py
# IDE :PyCharm
import pandas as pd
data = {
'A':[1, 2, 3, 4, 5],
'B':[6, 7, 8, 9, 10],
'C':[11, 12, 13, 14, 15]}
# Create a for the specified column name DataFrame object
data_frame = pd.DataFrame(data, columns=['B', 'C'])
# Output DataFrame Object content
print(data_frame)
The program runs as follows :
 B C
0 6 11
1 7 12
2 8 13
3 9 14
4 10 15
Process finished with exit code 0
When it comes to DataFrame Object to add a column of data , You can create column names first , Then assign data to it . The sample code is as follows :
#_*_coding:utf-8_*_
# author :liuxiaowei
# Creation time :2/13/22 10:39 PM
# file : Add data .py
# IDE :PyCharm
# Import pandas modular
import pandas as pd
data = {
'A':[1, 2, 3, 4, 5],
'B':[6, 7, 8, 9, 10],
'C':[11, 12, 13, 14, 15]}
# establish DataFrame object
data_frame = pd.DataFrame(data)
# increase D Column data
data_frame['D'] = [10, 20, 30, 40, 50]
# Output DataFrame Object content
print(data_frame)
The program runs as follows :
 A B C D
0 1 6 11 10
1 2 7 12 20
2 3 8 13 30
3 4 9 14 40
4 5 10 15 50
Process finished with exit code 0
pandas Module provides drop() function , Used to delete DataFrame A row or column of data in an object , The function provides multiple parameters , The commonly used parameters and their meanings are shown in the following table :
drop() Function common parameters and their meanings
Implementation delete DataFrame Object the row data of the specified column and index in the original data . The sample code is as follows :
#_*_coding:utf-8_*_
# author :liuxiaowei
# Creation time :2/13/22 10:48 PM
# file : Delete data .py
# IDE :PyCharm
# Import pandas modular
import pandas as pd
data = {
'A':[1, 2, 3, 4, 5],
'B':[6, 7, 8, 9, 10],
'C':[11, 12, 13, 14, 15]}
# establish DataFrame object
data_frame = pd.DataFrame(data)
# Delete the index in the original data 0 That line of data
data_frame.drop([0], inplace=True)
# Delete the column named in the original data A That column of data
data_frame.drop(labels='A', axis=1, inplace=True)
# Output DataFrame Object content
print(data_frame)
The program runs as follows :
 B C
1 7 12
2 8 13
3 9 14
4 10 15
Process finished with exit code 0
repair charge
Delete in the implementation DataFrame Object to specify the data of the column name , It can also be done through del Keyword to implement , For example, delete the column named in the original data A The data of , It can be used del data_frame[‘A’] Code
drop() Function can delete the specified column or row data , You can also specify the range of the row index , Realize the function of deleting multiple rows of data . The sample code is as follows :
#_*_coding:utf-8_*_
# author :liuxiaowei
# Creation time :2/13/22 11:01 PM
# file : Delete multiline data .py
# IDE :PyCharm
# Import pandas modular
import pandas as pd
data = {
'A':[1, 2, 3, 4, 5],
'B':[6, 7, 8, 9, 10],
'C':[11, 12, 13, 14, 15]}
# establish DataFrame object
data_frame = pd.DataFrame(data)
# Delete the row index from the original data 0 to 2 The first three rows of data
data_frame.drop(labels=range(0, 3), axis=0, inplace=True)
# Output DataFrame Object content
print(data_frame)
The program runs as follows :
 A B C
3 4 9 14
4 5 10 15
Process finished with exit code 0
When you need to modify DataFrame Object in a column , You can modify elements by assigning values . The sample code is as follows :
#_*_coding:utf-8_*_
# author :liuxiaowei
# Creation time :2/13/22 11:12 PM
# file : Modifying data .py
# IDE :PyCharm
# Import pandas modular
import pandas as pd
data = {
'A':[1, 2, 3, 4, 5],
'B':[6, 7, 8, 9, 10],
'C':[11, 12, 13, 14, 15]}
# establish DataFrame object
data_frame = pd.DataFrame(data)
# take A The data in the third row of the column is modified to 10
data_frame['A'][2] = 10
# Output DataFrame Object content
print(data_frame)
The program runs as follows :
 A B C
0 1 6 11
1 2 7 12
2 10 8 13
3 4 9 14
4 5 10 15
Process finished with exit code 0
In the revision DataFrame When all the data of a column in the object , You need to know the number of elements contained in the element array corresponding to the current modified column name , Then modify the corresponding elements according to the number of original elements . The code is as follows :
#_*_coding:utf-8_*_
# author :liuxiaowei
# Creation time :2/13/22 11:21 PM
# file : Modify all data of a column .py
# IDE :PyCharm
# Import pandas modular
import pandas as pd
data = {
'A':[1, 2, 3, 4, 5],
'B':[6, 7, 8, 9, 10],
'C':[11, 12, 13, 14, 15]}
# establish DataFrame object
data_frame = pd.DataFrame(data)
# take B All data in the column is modified
data_frame['B'] = [5, 4, 3, 2, 1]
# Output DataFrame Object content
print(data_frame)
The program runs as follows :
 A B C
0 1 5 11
1 2 4 12
2 3 3 13
3 4 2 14
4 5 1 15
Process finished with exit code 0
notes It means
When modifying B All data in the column and the number of modified elements does not match the original number of elements , Will be an error .
say bright
When a column is assigned a single element , for example ,data_frame[‘B’] = 1, here B The data corresponding to the column will be modified to 1
data_frame['B'] = 1
give the result as follows :
 A B C
0 1 1 11
1 2 1 12
2 3 1 13
3 4 1 14
4 5 1 15
Process finished with exit code 0
In obtaining DataFrame Object , You can obtain the data of the specified column by directly specifying the column name or directly calling the column name attribute . The sample code is as follows :
#_*_coding:utf-8_*_
# author :liuxiaowei
# Creation time :2/13/22 11:34 PM
# file : Query data .py
# IDE :PyCharm
# Import pandas modular
import pandas as pd
data = {
'A':[1, 2, 3, 4, 5],
'B':[6, 7, 8, 9, 10],
'C':[11, 12, 13, 14, 15]}
# establish DataFrame object
data_frame = pd.DataFrame(data)
print(' The data of the specified column name is :\n', data_frame['A'])
print(' The data of the specified column name attribute is :\n', data_frame.B)
The program runs as follows :
 The data of the specified column name is :
0 1
1 2
2 3
3 4
4 5
Name: A, dtype: int64
The data of the specified column name attribute is :
0 6
1 7
2 8
3 9
4 10
Name: B, dtype: int64
Process finished with exit code 0
In obtaining DataFrame Object from the 1 To the first 3 Row range data , Data can be obtained by specifying the index range , Line index from 0 Start , Row index 0 The corresponding is DataFrame Object 1 Row data . The sample code is as follows :
#_*_coding:utf-8_*_
# author :liuxiaowei
# Creation time :2/13/22 11:39 PM
# file : Get the data of the specified row index range .py
# IDE :PyCharm
# Import pandas modular
import pandas as pd
data = {
'A':[1, 2, 3, 4, 5],
'B':[6, 7, 8, 9, 10],
'C':[11, 12, 13, 14, 15]}
# establish DataFrame object
data_frame = pd.DataFrame(data)
print(' Specify the data of the row index range :\n', data_frame[0:3])
The program runs as follows :
 Specify the data of the row index range :
A B C
0 1 6 11
1 2 7 12
2 3 8 13
Process finished with exit code 0
say bright
In the sample code to get the specified row index range ,0 Index the starting row ,3 Is the end row index position , Therefore, the content obtained this time does not contain a row index of 3 The data of .
In obtaining DataFrame Object in a column , You can specify column names in turn 、 Row index is used to obtain data . The sample code is as follows :
#_*_coding:utf-8_*_
# author :liuxiaowei
# Creation time :2/13/22 11:44 PM
# file : Get an element of a column .py
# IDE :PyCharm
# Import pandas modular
import pandas as pd
data = {
'A':[1, 2, 3, 4, 5],
'B':[6, 7, 8, 9, 10],
'C':[11, 12, 13, 14, 15]}
# establish DataFrame object
data_frame = pd.DataFrame(data)
print(' Get a data in the specified column :\n', data_frame['B'][2])
The program runs as follows :
 Get a data in the specified column :
8
Process finished with exit code 0
NaN The data is in numpy The module represents the vacancy data , Therefore, in data analysis, it is occasionally necessary to modify an element in the data structure to NaN value , All you need to do is call numpy.NaN, The purpose of modifying an element can be achieved by assigning a value to the element to be modified . The sample code is as follows :
#_*_coding:utf-8_*_
# author :liuxiaowei
# Creation time :2/14/22 8:14 AM
# file : Modify element to NaN.py
# IDE :PyCharm
# Import pandas modular
import pandas as pd, numpy
data = {
'A':[1, 2, 3, 4, 5],
'B':[6, 7, 8, 9, 10],
'C':[11, 12, 13, 14, 15]}
# establish DataFrame object
data_frame = pd.DataFrame(data)
# Name the column in the data as A, The row index is 0 The element of is changed to NaN
data_frame['A'][0] = numpy.nan
# Output DataFrame Object content
print(data_frame)
The program runs as follows :
 A B C
0 NaN 6 11
1 2.0 7 12
2 3.0 8 13
3 4.0 9 14
4 5.0 10 15
Process finished with exit code 0
pandas The module provides two methods to quickly identify the missing values ,isnull() Method is used to determine whether a value is a null value , If it is an empty value, it will return True.notnull() Method is used to identify non - null values , This method will return... When it detects data that is not a null value True. Through these two methods and statistical functions sum() Method to obtain the specific number of empty values and non empty values in the data . The sample code is as follows :
#_*_coding:utf-8_*_
# author :liuxiaowei
# Creation time :2/14/22 8:32 AM
# file : Statistics NaN data .py
# IDE :PyCharm
# Import pandas modular
import pandas as pd, numpy
data = {
'A':[1, 2, 3, 4, 5],
'B':[6, 7, 8, 9, 10],
'C':[11, 12, 13, 14, 15]}
# establish DataFrame object
data_frame = pd.DataFrame(data)
# Name the column in the data as A, The row index is 0 The element of is changed to NaN
data_frame['A'][0] = numpy.nan
# Print the number of empty values in the data
print(' The number of blank values in each column is :\n', data_frame.isnull().sum())
# Print the number of non vacancy values in the data
print(' The number of non vacancy values in each column is :\n', data_frame.notnull().sum())
The program runs as follows :
 The number of blank values in each column is :
A 1
B 0
C 0
dtype: int64
The number of non vacancy values in each column is :
A 4
B 5
C 5
dtype: int64
Process finished with exit code 0
In the realization of NaN When filtering elements , have access to dropna() function , for example , Will include NaN Delete the entire row of data where the element is located . The sample code is as follows :
#_*_coding:utf-8_*_
# author :liuxiaowei
# Creation time :2/14/22 8:38 AM
# file : Screening NaN Elements .py
# IDE :PyCharm
# Import pandas modular
import pandas as pd, numpy
data = {
'A':[1, 2, 3, 4, 5],
'B':[6, 7, 8, 9, 10],
'C':[11, 12, 13, 14, 15]}
# establish DataFrame object
data_frame = pd.DataFrame(data)
# Name the column in the data as A, The row index is 0 The element of is changed to NaN
data_frame['A'][0] = numpy.nan
# Will include NaN The entire row of data of the element is deleted
data_frame.dropna(axis=0, inplace=True)
# Output DataFrame Object content
print(data_frame)
The program runs as follows :
 A B C
1 2.0 7 12
2 3.0 8 13
3 4.0 9 14
4 5.0 10 15
Process finished with exit code 0
say bright
If you need to include... In the data NaN Delete the entire column of data where the element is located , Can be axis Parameter set to 1
dropna() The function provides a how Parameters , If the parameter is set to all, dropna() Function will delete a row or column. All elements are NaN Value . The sample code is as follows :
#_*_coding:utf-8_*_
# author :liuxiaowei
# Creation time :2/14/22 8:49 AM
# file :dropna() function how Parameter application .py
# IDE :PyCharm
#_*_coding:utf-8_*_
# author :liuxiaowei
# Creation time :2/14/22 8:14 AM
# file : Modify element to NaN.py
# IDE :PyCharm
# Import pandas modular
import pandas as pd, numpy
data = {
'A':[1, 2, 3, 4, 5],
'B':[6, 7, 8, 9, 10],
'C':[11, 12, 13, 14, 15]}
# establish DataFrame object
data_frame = pd.DataFrame(data)
# Name the column in the data as A, The row index is 0 The element of is changed to NaN
data_frame['A'][0] = numpy.nan
# Name the column in the data as A, The row index is 1 The element of is changed to NaN
data_frame['A'][1] = numpy.nan
# Name the column in the data as A, The row index is 2 The element of is changed to NaN
data_frame['A'][2] = numpy.nan
# Name the column in the data as A, The row index is 3 The element of is changed to NaN
data_frame['A'][3] = numpy.nan
# Name the column in the data as A, The row index is 4 The element of is changed to NaN
data_frame['A'][4] = numpy.nan
# Delete include NaN The entire row of data corresponding to the element
data_frame.dropna(how='all', axis=1,inplace=True)
# Output DataFrame Object content
print(data_frame)
The program runs as follows :
 B C
0 6 11
1 7 12
2 8 13
3 9 14
4 10 15
Process finished with exit code 0
say bright
because axis The default value of 0, So only the row data is deleted , And all elements are NaN Is a column , So we're specifying how Parameter, you also need to specify the deletion target column axis=1
When processing... In data NaN Element time , In order to avoid deleting important reference data in the data . have access to fillna() Function to put data in NaN Element with the same element , In this way, during data analysis , It is clear which elements are useless ( That is to say NaN Elements ). The sample code is as follows :
#_*_coding:utf-8_*_
# author :liuxiaowei
# Creation time :2/14/22 9:53 AM
# file :NaN Element replacement .py
# IDE :PyCharm
# Import pandas modular
import pandas as pd
data = {
'A':[1, None, 3, 4, 5],
'B':[6, 7, 8, None, 10],
'C':[11, 12, None, 14, None]}
# establish DataFrame object
data_frame = pd.DataFrame(data)
# Output the data before modification
print(' Data before modification :\n', data_frame)
# All... In the data NaN The element is modified to 0
data_frame.fillna(0, inplace=True)
# Output the modified data
print(' Modify descendant data :\n', data_frame)
The program runs as follows :
 Data before modification :
A B C
0 1.0 6.0 11.0
1 NaN 7.0 12.0
2 3.0 8.0 NaN
3 4.0 NaN 14.0
4 5.0 10.0 NaN
Modify descendant data :
A B C
0 1.0 6.0 11.0
1 0.0 7.0 12.0
2 3.0 8.0 0.0
3 4.0 0.0 14.0
4 5.0 10.0 0.0
Process finished with exit code 0
pandas Module provided drop_duplicates() Method is used to remove duplicate data in a specified column . The syntax is as follows :
pandas.dataFrame.drop_duplicates(subset=None, keep='first', inplace=False)
drop_duplicates() The common parameters and meanings of the method are shown in the following table :
drop_duplicates() Common parameters and meanings in methods
When specifying to remove duplicate data in a column , Need to be in subset The parameter position specifies the column name . The sample code is as follows :
#_*_coding:utf-8_*_
# author :liuxiaowei
# Creation time :2/14/22 11:00 AM
# file :drop_duplicate() Method to specify duplicate data in a column .py
# IDE :PyCharm
# Import pandas modular
import pandas as pd
# Create data
data = {
'A':['A1','A1','A3'],
'B':['B1','B2','B1']}
# establish DataFrame object
data_frame = pd.DataFrame(data)
# Specify the column name as A
data_frame.drop_duplicates('A', inplace=True)
# Print the removed data
print(data_frame)
The program runs as follows :
 A B
0 A1 B1
2 A3 B1
Process finished with exit code 0
notes It means
Removing DataFrame Object , The entire row of data corresponding to duplicate data in the specified column will be deleted .
say bright
drop_duplicates() Method except delete DataFrame Object , You can also be right about DataFrame Object to delete duplicate data . for example , Delete DataFrame In the object A Duplicate data in column , You can use this line of code :new_data = data_frame[‘A’].drop_duplicates()
drop_duplicates() Methods can not only implement DataFrame Object to repeat a single column , You can also implement multiple column de duplication operations . The sample code is as follows :
#_*_coding:utf-8_*_
# author :liuxiaowei
# Creation time :2/14/22 12:00 PM
# file :drop_duplicates() Method realization DataFrame Object multi column de duplication operation .py
# IDE :PyCharm
# Import pandas modular
import pandas as pd
# Create data
data = {
'A':['A1', 'A1', 'A1', 'A2', 'A2'],
'B':['B1', 'B1', 'B3', 'B4', 'B5'],
'C':['C1', 'C2', 'C3', 'C4', 'C5']}
# establish DataFrame object
data_frame = pd.DataFrame(data)
# Perform multi column de duplication operation
data_frame.drop_duplicates(subset=['A', 'B'], inplace=True)
# Output the removed data
print(data_frame)
The program runs as follows :
 A B C
0 A1 B1 C1
2 A1 B3 C3
3 A2 B4 C4
4 A2 B5 C5
Process finished with exit code 0
If you want to simply TXT File storage work , Can pass open() Function operation file implementation , That is, you need to create or open the specified file and create the file object first .open() The basic syntax format of the function is as follows :
file = open(filename[, mode[,buffering]])
Parameter description
§ file: The created file object
§ filename: The name of the file to create or open , It needs to be enclosed in single or double quotation marks . If the file to be opened is in the same directory as the current file , Then write the file name directly , Otherwise, you need to specify the full path . for example , The name under the current path to open is status.txt The file of , have access to "status.txt".
§ mode: Optional parameters , Used to specify the open mode of the file . Its parameters are shown in the following table . The default open mode is read-only ( namely r)
mode Parameter value description of the parameter
§ buffering: Optional parameters , Used to specify the buffer mode for reading and writing files , The value is 0 Expressions are not cached ; The value is 1 Represent cache ; Greater than 1, Indicates the size of the buffer . The default is cache mode .
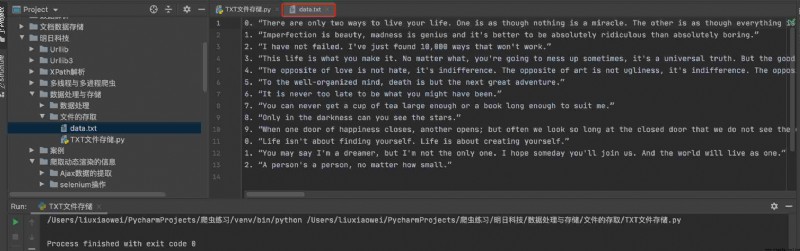
Take the famous inspirational sentences in a web page as an example , First, through requests Send network request , Then receive the response result and pass BeautifulSoup analysis HTML Code , Then extract all the information , Finally, write the information one by one data.txt The file of . The sample code is as follows :
#_*_coding:utf-8_*_
# author :liuxiaowei
# Creation time :2/14/22 1:06 PM
# file :TXT File store .py
# IDE :PyCharm
# Import network request module
import requests
# Import etree Sub module
from lxml import etree
# Define request headers
headers = {

"user-agent": "Mozilla/5.0 (Macintosh; Intel Mac OS X 10_15_7) AppleWebKit/537.36 (KHTML, like Gecko) Chrome/98.0.4758.80 Safari/537.36"
}
for i in range(2):
# Define the request address
url = f'http://quotes.toscrape.com/tag/inspirational/page/{
i+1}/'
# Send network request
resp = requests.get(url, headers=headers)
# If the network request is successful
if resp.status_code == 200:
# analysis html file
html = etree.HTML(resp.text)
# Get all the inspirational sentences displayed on the current page span label
text_all = html.xpath('//span[@class="text"]')
# establish open object
txt_file = open('data.txt', 'a', encoding='utf-8')
# Loop through crawling content
for i1, value in enumerate(text_all):
# Write each inspirational sentence you crawl through and wrap it at the end
txt_file.write(str(i1)+value.text+'\n')
txt_file.close()
After running the above example code , The current directory will automatically generate data.txt file , Open the file as shown in the following figure :
stay Python Open in TXT After the document , In addition to writing or appending to it , You can also read the contents of the file . Reading the contents of the file is mainly divided into the following situations .
§ Read the specified character
The file object provides read() Method to read a specified number of characters . The syntax is as follows :
file.read([size])
among ,file For open file objects ;size Is an optional parameter , Used to specify the number of characters to read , If omitted, all contents are read at once . Read... In the above example data.txt The sample code in the file is as follows :
#_*_coding:utf-8_*_
# author :liuxiaowei
# Creation time :2/14/22 2:27 PM
# file : Read data.txt Before in the document 46 Characters .py
# IDE :PyCharm
# Open file
with open('data.txt', 'r') as f:
# Before reading 50 Characters
string = f.read(46)
print(string)
The results are as follows :
0. “There are only two ways to live your life.
Process finished with exit code 0
Use read() Method to read the file , Is read from the beginning of the file . If you want to read part of the content , You can use the... Of the file object first seek() Method to move the pointer of the file to a new location , And then apply read() Method reading .seek() The basic syntax format of the method is as follows :
file.seek(offset[,where])
Parameter description :
file: Represents an open file object
offset: Specifies the number of characters to move , Its specific location and whence of
whence: Used to specify where the calculation starts . The value is 0 Indicates that the calculation starts from the file header ;1 Indicates that the calculation starts from the current position ;2 Indicates that the calculation starts from the end of the file , The default is 0
Want to start from the... Of the file 49 Characters start reading 38 Characters , The sample code is as follows :
#_*_coding:utf-8_*_
# author :liuxiaowei
# Creation time :2/14/22 2:56 PM
# file : Read a specific number of characters from the specified characters of the file .py
# IDE :PyCharm
# Open file
with open('data.txt', 'r') as f:
# Move the file pointer to the new location
f.seek(49)
string = f.read(38)
print(string)
The execution result of the above program is as follows :
One is as though nothing is a miracle.
Process finished with exit code 0
say bright
Use seek() When the method is used , If the GBK code , that offset The value of is according to a Chinese character ( Including Chinese punctuation marks ) Take two characters to calculate , And use UTF-8 code , Then one Chinese character accounts for 3 Characters , However, no matter what code is used, English and numbers are calculated by one character . This is related to read() The method is different .
§ Read a line
In the use of read() Method to read the file , If the file is large , Reading all the contents to the memory at one time is easy to cause insufficient memory , Therefore, line by line reading is usually used . The file object provides readline() Method is used to read one row of data at a time .readline() The basic syntax format of the method is as follows :
file.readline()
among ,file For open file objects . Same as read() The method is the same , When opening a file , You also need to specify the opening mode as r( read-only ) perhaps r+( Reading and writing ). Read line by line Python Classic application files , The sample code is as follows :
#_*_coding:utf-8_*_
# author :liuxiaowei
# Creation time :2/14/22 3:27 PM
# file : Read line by line Python Classic application files .py
# IDE :PyCharm
print("\n","="*20,"Python Classic application ","="*20,"\n")
with open('message.txt','r') as file: # Open save Python Classic application information files
number = 0 # Record line number
while True:
number += 1
line = file.readline()
if line =='':
break # Out of the loop
print(number,line,end= "\n") # Output a line of content
print("\n","="*20,"over","="*20,"\n")
The program runs as follows :
==================== Python Classic application ====================
1 1 Zope : application server
2 2 Plone : Content management system
3 3 Django : Encourage rapid development of Web Application framework
4 4 Python Wikipedia Robot Framework:MediaWiki Robot program for
5 5 tornado : Non blocking servers
6 6 Reddit : Social sharing sites
7 7 Dropbox : File sharing service
8 8 Trac : Use Python Compiling BUG In pipe system
9 9 Blender : With C And Python Open source for development 3D Drawing software
==================== over ====================
Process finished with exit code 0
§ Read all lines
Reading all rows is the same as calling readd() Method is not specified size similar , Just when reading all the rows , Returns a list of strings , Each element is a line of the file . Read all lines , Using a file object **readlines()** Method , The syntax is as follows :
file.readlines()
among ,file For open file objects . Same as read() The method is the same , When opening a file , You also need to specify the opening mode as r( read-only ) perhaps r+( Reading and writing ), adopt readlines() Method reading message.txt Everything in the document , And output the reading result , The code is as follows :
#_*_coding:utf-8_*_
# author :liuxiaowei
# Creation time :2/14/22 4:13 PM
# file : adopt readlines() Method to read all the contents .py
# IDE :PyCharm
print("\n","="*20,"Python Classic application ","="*20,"\n")
with open('message.txt','r') as file: # Open save Python Classic application information files
message = file.readlines() # Read all the information
print(message) # Output information
print("\n","="*25,"over","="*25,"\n")
The program runs as follows :
==================== Python Classic application ====================
['1 Zope : application server \n', '2 Plone : Content management system \n', '3 Django : Encourage rapid development of Web Application framework \n', '4 Python Wikipedia Robot Framework:MediaWiki Robot program for \n', '5 tornado : Non blocking servers \n', '6 Reddit : Social sharing sites \n', '7 Dropbox : File sharing service \n', '8 Trac : Use Python Compiling BUG In pipe system \n', '9 Blender : With C And Python Open source for development 3D Drawing software ']
========================= over =========================
It can be seen from the operation results that readlines() Method returns a list of strings . In this string list , Each element records one line . If the file is large , Using this method to output the contents of the read file will be very slow . At this time, the contents of the list can be output line by line . The code is as follows :
#_*_coding:utf-8_*_
# author :liuxiaowei
# Creation time :2/14/22 4:26 PM
# file :deadlines() Method to output the contents line by line .py
# IDE :PyCharm
print("\n","="*20,"Python Classic application ","="*20,"\n")
with open('message.txt','r') as file: # Open save Python Classic application information files
messageall = file.readlines() # Read all the information
for message in messageall:
print(message) # Output information
print("\n","="*25,"over","="*25,"\n")
The program runs as follows :
==================== Python Classic application ====================
1 Zope : application server
2 Plone : Content management system
3 Django : Encourage rapid development of Web Application framework
4 Python Wikipedia Robot Framework:MediaWiki Robot program for
5 tornado : Non blocking servers
6 Reddit : Social sharing sites
7 Dropbox : File sharing service
8 Trac : Use Python Compiling BUG In pipe system
9 Blender : With C And Python Open source for development 3D Drawing software
========================= over =========================
Process finished with exit code 0
CSV File is a kind of text file , The elements of each row of data in the file are separated by commas . In fact, access CSV File can also be used open() function , But there are better ways , That's using pandas Module implementation CSV Access to documents .
Pandas Provides to_csv() The function is used to implement CSV File storage , The common parameters in this function and their meanings are shown in the following table :
to_csv() Function common parameters and their meanings
for example , establish A,B,C Three columns of data , Then write the data to CSV In file , The code is as follows :
#_*_coding:utf-8_*_
# author :liuxiaowei
# Creation time :2/14/22 5:14 PM
# file : establish CSV file .py
# IDE :PyCharm
# Import pandas modular
import pandas as pd
# Create three columns of data
data = {
'A':[1, 2, 3], 'B':[4, 5, 6], 'C':[7, 8, 9]}
# establish DataFrame object
df = pd.DataFrame(data)
# Storage CSV file
df.to_csv('test.csv')
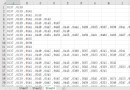
After running the code , A... Will be generated automatically in the folder directory test.csv file , stay Pycharm Open the file in , The contents shown in the following figure will be displayed :
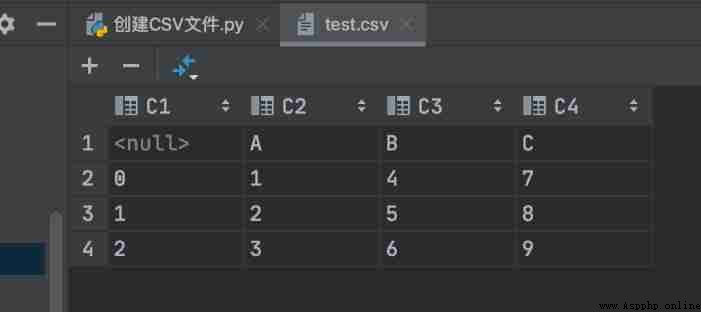
say bright
The first column in the figure is the index column generated by default , If the default index column is not required when writing data , Can be in to_csv() Function index Parameter is False that will do .
pandas The module provides read_csv() Function for CSV File reading .read_csv() The common parameters and meanings in the function are shown in the following table :
read_csv() Common parameters and meanings of functions
In the implementation of a simple read CSV When you file , Call directly pandas.read_csv() function , Then specify the file path . The sample code is as follows :
#_*_coding:utf-8_*_
# author :liuxiaowei
# Creation time :2/14/22 5:50 PM
# file : Read csv file .py
# IDE :PyCharm
# Import pandas modular
import pandas as pd
# Read csv file information
data = pd.read_csv('test.csv')
# Output the read file contents
print(' Read the CSV The content of the document is :\n', data)
The program runs as follows :
 Read the CSV The content of the document is :
Unnamed: 0 A B C
0 0 1 4 7
1 1 2 5 8
2 2 3 6 9
Process finished with exit code 0
You can also specify columns for the read data , Write to new file . The sample code is as follows :
#_*_coding:utf-8_*_
# author :liuxiaowei
# Creation time :2/14/22 5:59 PM
# file : Will read out csv The data specified column is written to the new file .py
# IDE :PyCharm
# Import pandas modular
import pandas as pd
# Read csv file information
data = pd.read_csv('test.csv')
# Specify the column in the information to be read , Write to a new file
data.to_csv('new_test.csv', columns=['B', 'C'], index=False)
# Read newly written CSV file information
new_data = pd.read_csv('new_test.csv')
# Print new file information
print(' Read the new csv The content of the document is :\n', new_data)
The program runs as follows :
 Read the new csv The content of the document is :
B C
0 4 7
1 5 8
2 6 9
Process finished with exit code 0
Excel File is a common office form file that we are familiar with , It is a component of Microsoft office software .Excel There are currently two file extensions , One is .xls, The other is .xlsx, Its extension is mainly determined by the office software version .
adopt DataFrame The data object directly calls to_excel() Method can be realized Excel File writing function , The parameter meaning of this method is the same as to_csv() The method is similar to . adopt to_excel() Method direction Excel The code for writing information to the file is as follows :
#_*_coding:utf-8_*_
# author :liuxiaowei
# Creation time :2/14/22 6:18 PM
# file :to_excel() Method write excel file .py
# IDE :PyCharm
# Import pandas modular
import pandas as pd
# Create three columns of data
data = {
'A':[1, 2, 3],'B':[4, 5, 6], 'C':[7, 8, 9]}
# establish DataFrame object
df = pd.DataFrame(data)
# Storage Excel file
df.to_excel('test.xlsx')
pandas Modular read_excel() Function for Excel File reading , The common parameters in this function and their meanings are shown in the following table :
read_excel() Function common parameters and their meanings
In no special case , Read Excel File content and reading CSV The contents of the document are the same , Call directly pandas.read_excel() Function . The sample code is as follows :
#_*_coding:utf-8_*_
# author :liuxiaowei
# Creation time :2/14/22 6:31 PM
# file : Read excel file .py
# IDE :PyCharm
# Import pandas modular
import pandas as pd
# Read Excel The contents of the document
data = pd.read_excel('test.xlsx')
print(' Read the Excel The content of the document is :\n', data)
The program runs as follows :
 Read the Excel The content of the document is :
Unnamed: 0 A B C
0 0 1 4 7
1 1 2 5 8
2 2 3 6 9
Process finished with exit code 0
Unlike many other database management systems ,SQLite Not a client / Server structured database engine , It's a kind of embedded database , Its database is a file .SQLite The entire database , Including definition 、 surface 、 The index and the data itself , As a separate 、 Files that can be used across platforms are stored on the host . because SQLite Itself is C language-written , And it's very small , So it is often integrated into various applications .Python It's built in SQLite3, therefore , stay Python Use in SQLite database , No modules need to be installed , You can use it directly .
because Python Built in SQLite3, So you can use it directly import Statement import SQLite3 modular .Python The general process of operating the database is shown in the figure :

for example , Create a name mySoft.db Of SQLite Database files , And then execute SQL Statement to create a user( User table ),user The table contains id and name Two fields , The sample code is as follows :
#_*_coding:utf-8_*_
# author :liuxiaowei
# Creation time :2/14/22 8:27 PM
# file : establish mySoft.db Of SQLite database .py
# IDE :PyCharm
import sqlite3
# Connect to SQLite database
# The database file is mySoft.db, If the file doesn't exist , Will automatically create... In the current directory
conn = sqlite3.connect('mySoft.db')
# Create a Cursor
cursor = conn.cursor()
# To perform a SQL sentence , establish user surface
cursor.execute('create table user(id int(10) primary key, name varchar(20))')
# Close cursor
cursor.close()
# close connection
conn.close()
say bright
The above code can only be run once , When running again , Error messages will be prompted :sqlite3.OperationalError:table user already exists. This is because user The table already exists
In order to add data to the data table , You can use the following SQL sentence :
insert into Table name ( Field name 1, Field name 2,...., Field name n) values( field value 1, field value 2,....., field value n)
for example , stay user Table has 2 A field , The field names are id and name. and The field value needs to be assigned according to the data type of the field , for example ,id Is a length of 10 The integer of ,name It's a length of 20 String data . towards user Insert in table 3 User information records ,SQL The statement is as follows :
#_*_coding:utf-8_*_
# author :liuxiaowei
# Creation time :2/15/22 6:26 AM
# file : Add user data information .py
# IDE :PyCharm
import sqlite3
# Connect to SQLite database
# The database file is mySoft.db, If the file doesn't exist , Will automatically create... In the current directory
conn = sqlite3.connect('mySoft.db')
# Create a Cursor
cursor = conn.cursor()
# To perform a SQL sentence , establish user surface
cursor.execute('create table user (id int(10) primary key, name varchar(20))')
# Insert 3 Data
cursor.execute('insert into user (id, name) values("1", "Bruce_liu")')
cursor.execute('insert into user (id, name) values("2", "Andy")')
cursor.execute('insert into user (id, name) values("3", " Glorious years ")')
# Submit commit()
cursor.commit()
# Close cursor
cursor.close()
# close connection
conn.close()
lookup user The data in the table can be used as follows SQL sentence :
selec Field name 1, Field name 2, Field name 3,.... from Table name where Query criteria
The code for viewing user information is roughly the same as that for inserting data information , The difference lies in the use of SQL The statements are different . Besides , When querying data, you usually use the following 3 Ways of planting :
§ fetching(): Get the next record in the query result set
§ fetch many(size): Get a specified number of records
§ fetch all(): Get all the records of the result set
Let's practice this by example 3 The difference between the two query methods :
for example , Separate use fetchone()、fetch many(size)、fetchall() this 3 There are three ways to query user information , The code is as follows :
#_*_coding:utf-8_*_
# author :liuxiaowei
# Creation time :2/15/22 6:38 AM
# file : View user data information .py
# IDE :PyCharm
# The import module
import sqlite3
# Connect to SQLite database
# The database file is mySoft.db, If the file doesn't exist , Will automatically create... In the current directory
conn = sqlite3.connect('mySoft.db')
# Create a Cursor
cursor = conn.cursor()
# Execute query statement
cursor.execute('select * from user')
# Get query results
result1 = cursor.fetchone() # Use fetchone() Get a message
print(result1)
result2 = cursor.fetchmany(2) # Use fetchmany(size) Method to query a specified amount of data
print(result2)
result3 = cursor.fetchall() # Use fetchall() Method to query all data
print(result3)
# Close cursor
cursor.close()
# Close links
conn.close()
The program runs as follows :
(1, 'Bruce_liu')
[(2, ' Wei '), (3, ' as boundless as the sea and sky ')]
[(1, 'Bruce_liu'), (2, ' Wei '), (3, ' as boundless as the sea and sky ')]
Modify the above code as condition query , Examples are as follows :
cursor.execute('select * from user where id > ?', (1, ))
result3 = cursor.fetchall()
print(result3)
The program runs as follows :
[(2, ' Wei '), (3, ' as boundless as the sea and sky ')]
Process finished with exit code 0
stay select In the query statement , Use question marks as placeholders for specific values , Then replace the question mark with a tuple ( Be careful , Don't ignore the last comma in a tuple ). The above conditional query statement is equivalent to :
cursor.execute('select * from user where id > 1')
say bright
Using placeholders can avoid SQL The risk of Injection , It is recommended to use this way
modify user The data in the table can be used as follows SQL sentence :
update Table name set Field name = field value where Query criteria
for example , take SQLite In the database user surface id by 1 The data of name Change the field value to ’ Bruce Lee ’, The code is as follows :
#_*_coding:utf-8_*_
# author :liuxiaowei
# Creation time :2/15/22 7:33 AM
# file : Delete user data information .py
# IDE :PyCharm
# The import module
import sqlite3
# Connect to database
conn = sqlite3.connect('mySoft.db')
# establish cursor
cursor = conn.cursor()
# Execute statement
cursor.execute('delete from user where id = ?', (1, ))
# Submit
conn.commit()
# Close cursor
cursor.close()
# Close the connection
conn.close()
My operating environment is macOS System , stay terminal perform brew install [email protected] Installation , No more details here .
[email protected] ~ % brew install [email protected]
==> Downloading https://ghcr.io/v2/homebrew/core/mysql/5.7/manifests/5.7.36
Already downloaded: /Users/liuxiaowei/Library/Caches/Homebrew/downloads/3bd8201c[email protected]5.7-5.7.36.bottle_manifest.json
==> Downloading https://ghcr.io/v2/homebrew/core/mysql/5.7/blobs/sha256:5289b664
Already downloaded: /Users/liuxiaowei/Library/Caches/Homebrew/downloads/e6da9b8d[email protected]5.7--5.7.36.monterey.bottle.tar.gz
==> Pouring [email protected]
==> Caveats
We've installed your MySQL database without a root password. To secure it run: mysql_secure_installation MySQL is configured to only allow connections from localhost by default To connect run: mysql -uroot [email protected] is keg-only, which means it was not symlinked into /usr/local, because this is an alternate version of another formula. If you need to have [email protected] first in your PATH, run: echo 'export PATH="/usr/local/opt/[email protected]/bin:$PATH"' >> ~/.zshrc
For compilers to find [email protected] you may need to set:
export LDFLAGS="-L/usr/local/opt/[email protected]/lib"
export CPPFLAGS="-I/usr/local/opt/[email protected]/include"
To restart [email protected] after an upgrade:
brew services restart [email protected]
Or, if you don't want/need a background service you can just run:
/usr/local/opt/[email protected]/bin/mysqld_safe --datadir=/usr/local/var/mysql
==> Summary
/usr/local/Cellar/[email protected]/5.7.36: 320 files, 234.3MB
==> Running `brew cleanup [email protected]`...
Disable this behaviour by setting HOMEBREW_NO_INSTALL_CLEANUP.
Hide these hints with HOMEBREW_NO_ENV_HINTS (see `man brew`).
say bright
If there is a problem with the installation , I have published a blog about solving problems before , Link address :
https://blog.csdn.net/weixin_41905135/article/details/122583513?ops_request_misc=%257B%2522request%255Fid%2522%253A%2522164488355516780261997164%2522%252C%2522scm%2522%253A%252220140713.130102334.pc%255Fblog.%2522%257D&request_id=164488355516780261997164&biz_id=0&utm_medium=distribute.pc_search_result.none-task-blog-2blogfirst_rank_ecpm_v1~rank_v31_ecpm-1-122583513.nonecase&utm_term=%E5%AE%89%E8%A3%85mysql5.7&spm=1018.2226.3001.4450
Use MySQL Before database , You have to start MySQL. stay terminal Window , Enter the command :
MacBookAir:~ root# /usr/local/opt/mysql\@5.7/bin/mysql.server start
The startup results are as follows :
Starting MySQL
. SUCCESS!
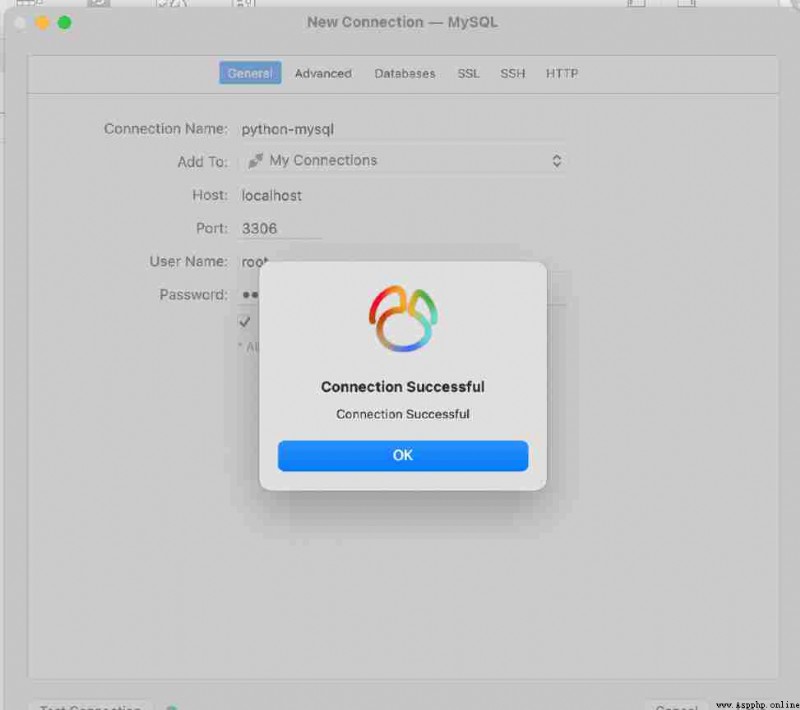
§ 1. open Navicat, newly build MySQL Connect , Enter the connection information .( This case ) Connection name :python-mysql, After entering the host name IP Address “localhost“ or "127.0.0.1", Input password , Here's the picture :
§ 2. Once I've created it , double-click python-mysql, Access to database . Here's the picture :

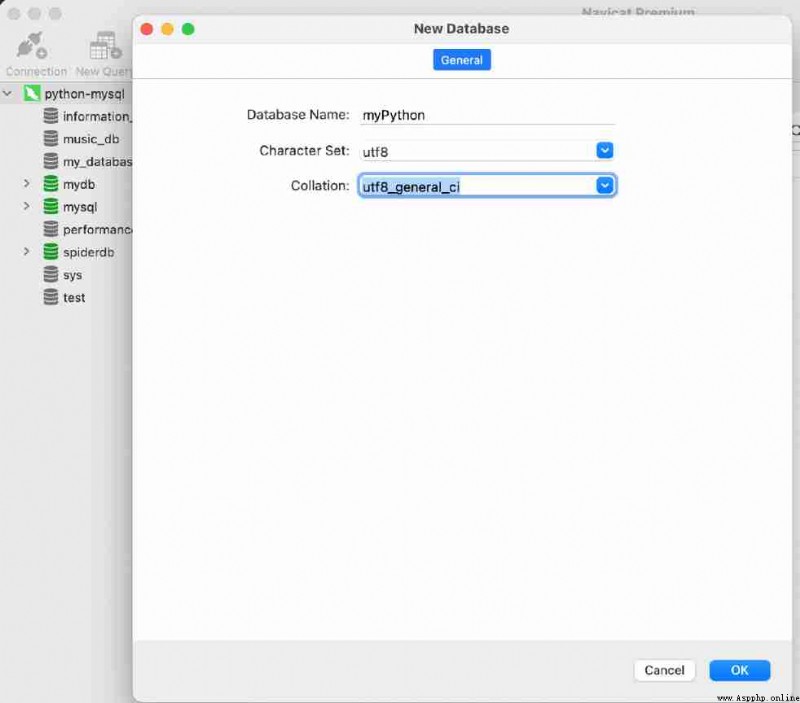
§ 3. Create a file called “myPython“ The database of , The steps are : Right click python-mysql, choice “ New database “, Fill in the database information , Here's the picture :
because MySQL Server independent process line , And through the network of external services , therefore , Need to support Python Of MySQL The driver is connected to MySQL The server . stay Python Chinese support MySQL There are many database modules , We choose to use PyMySQL modular .
PyMySQL The module installation is relatively simple , stay CMD Run the following commands in the command line window :
pip install PyMySQL
The first step in using a database is to connect to the database . Next use PyMySQL Module connection database . because PyMySQL The module page follows Python Database API2.0 standard , So operation MySQL The way of database is the same as SQLite be similar . I've created a MySQL Connect “python-mysql“, The user name of the database is set when installing the database "root" And password “12345”. The following is the above information , Use connect() Methods the connection MySQL database , The code is as follows :
#_*_coding:utf-8_*_
# author :liuxiaowei
# Creation time :2/15/22 12:19 PM
# file : Use connect() Methods the connection MySQL database .py
# IDE :PyCharm
# The import module
import pymysql
# Open database connection , Parameters 1: Host name or IP; Parameters 2: user name ; Parameters 3: password ; Parameters 4: Database name
db = pymysql.connect(host='localhost', database='myPython', port=3306, user='root', password='12345')
# Use cursor() Method to create a cursor object cursor
cursor = db.cursor()
# Use execute() Method execution SQL Inquire about
cursor.execute('SELECT VERSION()')
# Use fetchone() Method to get a single piece of data
data = cursor.fetchone()
print('Database version :%s '% data)
# Close database connection
db.close()
In the above code , use first connect() Method to connect to the database , And then use cursor() Method to create a cursor , Then use execute() Method execution SQL Statement view MySQL Database version , And then use fetchone() Method to get data , Finally using close() Method to close the database connection , The operation results are as follows :
Database version :5.7.36
Process finished with exit code 0
After the database connection is successful , Then you can create data tables for the database . To create a database table, you need to use excute() Method , This example uses this method to create a books The book list ,books The table contains id( Primary key )、name( The name of the book )、category( Book classification )、price( The book price ) and publish_time( Publication date )5 A field . establish books surface SQL The statement is as follows :
CREATE TABLE books(
id int(8) NOT NULL AUTO_INCREMENT,
name varchar(50) NOT NULL,
category varchar(50) NOT NULL,
price decimal(10,2) DEFAULT NULL,
publish_time date DEFAULT NULL,
PRIMARY KEY(id)
) ENGINE=MyISAM AUTO_INCREMENT=1 DEFAULT CHARSET = utf8;
remarks Before you create the table , Use the following statement to delete the current database table when it exists :
DROP TABLE IF EXISTS 'books';
The sample code is as follows :
#_*_coding:utf-8_*_
# author :liuxiaowei
# Creation time :2/15/22 12:44 PM
# file : Create data table .py
# IDE :PyCharm
# The import module
import pymysql
# Open database connection
db = pymysql.connect(host='localhost', database='myPython', port=3306, user='root', password='12345')
# Use cursor() Method to create a cursor object
cursor = db.cursor()
# Use preprocessing statements to create tables
sql = ''' CREATE TABLE books( id int(8) NOT NULL AUTO_INCREMENT, name varchar(50) NOT NULL, category varchar(50) NOT NULL, price decimal(10,2) DEFAULT NULL, publish_time date DEFAULT NULL, PRIMARY KEY(id) ) ENGINE=MyISAM AUTO_INCREMENT=1 DEFAULT CHARSET = utf8; '''
# perform SQL sentence
cursor.execute(sql)
# Close database connection
db.close()
After running the above code ,myPython A... Will be created under the database books surface . open Navicat( If it is already on, press the key to refresh ), Find out myPython There is one more in the database books surface , Right click books, Select design table , As shown in the figure below :

MySQL Data table operations mainly include data addition 、 Delete 、 Change 、 check , And operation SQLite similar , We use executemany() Method to batch add multiple records to the data table ,executemany() The format of the method is as follows :
exeutemany(operation, seq_of_params)
§ operation: Operation of the SQL sentence
§ seq_of_params: Parameter sequence
The sample code is as follows :
#_*_coding:utf-8_*_
# author :liuxiaowei
# Creation time :2/15/22 1:04 PM
# file : Batch add multiple records to the data table .py
# IDE :PyCharm
# The import module
import pymysql
# Open database connection
db = pymysql.connect(host="localhost", user="root", password="12345", database="myPython",charset="utf8")
# Use cursor() Method get operation cursor
cursor = db.cursor()
# Data list
data = [(" Zero basis to learn Python",'Python','79.80','2018-5-20'),
("Python From entry to mastery ",'Python','69.80','2018-6-18'),
(" Zero basis to learn PHP",'PHP','69.80','2017-5-21'),
("PHP Introduction to project development ",'PHP','79.80','2016-5-21'),
(" Zero basis to learn Java",'Java','69.80','2017-5-21'),
]
try:
# perform sql sentence , Insert multiple data
cursor.executemany("insert into books(name, category, price, publish_time) values (%s,%s,%s,%s)", data)
# Submit data
db.commit()
except:
# Rollback on error
db.rollback()
# Close database connection
db.close()
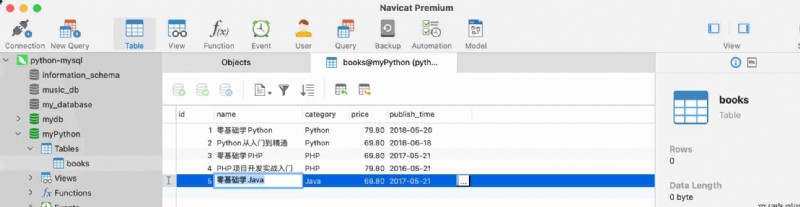
Run the above code , stay Navicat View in books Table data , Here's the picture :
notes It means
§ Use connect() Method to connect to the database , Additional character set “charset=utf-8“, It can prevent errors in inserting Chinese .
§ In the use of insert Statement inserts data , Use **“%s“** As placeholder , Can prevent SQL Inject .
total junction